How to Mark an Estimate as Accepted

Estimates can be marked as Accepted to help organize which Estimates have been accepted and are ready to be converted to an Order.
Table of Contents
- (1) Navigate to Estimates
- (2) Select the Estimate you wish to mark as Accepted
- (3) Navigate to the Status tab within the Estimate
- (4) Note the current Order Status and Estimate Status within the Status section
- (5) Update Estimate Status to Accepted
- (6) Confirm the Estimate Accepted Date and Estimate Accepted Note
- (7) Note the updated Estimate Status and the contained status message
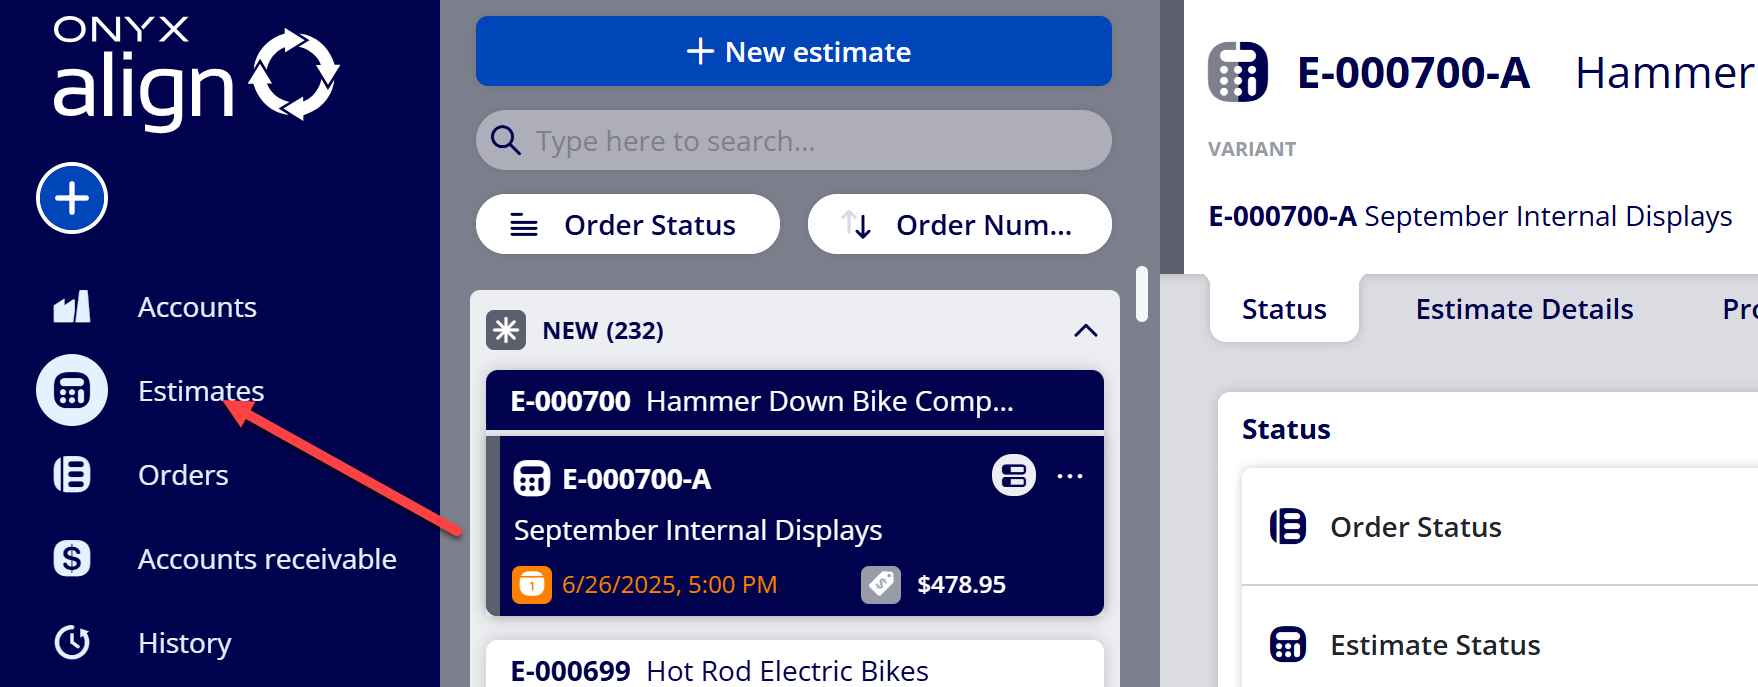
(1) Navigate to Estimates
(2) Select the Estimate you wish to mark as Accepted
(3) Navigate to the Status tab within the Estimate
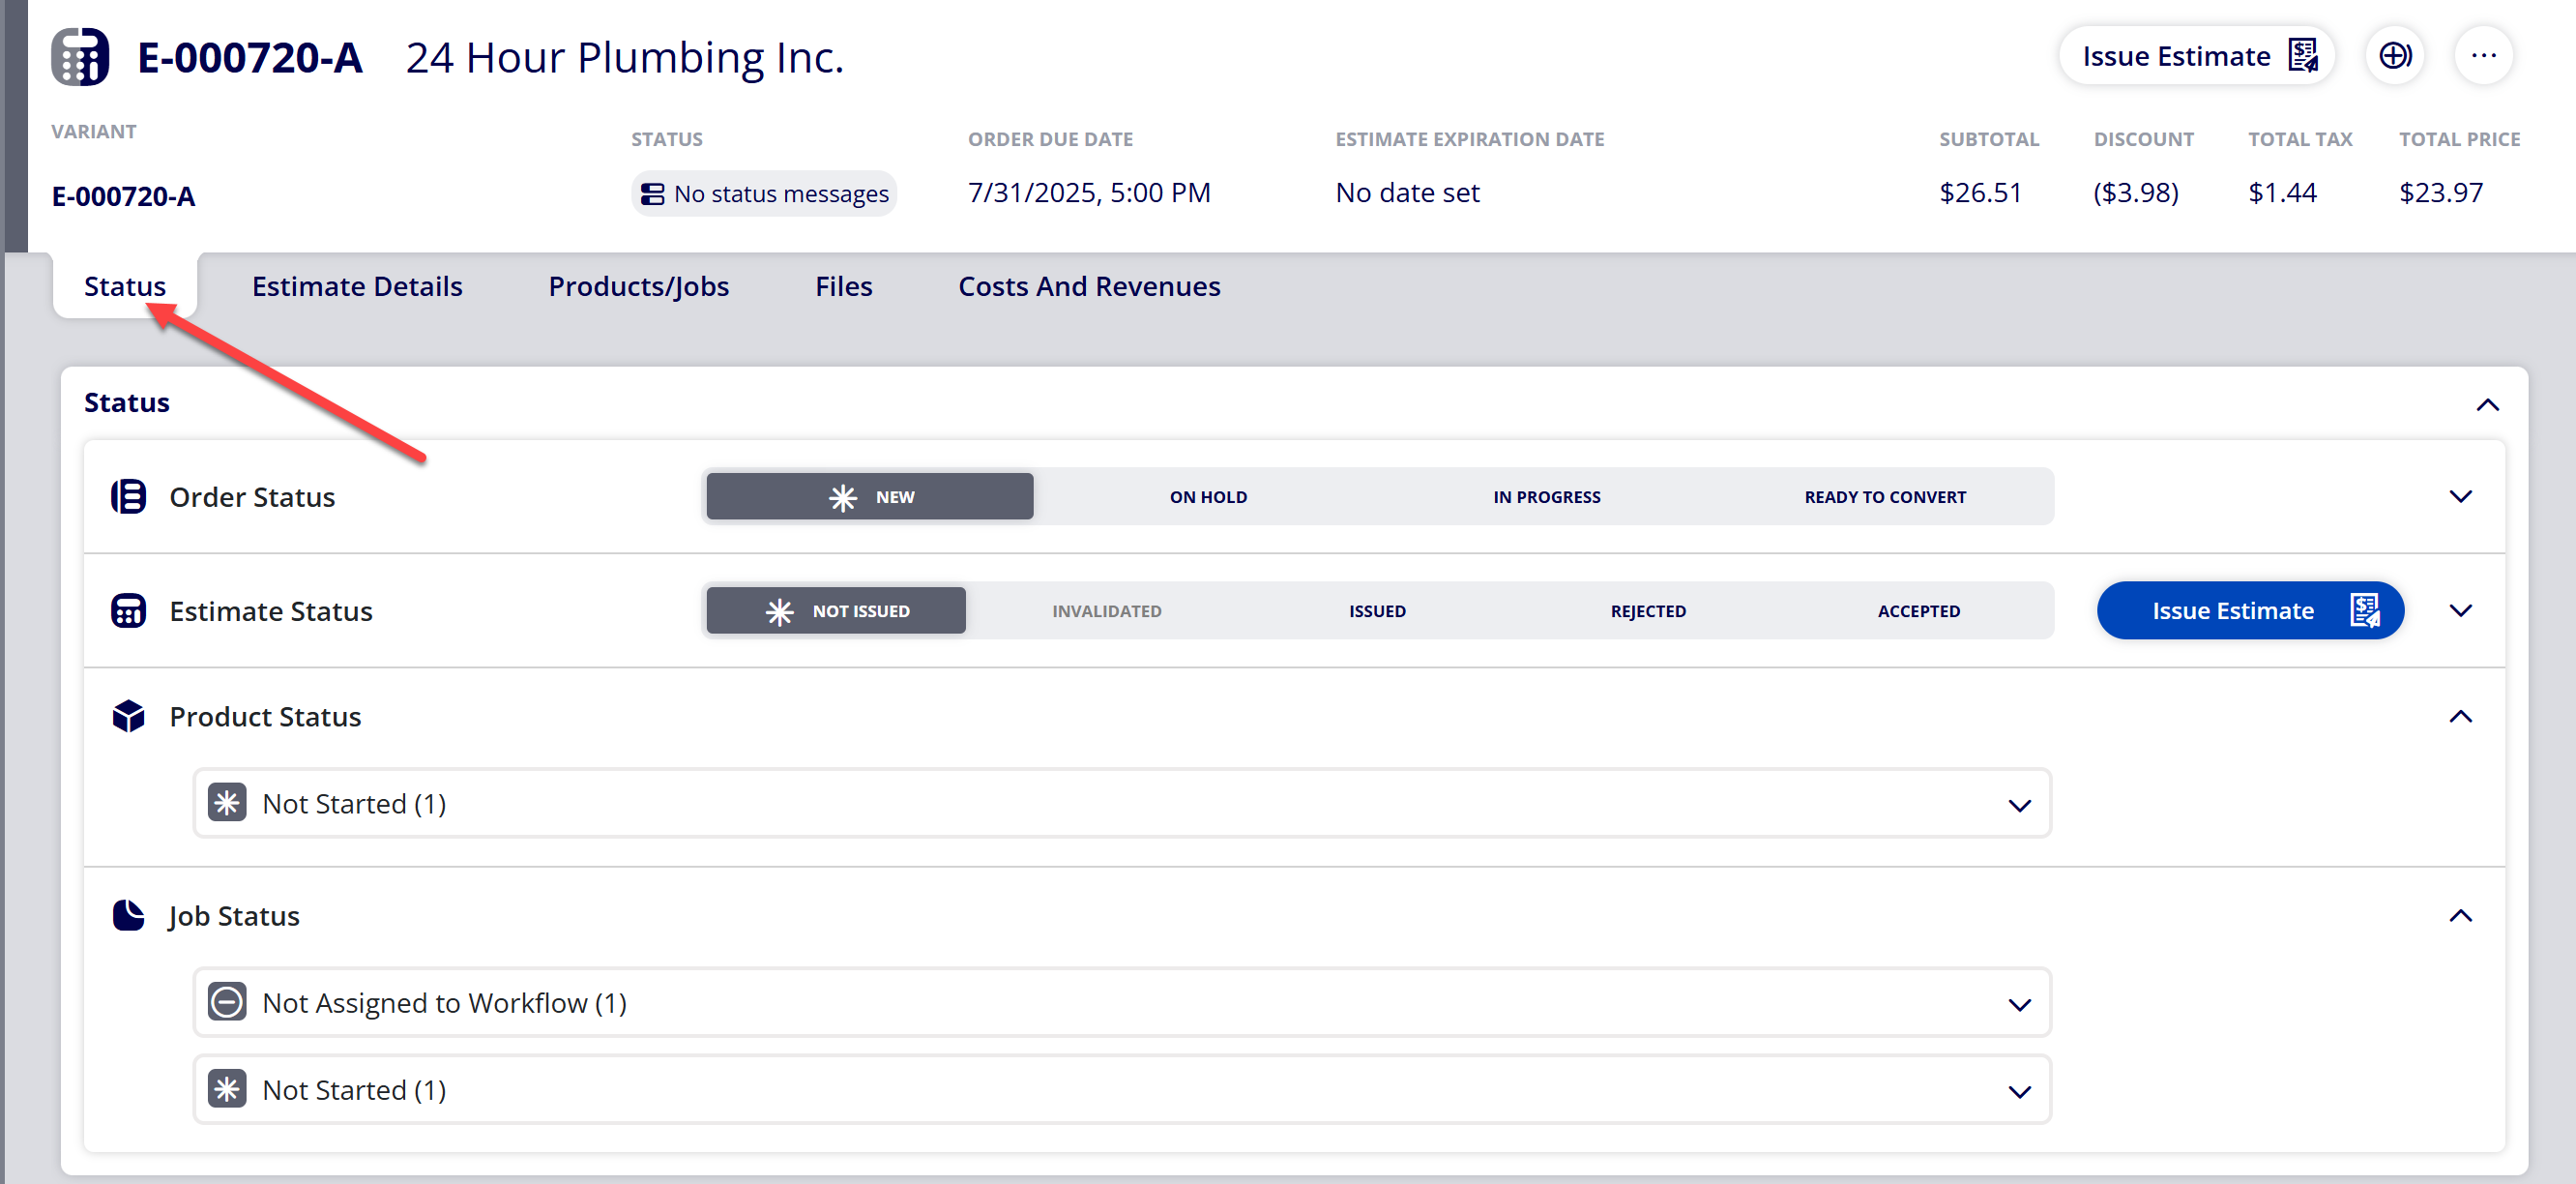
(4) Note the current Order Status and Estimate Status within the Status section
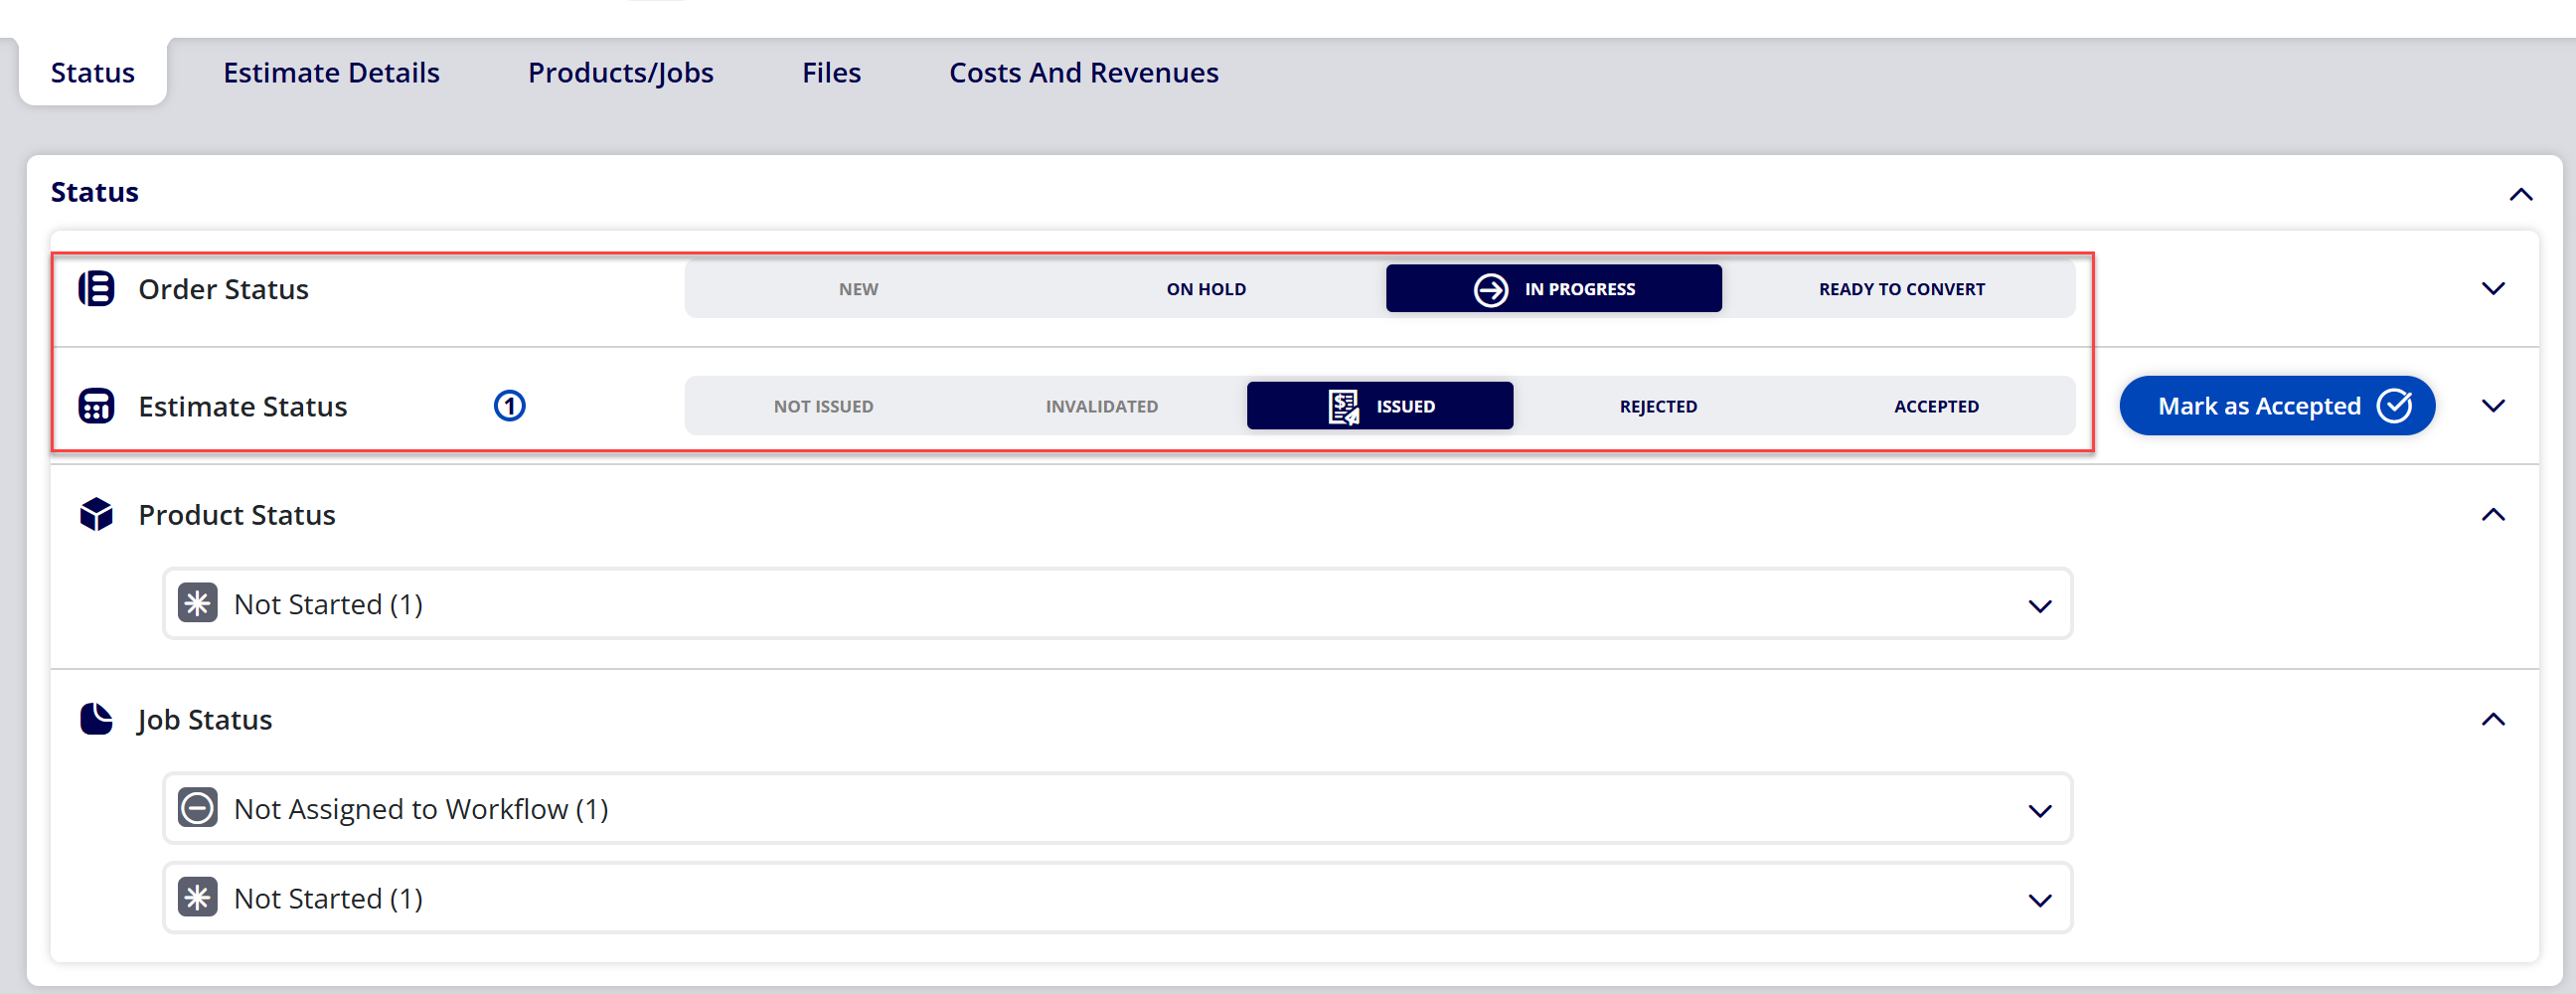
(5) Update Estimate Status to Accepted
Updating the Estimate Status to Accepted can differ based on the current Order Status and Estimate Status.
|
Current Order Status |
Current Estimate Status |
How to mark as Accepted |
|---|---|---|
|
In Progress Ready to Convert |
Issued |
|
|
New In Progress Ready to Convert |
Not Issued Invalidated Rejected |
|
|
On Hold |
n/a |
Not available |
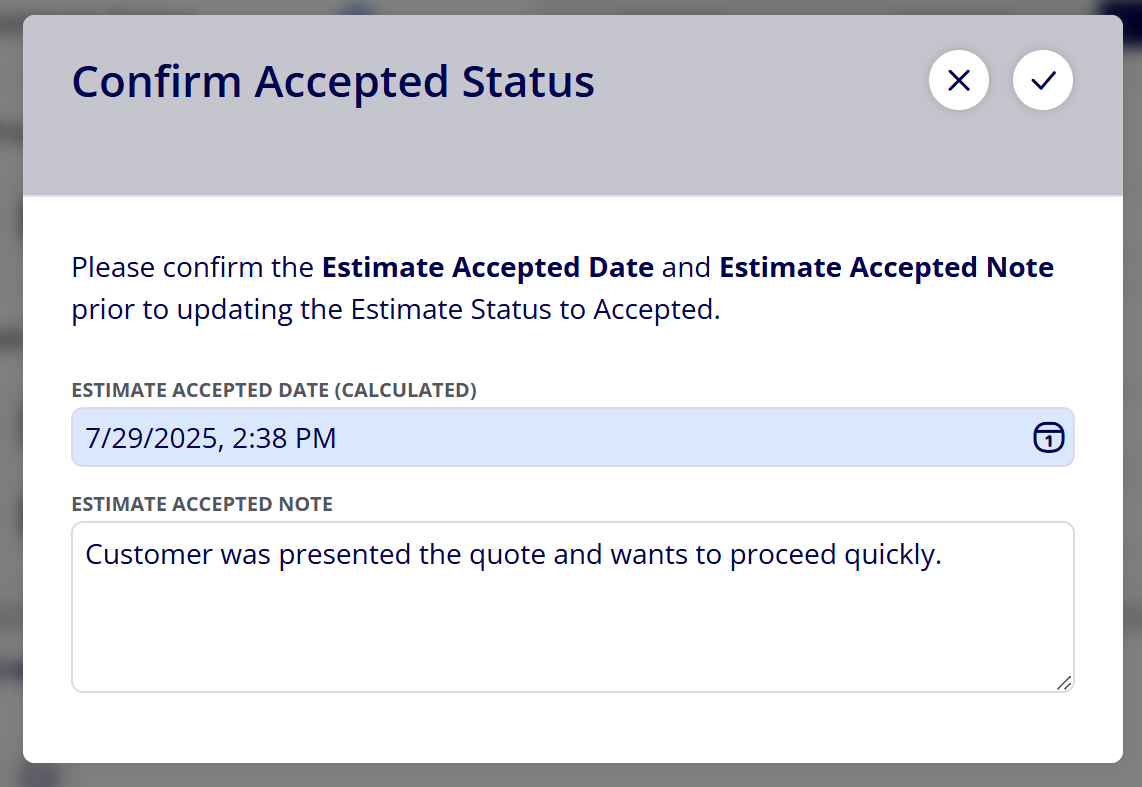
(6) Confirm the Estimate Accepted Date and Estimate Accepted Note
Note:
The Estimate Accepted Date will auto generate at the date/time the Estimate is marked as accepted. This date can be overridden if needed. It is displayed within Estimate Status, the Action Log, and Estimate/Order Details.
The Estimate Accepted Note allows you to provide a comment regarding the acceptance of the Estimate. It is displayed within Estimate Status, the Action Log, and Estimate/Order Details.
(7) Note the updated Estimate Status and the contained status message

Attachments:
 image-20250729-192208.png (image/png)
 image-20250729-192132.png (image/png)
 image-20250729-192016.png (image/png)
 image-20250729-191937.png (image/png)
 image-20250729-191826.png (image/png)
 image-20250729-191743.png (image/png)
 image-20250729-191622.png (image/png)
 image-20250729-191538.png (image/png)
 image-20250729-191515.png (image/png)
 image-20250729-191215.png (image/png)
 image-20241031-143935.png (image/png)
 image-20240627-184013.png (image/png)
 image-20240627-183948.png (image/png)
 image-20240627-183829.png (image/png)
 image-20240627-183926.png (image/png)
 image-20240117-210948.png (image/png)
 image-20240627-183857.png (image/png)
 2019 ONYX align PANTONE.png (image/png)
 image-20250729-185454.png (image/png)
 image-20250729-185323.png (image/png)
 image-20250729-185600.png (image/png)
 image-20250729-190209.png (image/png)
 image-20250729-190151.png (image/png)
 image-20250729-190240.png (image/png)
 image-20250729-190501.png (image/png)
 image-20250729-190329.png (image/png)
 image-20250729-190523.png (image/png)
 image-20250729-190637.png (image/png)
 image-20250729-190747.png (image/png)
 image-20250729-190735.png (image/png)
 image-20250729-192630.png (image/png)
 image-20250729-193854.png (image/png)
 image-20250729-194240.png (image/png)