How to Link Jobs Together on the Job Board

Multiple Jobs contained within a Product are able to be linked together so that they can progress through their assigned Workflow as a single unit on the Job Board.
Table of Contents
- (1) Add the Link Jobs and Linked Jobs Workflow items to your Product View
- (2) Navigate to the Product you would like to link Jobs together for within an active Estimate or Order
- (3) Toggle the Link Jobs setting to “Yes” within Product Details
- (4) Select the Linked Jobs Workflow
- (5) Click Yes
- (6) Navigate to the Job Board within the Order
- (7) See the linked Jobs displayed within the assigned Workflow
(1) Add the Link Jobs and Linked Jobs Workflow items to your Product View
(1a) Navigate to Configuration > View editor > Product views
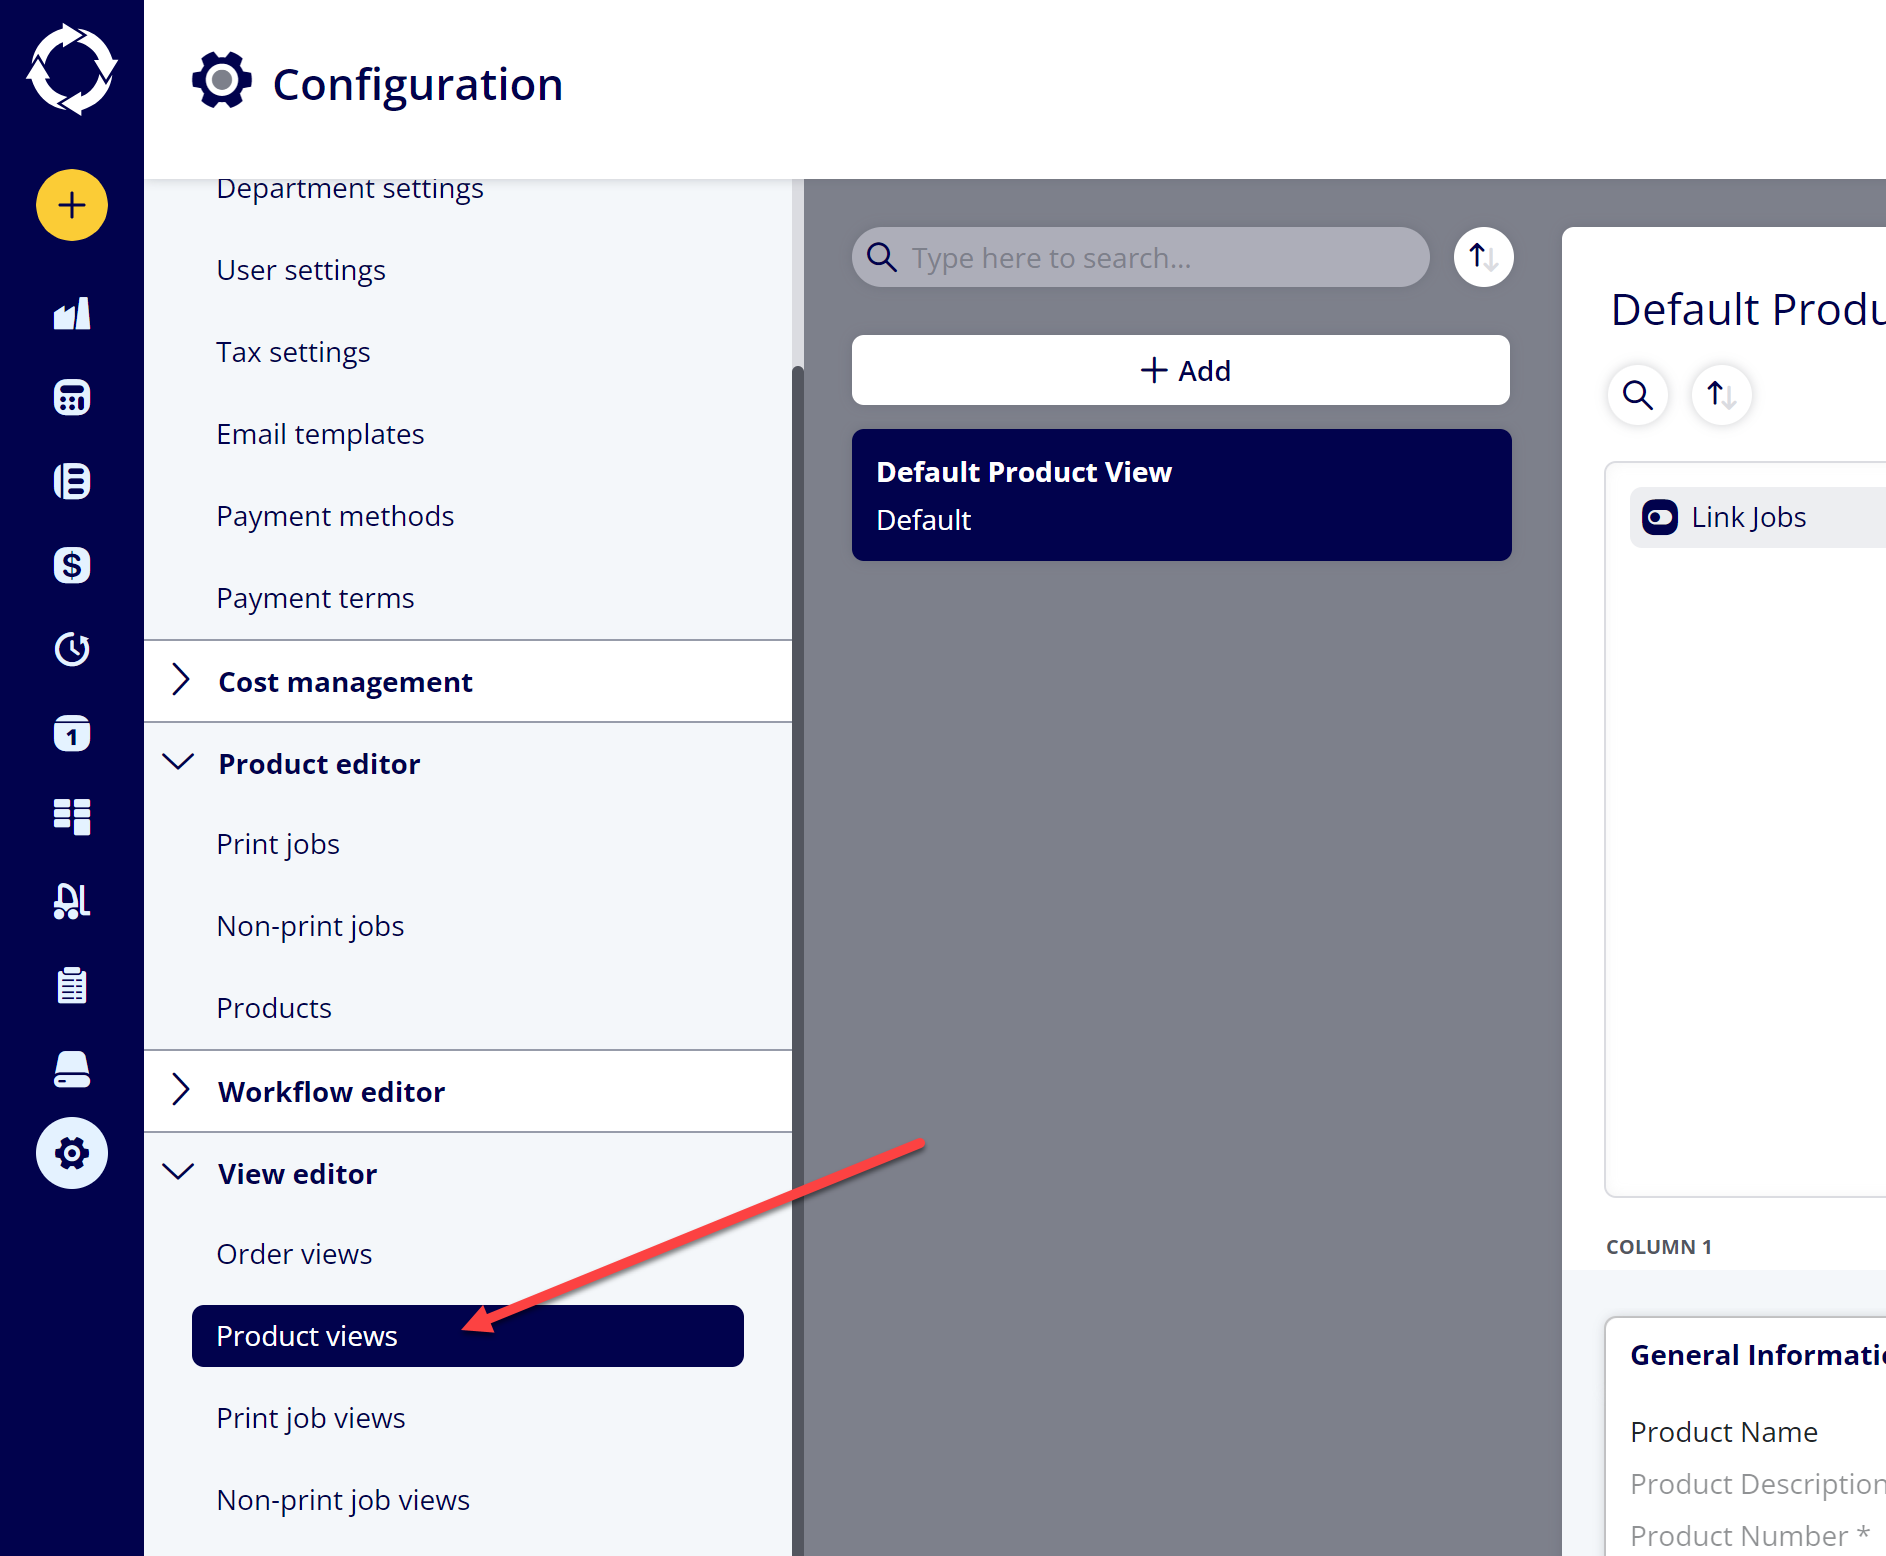
(1b) Select the Product View you would like to edit
(1c) Add the Link Jobs and Linked Jobs Workflow items into your Product View
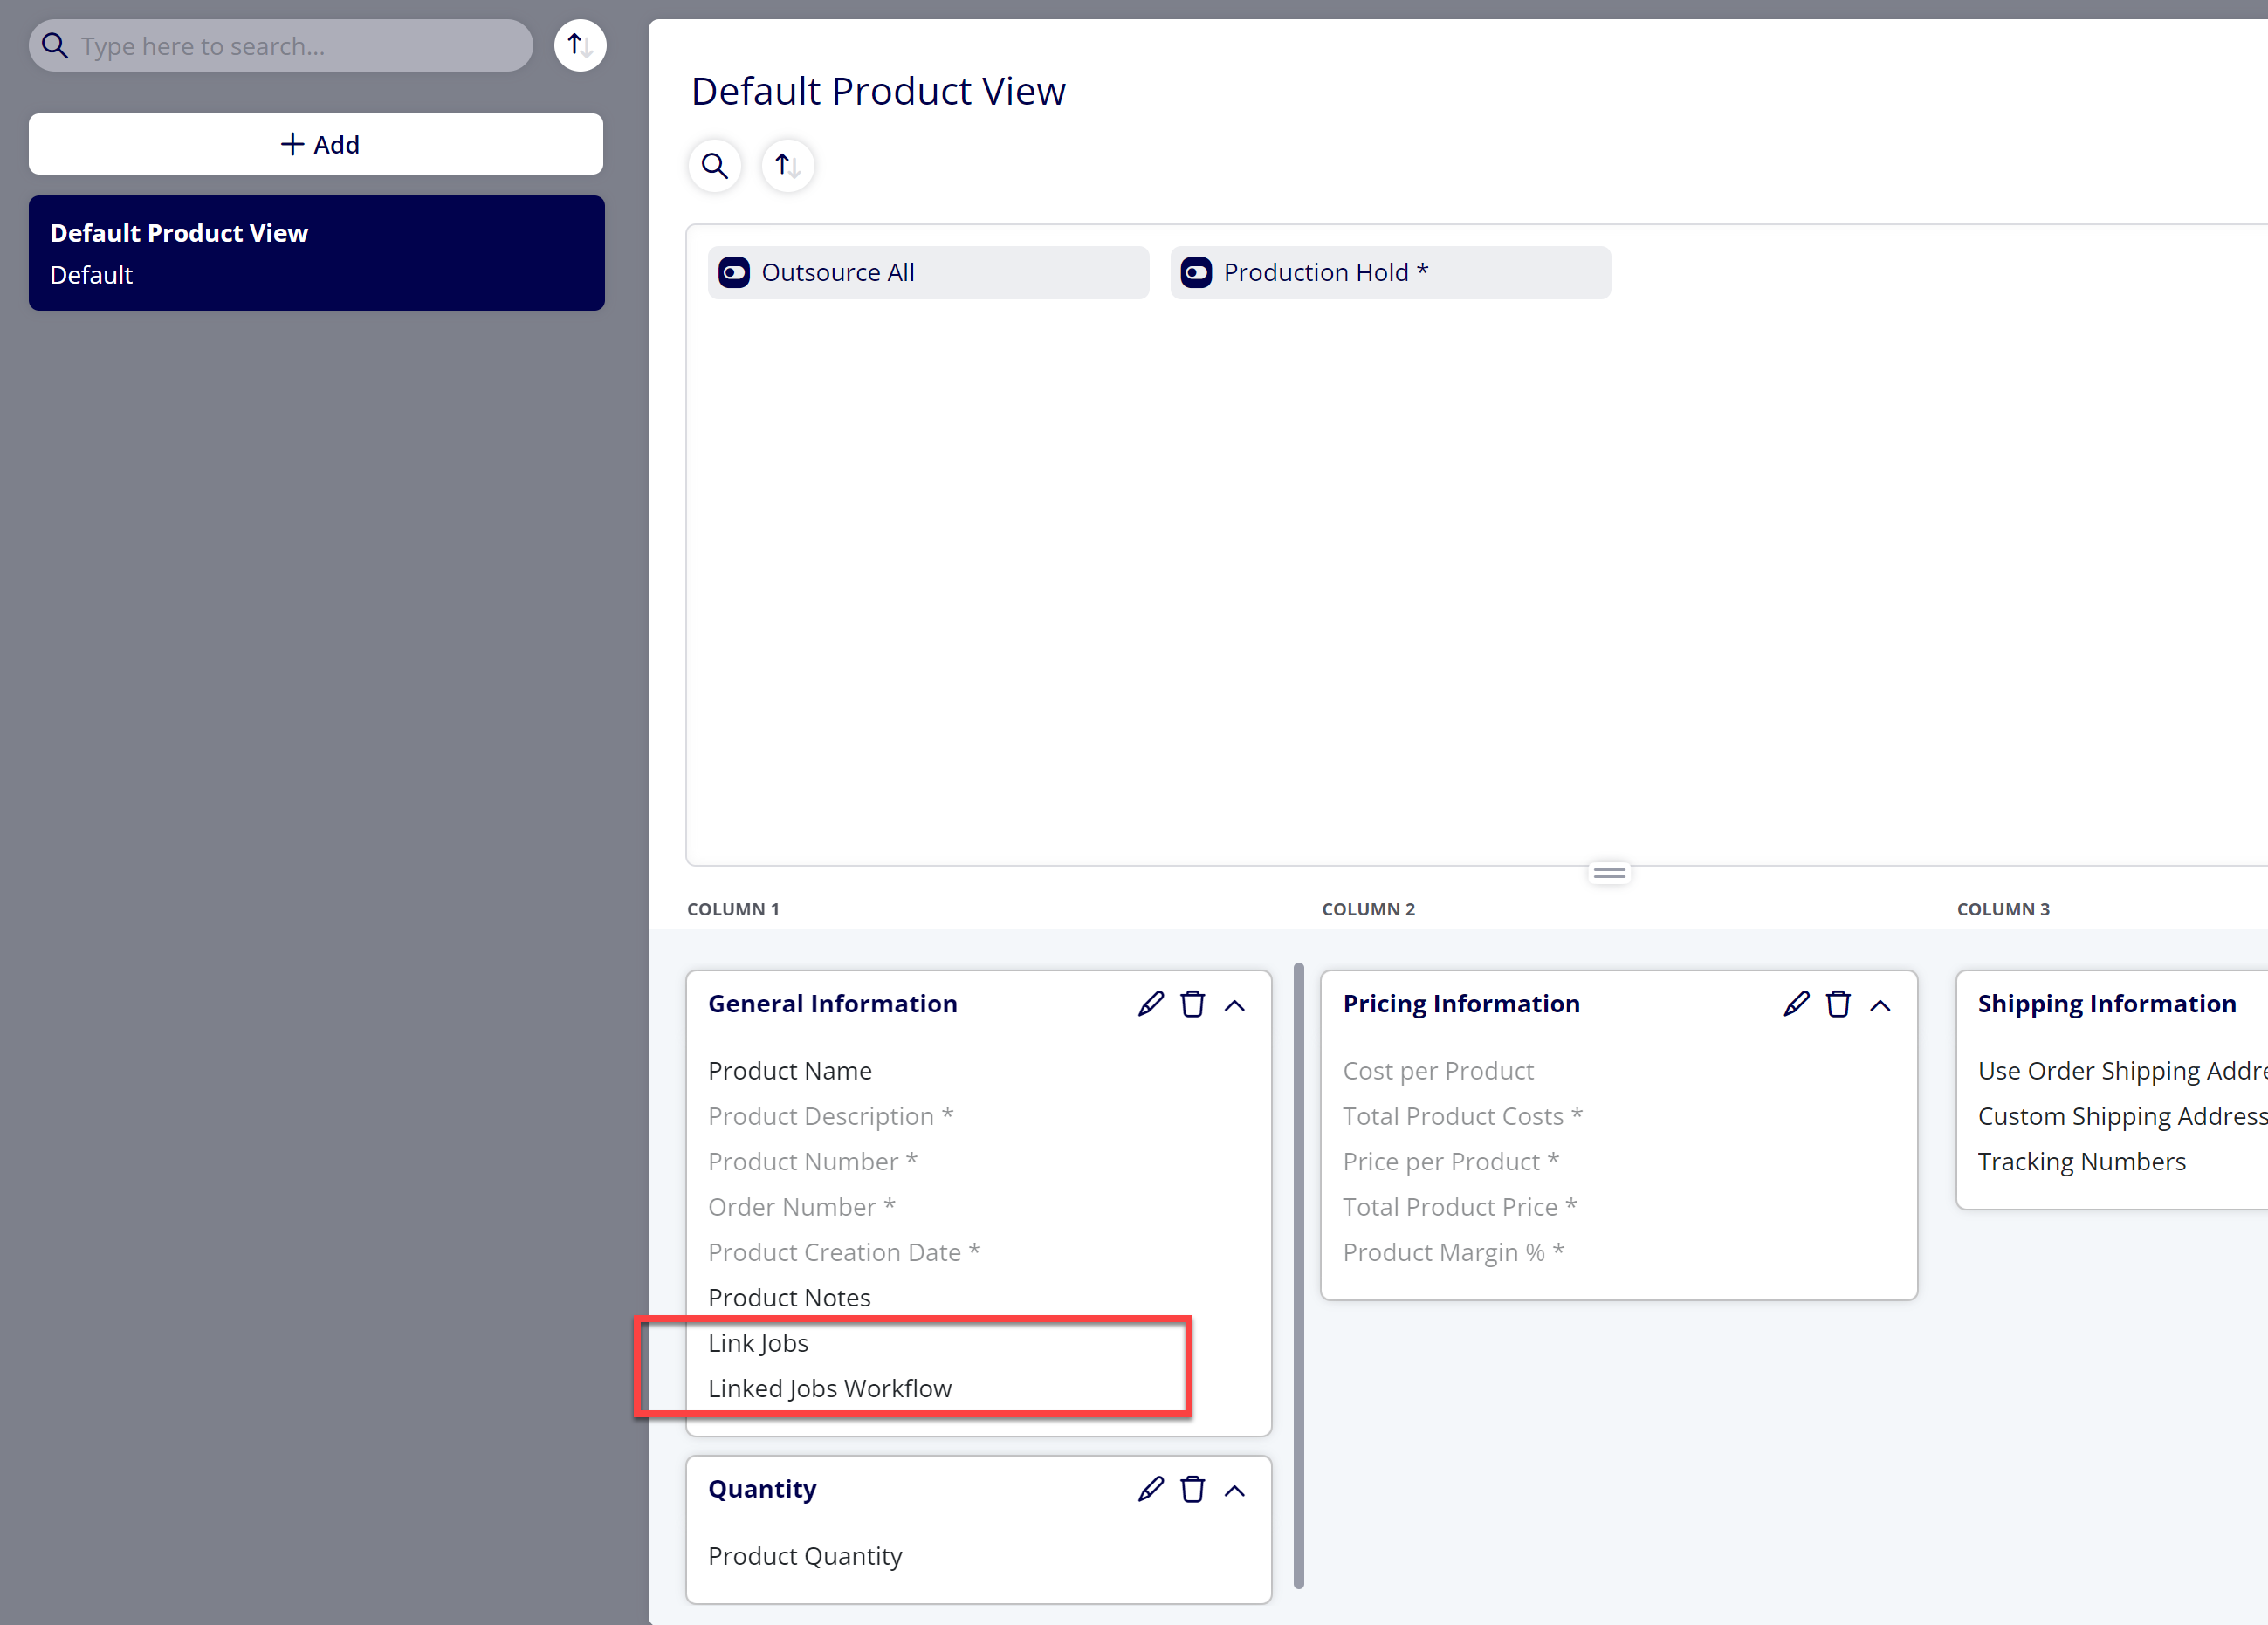
(1d) Click Save
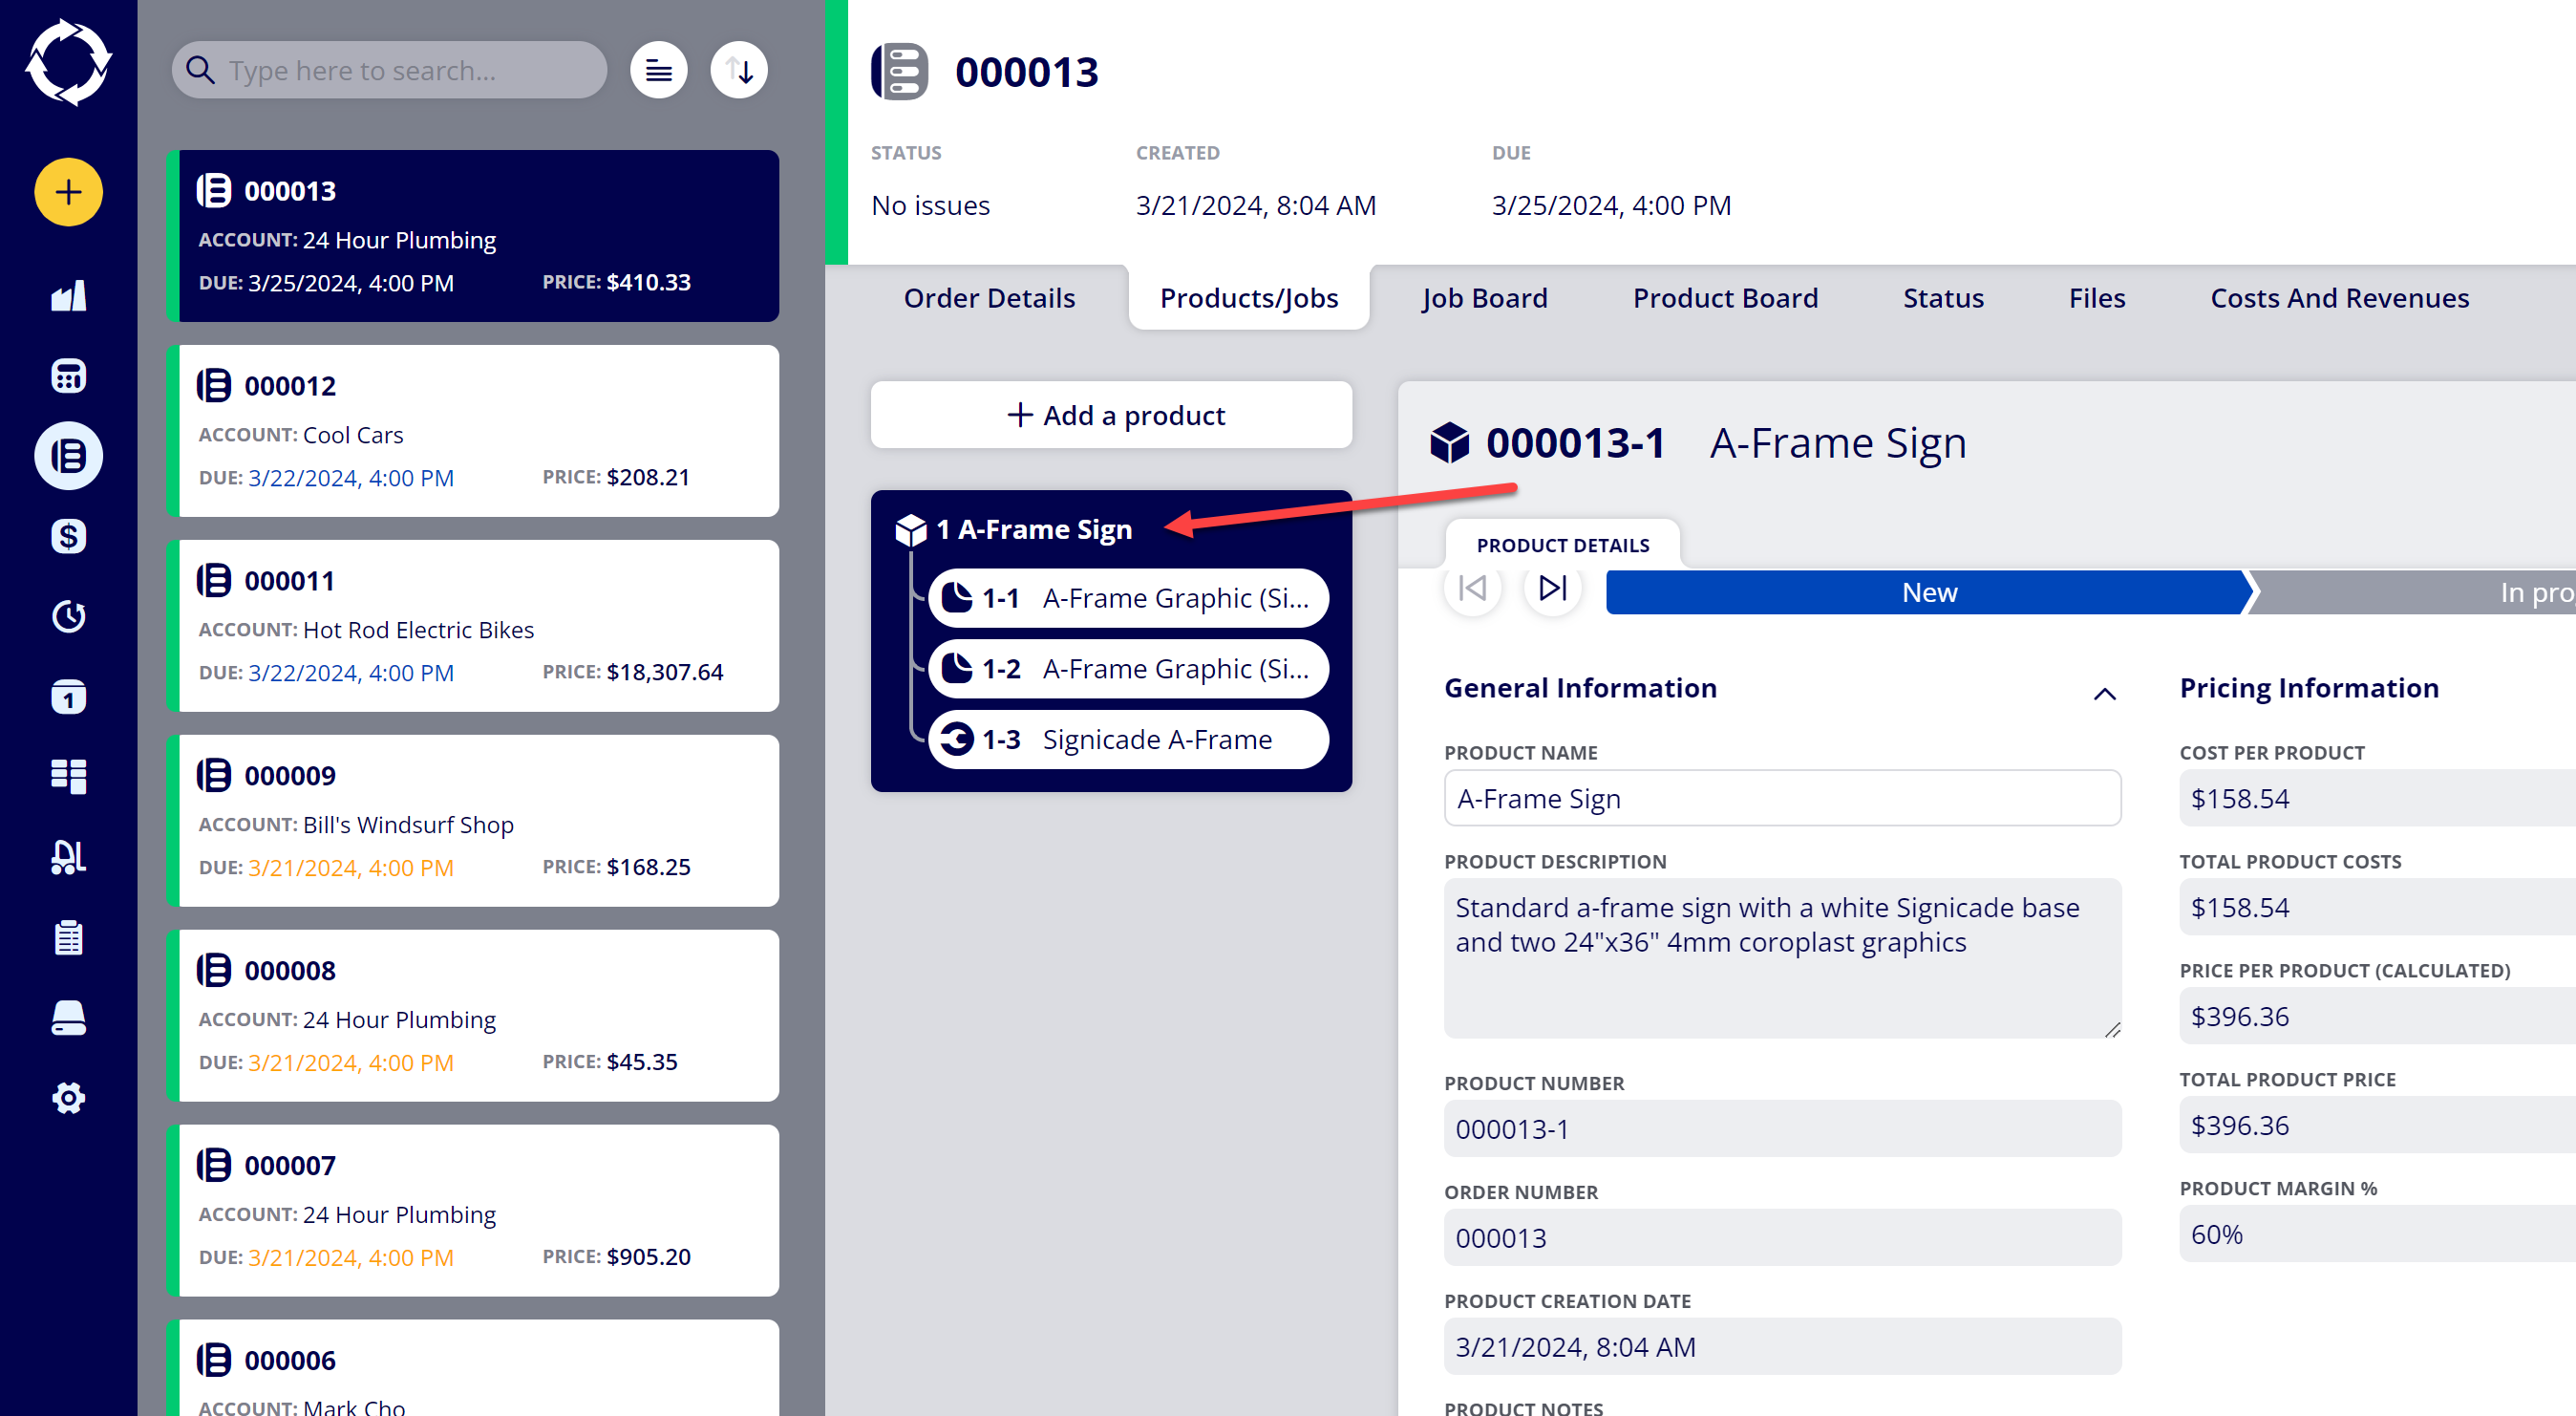
(2) Navigate to the Product you would like to link Jobs together for within an active Estimate or Order
(3) Toggle the Link Jobs setting to “Yes” within Product Details
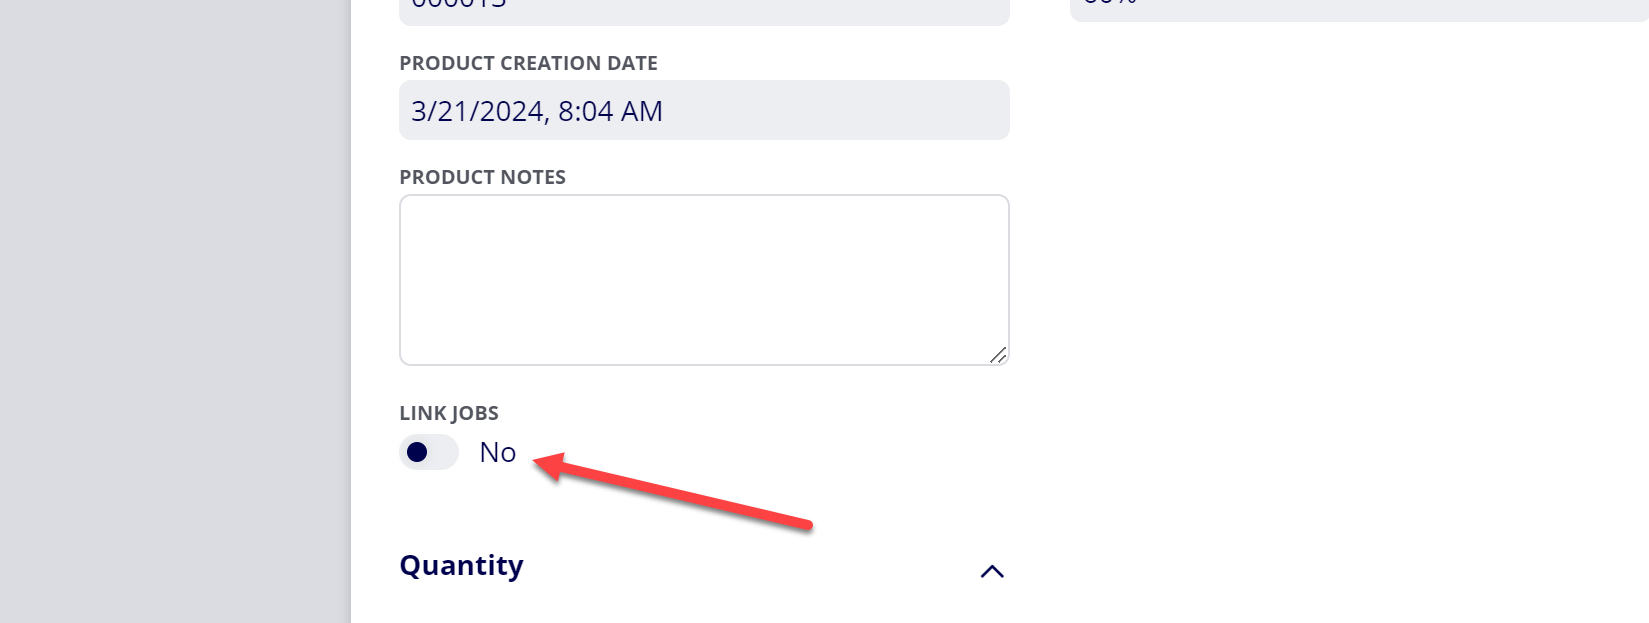
Note: If you would like this setting to be toggled to “Yes” by default, you can change the default settings for this item within Configuration > Ticket items editor > Product items > Link Jobs. You can also change the default selection for this item for a specific Product within Configuration > Product editor > Products > [Product] > Custom Item Settings > Link Jobs.
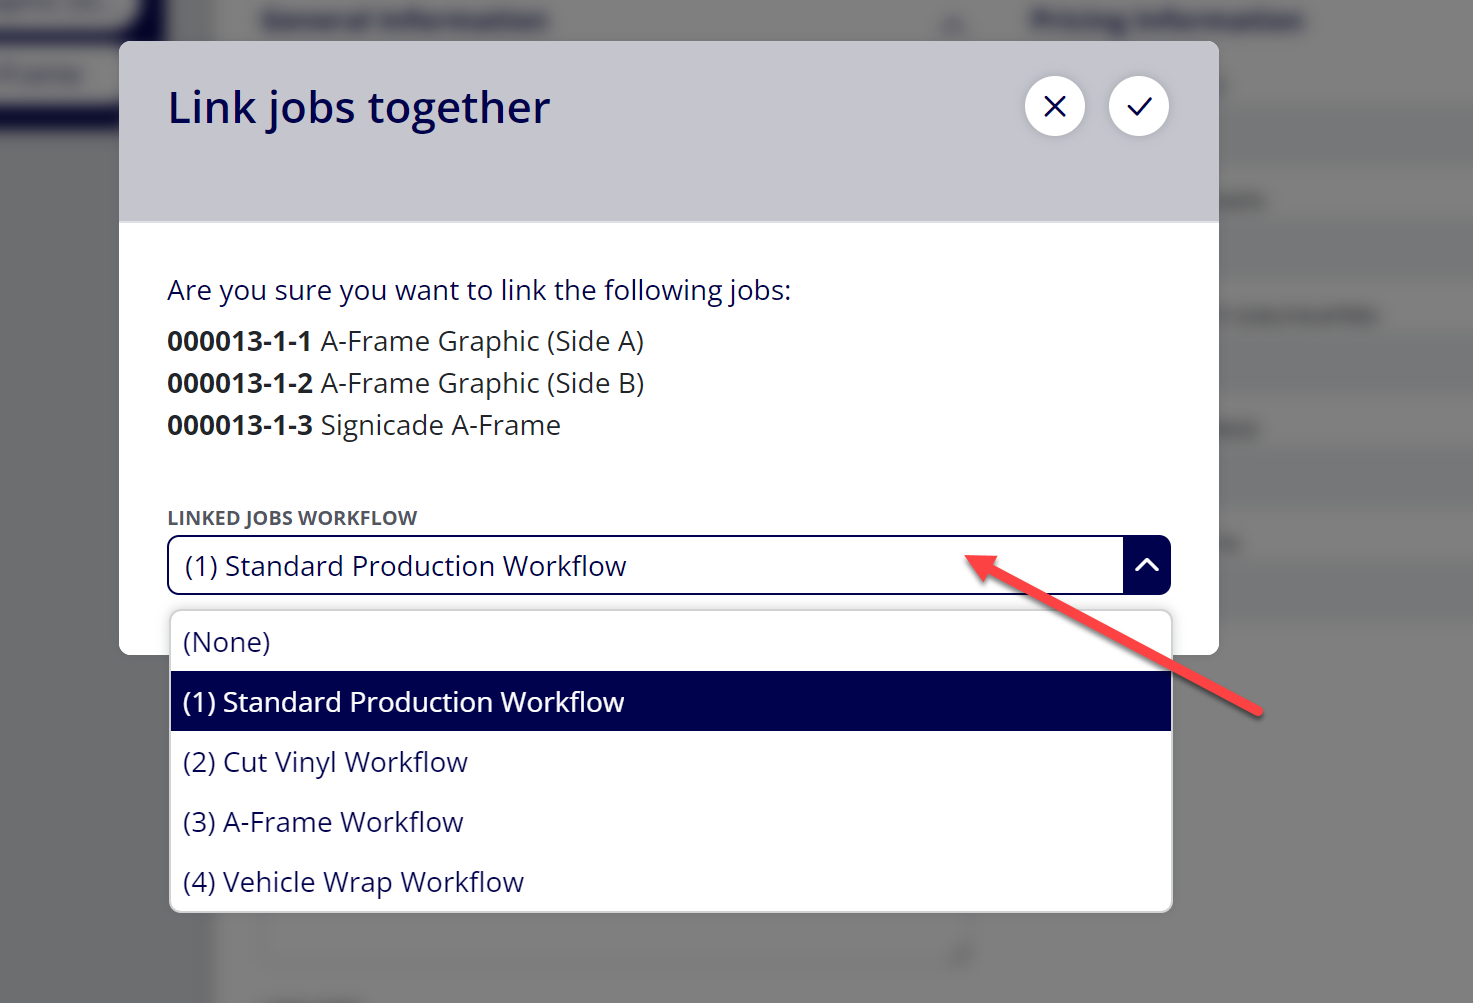
(4) Select the Linked Jobs Workflow
This is the Workflow the linked Jobs will belong to
Note: You can change the default selection for this item within Configuration > Ticket items editor > Product items > Linked Jobs Workflow. You can also change the default selection for this item for a specific Product within Configuration > Product editor > Products > [Product] > Custom Item Settings > Linked Jobs Workflow.
(5) Click Yes
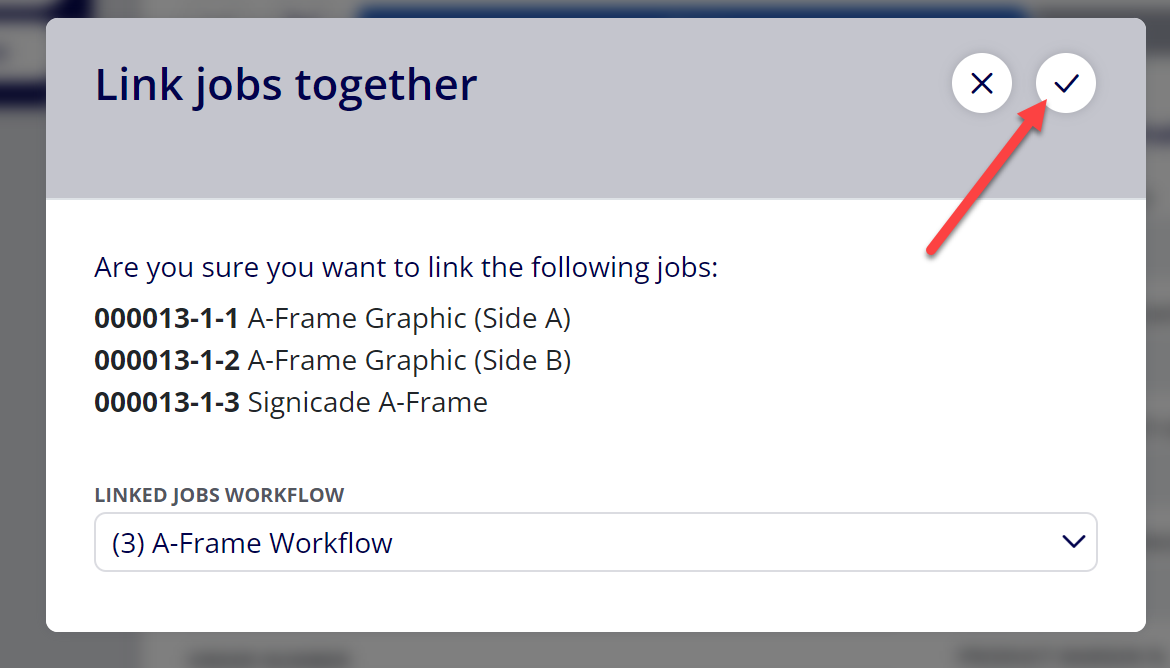
Note: You may need to Save the changes on the Estimate or Order after completing this step.
(6) Navigate to the Job Board within the Order

Note: You can also navigate to the Job Board in the overall Boards section:
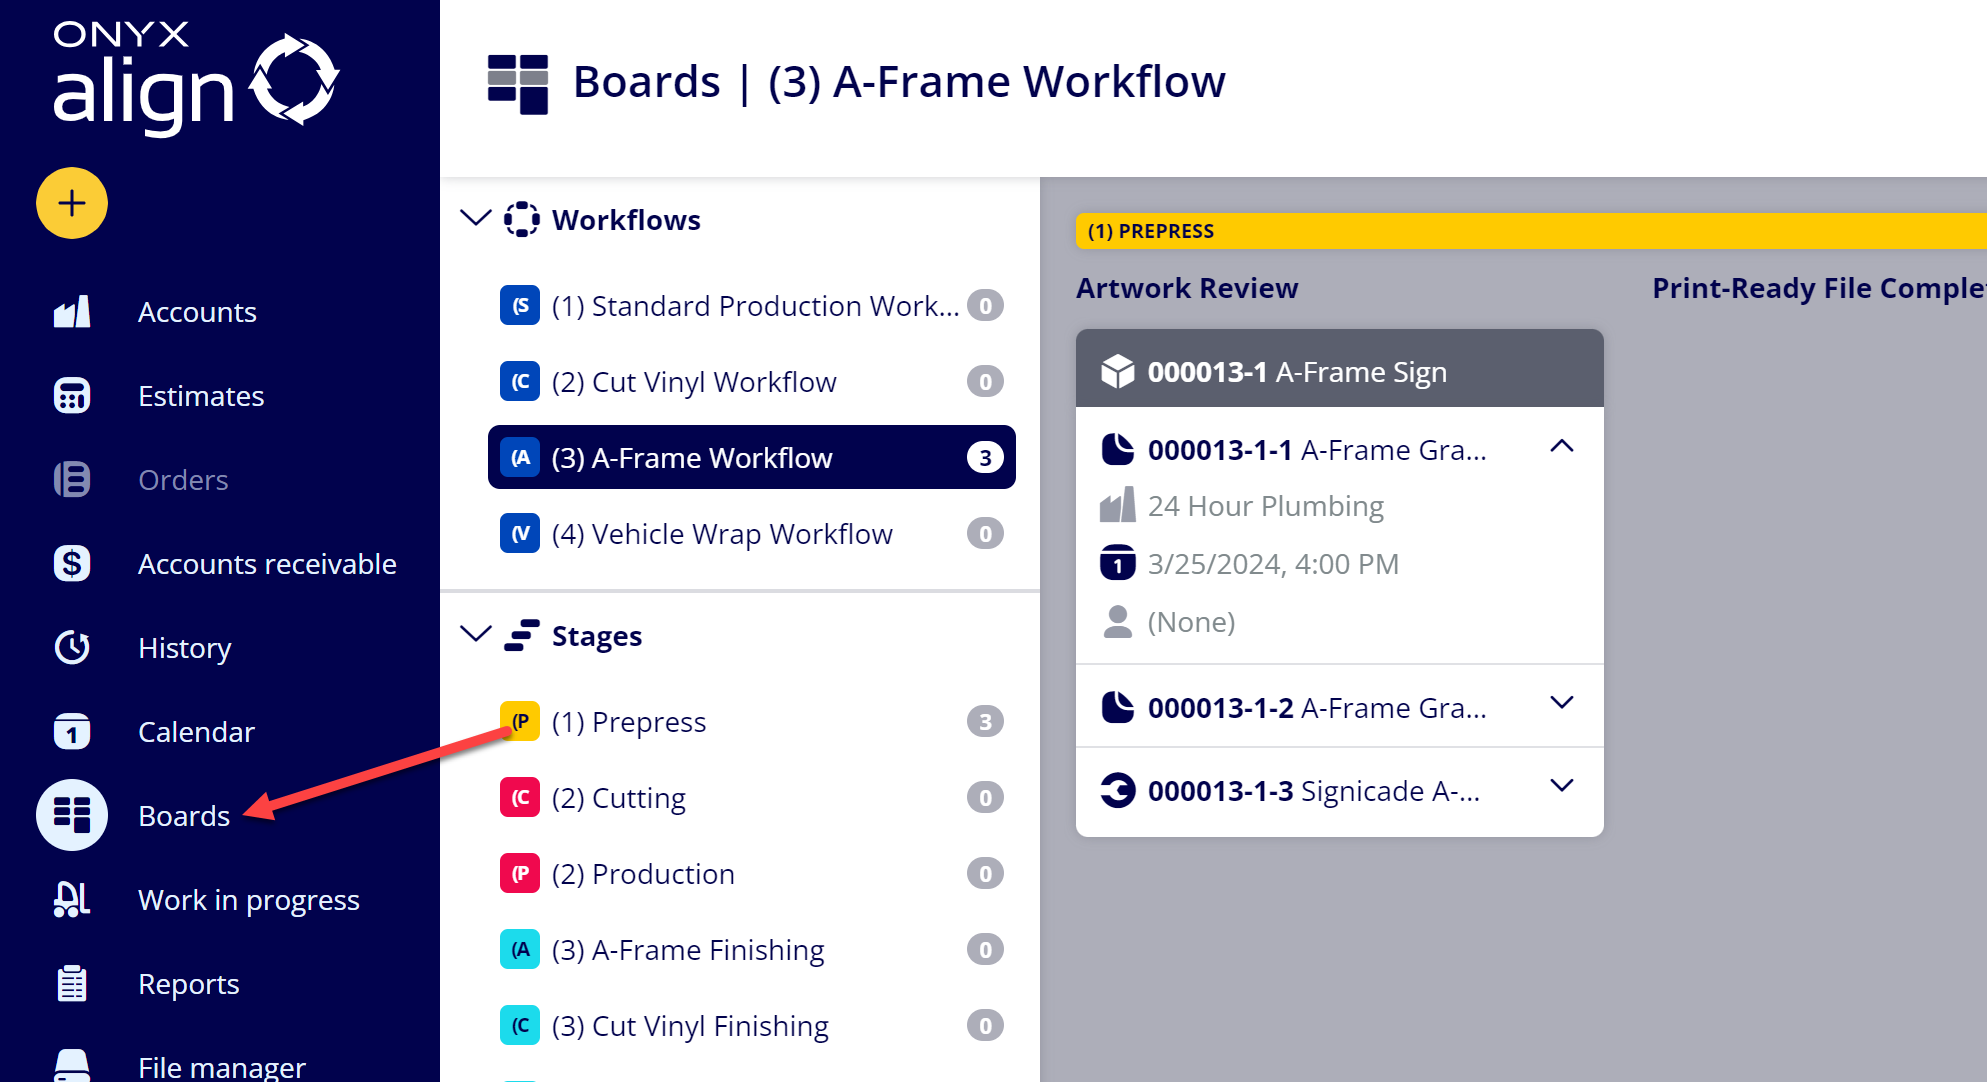
(7) See the linked Jobs displayed within the assigned Workflow

Attachments:
 image-20240321-145535.png (image/png)
 image-20240321-145323.png (image/png)
 image-20240321-141449.png (image/png)
 image-20240321-141334.png (image/png)
 image-20240321-141246.png (image/png)
 image-20240321-141100.png (image/png)
 image-20240321-140810.png (image/png)
 image-20240321-140645.png (image/png)
 image-20240321-140525.png (image/png)
 image-20240321-140204.png (image/png)
 image-20240321-135837.png (image/png)
 2019 ONYX align PANTONE.png (image/png)
 image-20240117-210948.png (image/png)