How to Edit Company Info Settings

The information provided within the Company Info section is used throughout the system to ensure information that pertains to your business is being generated correctly.
Table of Contents
(1) Navigate to Configuration > Company management > Company info
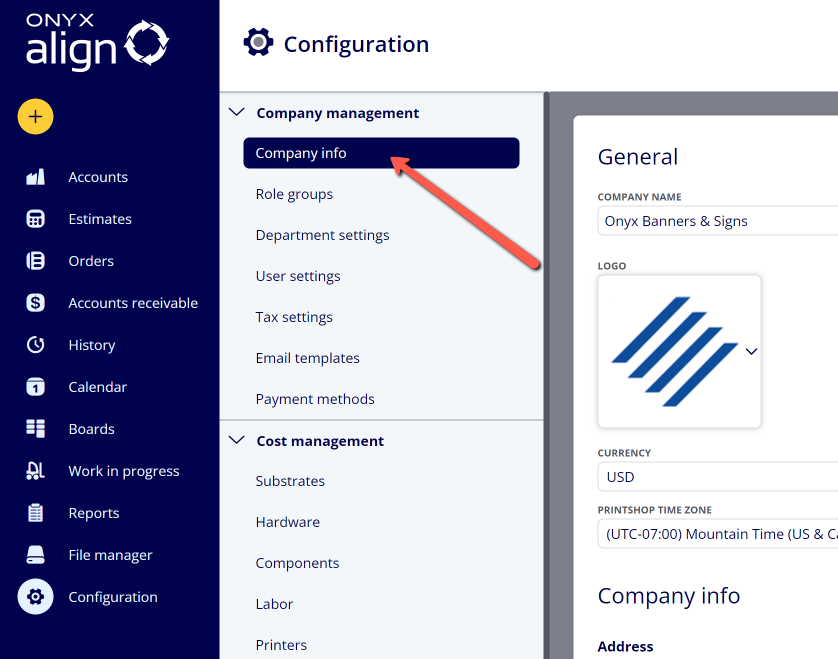
(2) Provide General information
|
Field |
Description |
Used in |
|---|---|---|
|
Company Name |
The name of your business. |
-Estimates -Invoices |
|
Logo |
The logo of your business (jpg or png file type recommended). |
-Estimates -Invoices -Price Breakdowns -Production Tickets -Reports |
|
Alternative Logo |
The logo of your business meant to be used with dark backgrounds (jpg or png file type recommended). |
-Estimates -Invoices -Price Breakdowns -Production Tickets -Reports |
|
Currency |
The type of currency used. |
All cost and price computations throughout the system. |
|
Printshop Time Zone |
The time zone pertaining to the location of your shop. |
-Order/Job Due Date computations -Time stamps related to order activity |
|
Unit |
The unit of measurement used. |
All measurement computations throughout the system. |
|
Sales Tax Calculation Method |
The method used for calculating tax amounts within estimates and orders. Note: Canada should only be selected if you are connecting to a Canada version QuickBooks Online account. |
All Total Tax Amount computations throughout the system. |
(3) Provide Company Info information
-This is the general address and contact information for your business.
-This information will appear on all Estimates and Invoices produced by ONYX Align.
(4) Provide the Starting Order Number
-Determine the number you would like to have Orders start at.
-For example, if you have not created any Orders in the system yet and set this value to 100, the very first Order created will have the Order Number of 100.
-Note: Setting a starting number lower than the current number may result in duplicate order numbers.
Attachments:
 image-2023-5-22_13-28-12.png (image/png)
 image-2023-3-7_12-56-40.png (image/png)
 image-2023-3-7_10-55-36.png (image/png)
 image-2023-3-7_10-54-27.png (image/png)
 image-2023-3-7_10-54-1.png (image/png)
 image-2023-1-24_14-50-7.png (image/png)
 image-2022-11-30_7-57-8.png (image/png)
 image-2022-11-30_7-56-32.png (image/png)
 image-2022-11-29_15-6-36.png (image/png)
 image-2022-11-29_15-1-39.png (image/png)
 image-2022-11-29_15-1-12.png (image/png)
 image-2022-11-29_14-52-45.png (image/png)
 image-2022-11-29_14-51-52.png (image/png)
 image-2022-11-29_14-51-30.png (image/png)
 image-2022-11-29_14-51-12.png (image/png)
 image-2022-11-29_14-50-3.png (image/png)
 image-2022-11-29_14-48-3-5.png (image/png)
 image-2022-11-29_14-48-3-4.png (image/png)
 image-2022-11-29_14-48-3-3.png (image/png)
 image-2022-11-29_14-48-3-2.png (image/png)
 image-2022-11-29_14-48-3-1.png (image/png)
 image-2022-11-29_14-48-3.png (image/png)
 image-2023-3-22_10-57-59.png (image/png)