How to Create an Order View

Create Order Views to control which fields are visible when viewing Order Details within ONYX Align. Order Views are broken into three types, being Manager, Operator, and Sales. These different types can be assigned to specific Role Groups, controlling which Users see which Order fields.
Table of Contents
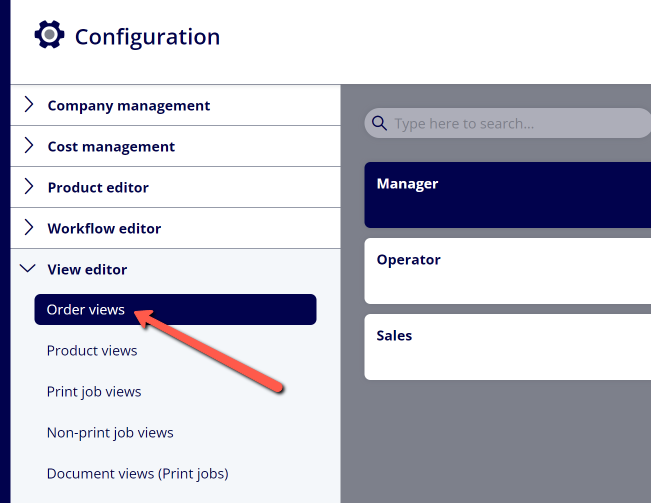
- (1) Navigate to Configuration > View Editor > Order views
- (2) Click on either the Manager, Operator, or Sales View
- (3) Drag fields from the top group of fields to the bottom section
- (4) Categorize the fields you have added to the bottom section into groups and assign each group a name
- (5) Click "Save"
- (6) Configure which type of View is used for each Role Group
(1) Navigate to Configuration > View Editor > Order views
(2) Click on either the Manager, Operator, or Sales View
-Manager, Operator, and Sales are the three different types of Order Views available. Within Role Groups settings, you can select which type of Order View is assigned to each Role Group.
-The Manager Order View is meant to be configured to display fields pertinent to management within your business.
-The Operator View is meant to be configured to display fields pertinent to production employees within your business.
-The Sales View is meant to be configured to display fields pertinent to sales employees within your business.
(3) Drag fields from the top group of fields to the bottom section
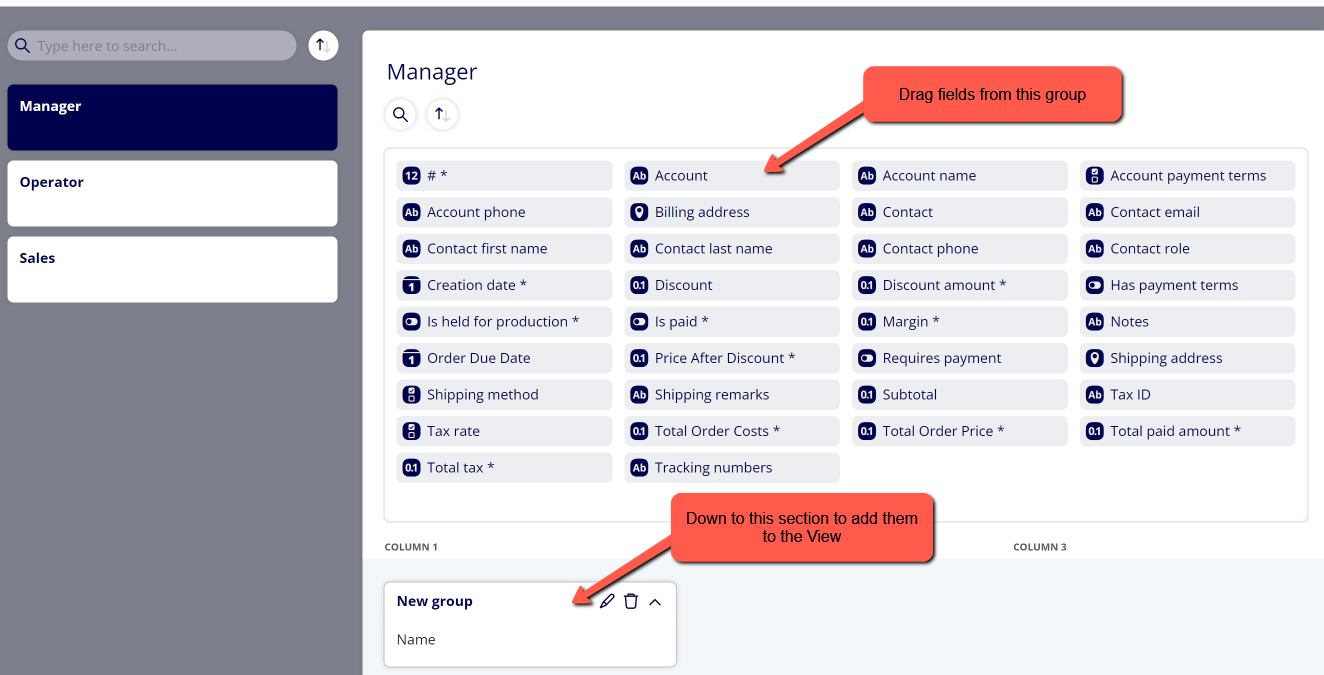
-To find a specific field you are looking for, click on the search icon above the top section and search for the field you are looking for.
-The top section contains all available fields for Orders. The bottom section is meant to contain all of the fields you want to display for Orders within that View.
(4) Categorize the fields you have added to the bottom section into groups and assign each group a name
-When you add fields to the bottom section, they will be put into groups. You can control which fields are in which group and also change the name of the group.
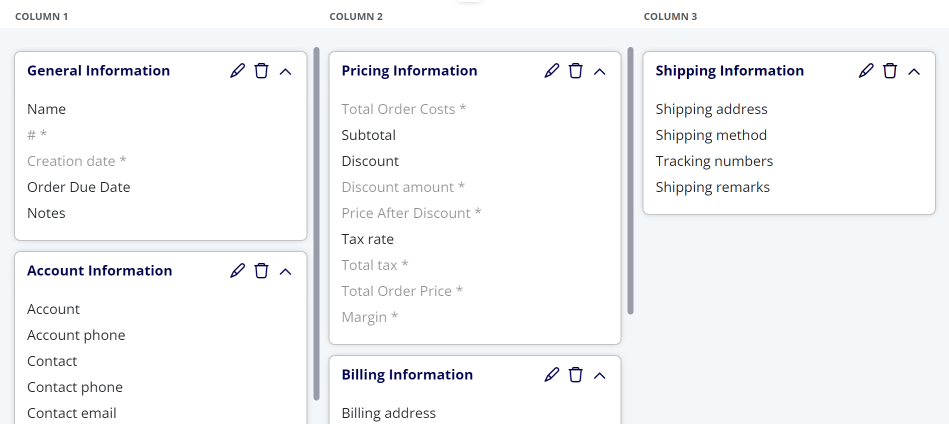
-If you would like to, you can delete the group name, making it appear blank.
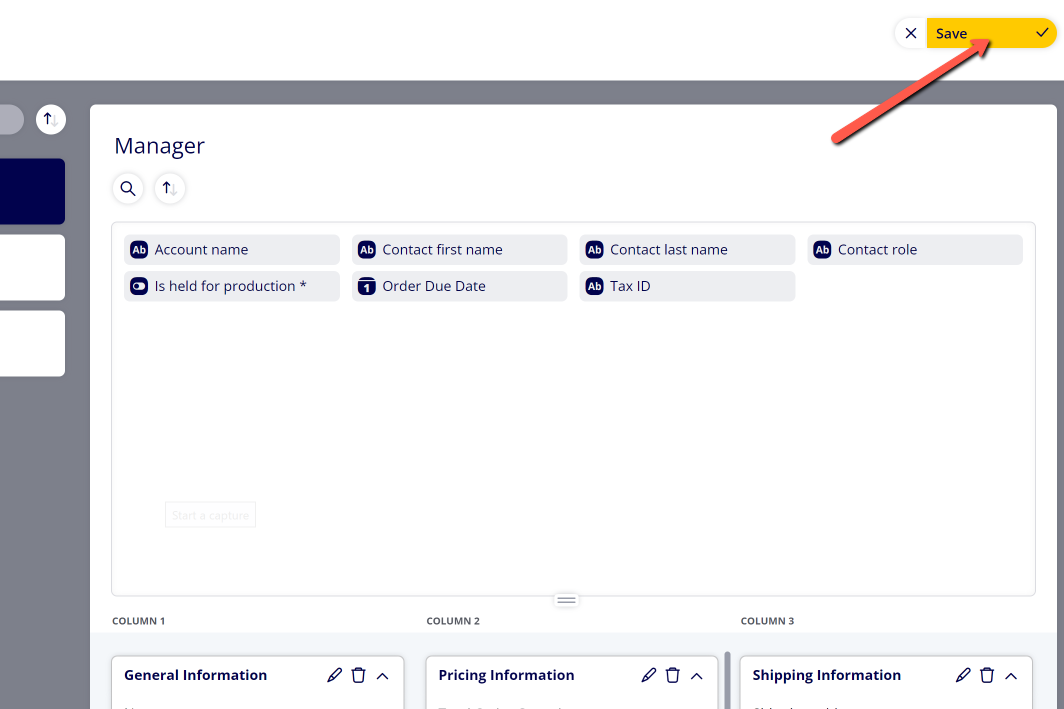
(5) Click "Save"
(6) Configure which type of View is used for each Role Group
Attachments:
 image-2023-3-28_12-18-6.png (image/png)
 image-2023-3-28_12-16-24.png (image/png)
 image-2023-3-28_12-12-58.png (image/png)
 image-2023-3-28_12-3-6.png (image/png)
 image-2023-3-7_12-56-40.png (image/png)
 image-2023-3-7_10-55-36.png (image/png)
 image-2023-3-7_10-54-27.png (image/png)
 image-2023-3-7_10-54-1.png (image/png)
 image-2023-1-24_14-50-7.png (image/png)
 image-2022-11-30_7-57-8.png (image/png)
 image-2022-11-30_7-56-32.png (image/png)
 image-2022-11-29_15-6-36.png (image/png)
 image-2022-11-29_15-1-39.png (image/png)
 image-2022-11-29_15-1-12.png (image/png)
 image-2022-11-29_14-52-45.png (image/png)
 image-2022-11-29_14-51-52.png (image/png)
 image-2022-11-29_14-51-30.png (image/png)
 image-2022-11-29_14-51-12.png (image/png)
 image-2022-11-29_14-50-3.png (image/png)
 image-2022-11-29_14-48-3-5.png (image/png)
 image-2022-11-29_14-48-3-4.png (image/png)
 image-2022-11-29_14-48-3-3.png (image/png)
 image-2022-11-29_14-48-3-2.png (image/png)
 image-2022-11-29_14-48-3-1.png (image/png)
 image-2022-11-29_14-48-3.png (image/png)
 image-2023-3-22_10-57-59.png (image/png)