How to Create a Workflow

Create a Workflow to assign to jobs. Workflows contain Stages, and Stages contain Steps. When jobs are assigned to a Workflow, they are able to move through a custom set of Stages and Steps to help you know where that job is at in its production and fulfillment process. You can see the Workflows you create within the Job Board (found within the Boards section and within the Job Board tab in Orders).
Table of Contents
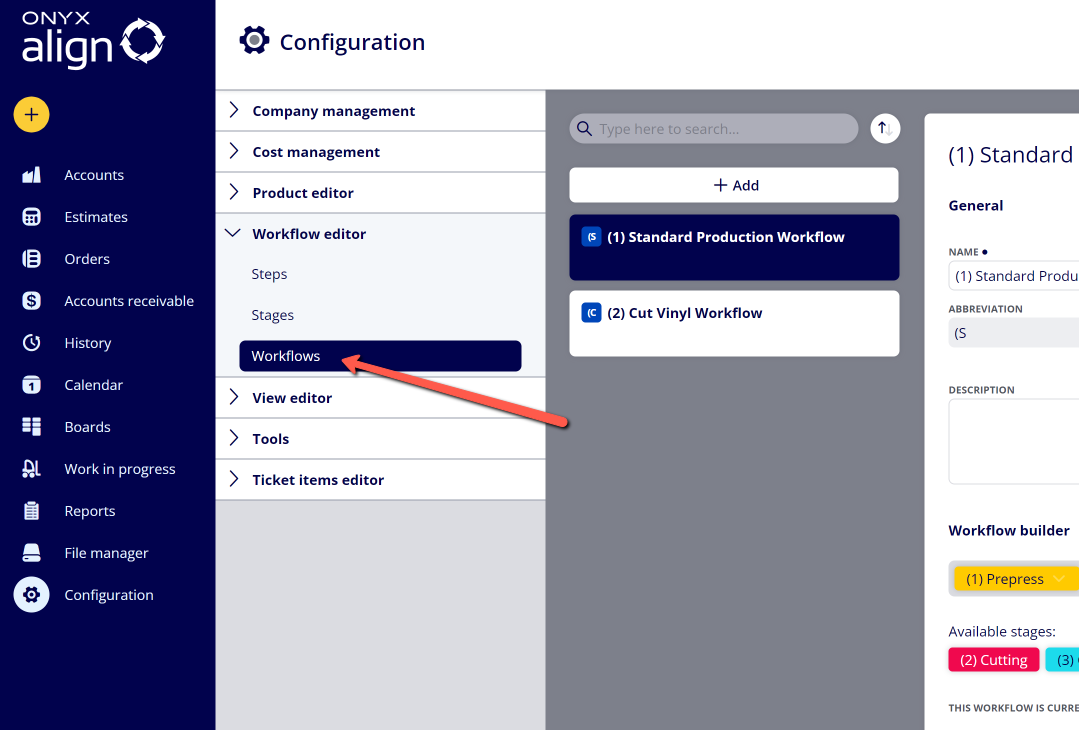
(1) Navigate to Configuration > Workflow Editor > Workflows
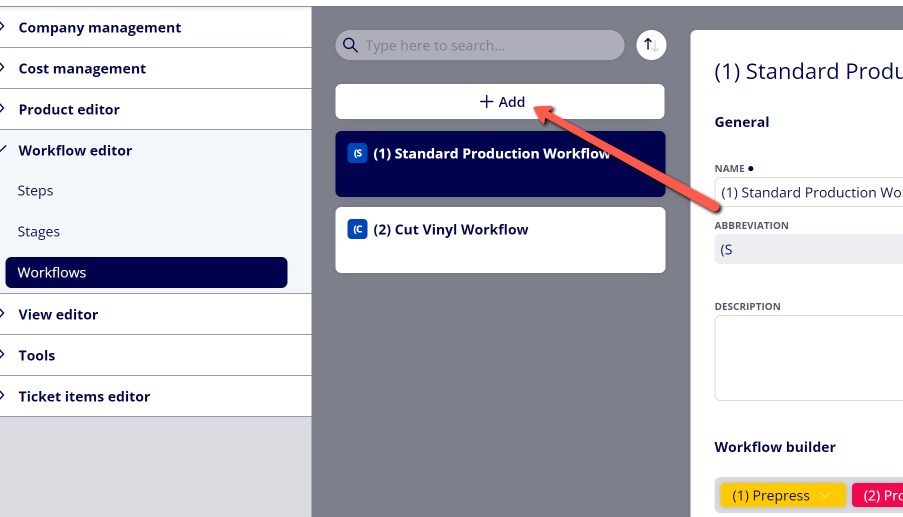
(2) Click "+ Add"
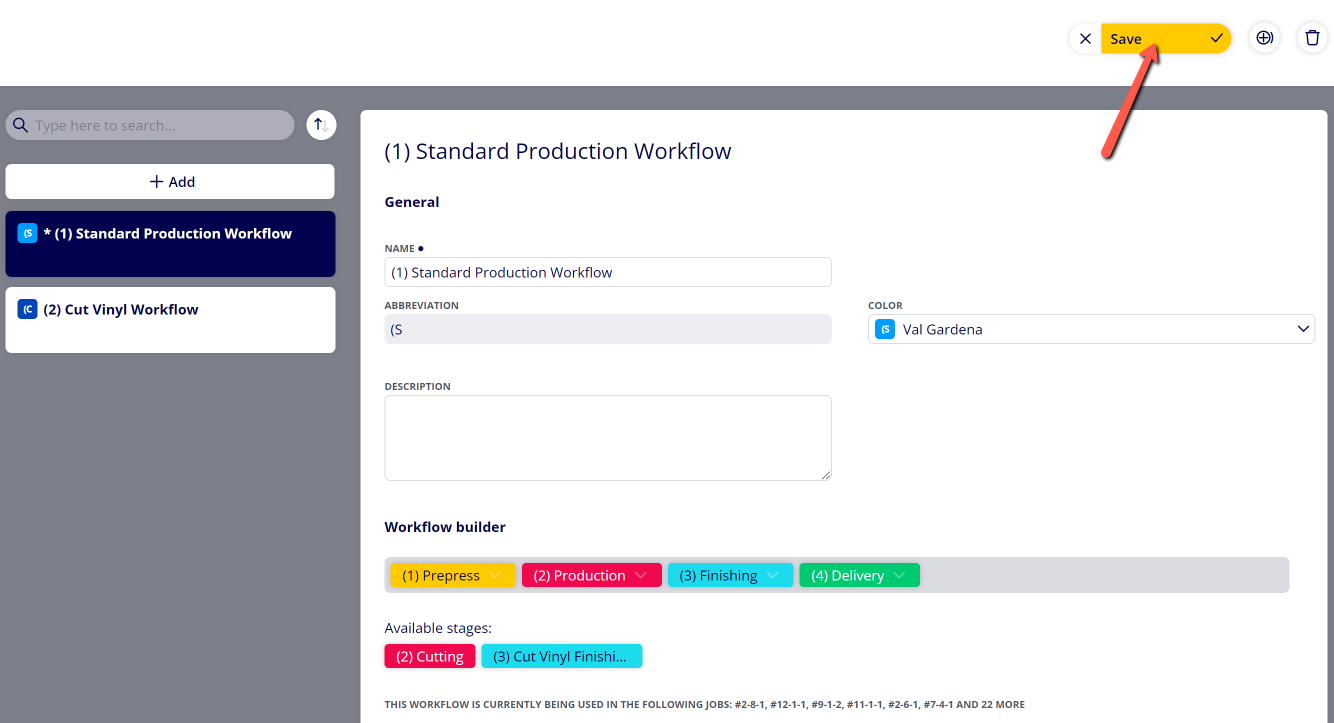
(3) Provide information within the Workflow settings
|
Field |
Description |
|---|---|
|
Name |
This will be the name displayed for the Workflow within the Job Board. |
|
Abbreviation |
This is automatically generated based off of the Workflow name. It is used in the icon that represents the Workflow within the Job Board. |
|
Color |
Set the color you would like to represent the Workflow within the Job Board. |
|
Description |
This will be a description of the Workflow that is visible within the Workflow settings. |
(4) Assign Stages to the Workflow within the Workflow Builder
-Drag and drop Stages from the "Available stages:" section to establish the order of Stages within the Workflow.
-Workflows are required to have at least 1 Stage assigned to them.
-Once you have assigned a Stage to a Workflow, you can click on the arrow within the Stage to denote whether or not you want that Stage to be required.
-To remove a Stage that has been assigned to a Workflow, click on the arrow within the Stage and click "Remove".
-If you need to add a Stage that has not been created yet, see How to Create a Stage for a Workflow.
(5) Click "Save"
(6) Assign the Workflow to a Print Job or Non-Print Job
-To assign a Workflow to a Print Job or Non-Print Job, see How to Assign the Default Workflow for All Print Jobs or How to Assign the Default Workflow to a Specific Print Job.
Attachments:
 image-2023-3-23_9-58-23.png (image/png)
 image-2023-3-23_9-53-12.png (image/png)
 image-2023-3-23_9-52-22.png (image/png)
 image-2023-3-7_12-56-40.png (image/png)
 image-2023-3-7_10-55-36.png (image/png)
 image-2023-3-7_10-54-27.png (image/png)
 image-2023-3-7_10-54-1.png (image/png)
 image-2023-1-24_14-50-7.png (image/png)
 image-2022-11-30_7-57-8.png (image/png)
 image-2022-11-30_7-56-32.png (image/png)
 image-2022-11-29_15-6-36.png (image/png)
 image-2022-11-29_15-1-39.png (image/png)
 image-2022-11-29_15-1-12.png (image/png)
 image-2022-11-29_14-52-45.png (image/png)
 image-2022-11-29_14-51-52.png (image/png)
 image-2022-11-29_14-51-30.png (image/png)
 image-2022-11-29_14-51-12.png (image/png)
 image-2022-11-29_14-50-3.png (image/png)
 image-2022-11-29_14-48-3-5.png (image/png)
 image-2022-11-29_14-48-3-4.png (image/png)
 image-2022-11-29_14-48-3-3.png (image/png)
 image-2022-11-29_14-48-3-2.png (image/png)
 image-2022-11-29_14-48-3-1.png (image/png)
 image-2022-11-29_14-48-3.png (image/png)
 image-2023-3-22_10-57-59.png (image/png)