How to Create a Product View

Create Product Views to control which fields are visible when viewing Product Details within ONYX Align. You are able to create as many Product Views as you would like. Product Views can be assigned to specific Products, controlling the fields each Product displays.
Table of Contents
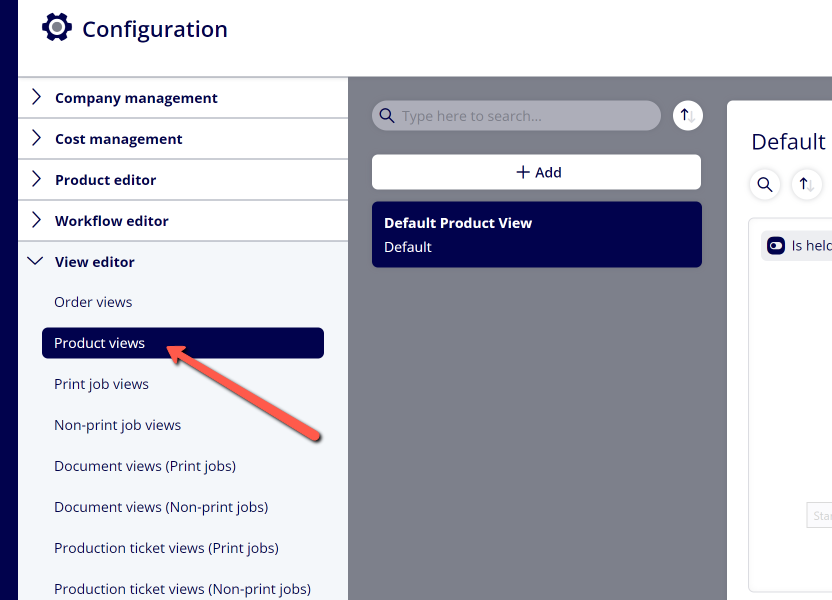
- (1) Navigate to Configuration > View Editor > Product views
- (2) Click "+ Add"
- (3) Enter the Name of the new View
- (4) Drag fields from the top group of fields to the bottom section
- (5) Categorize the fields you have added to the bottom section into groups and assign each group a name
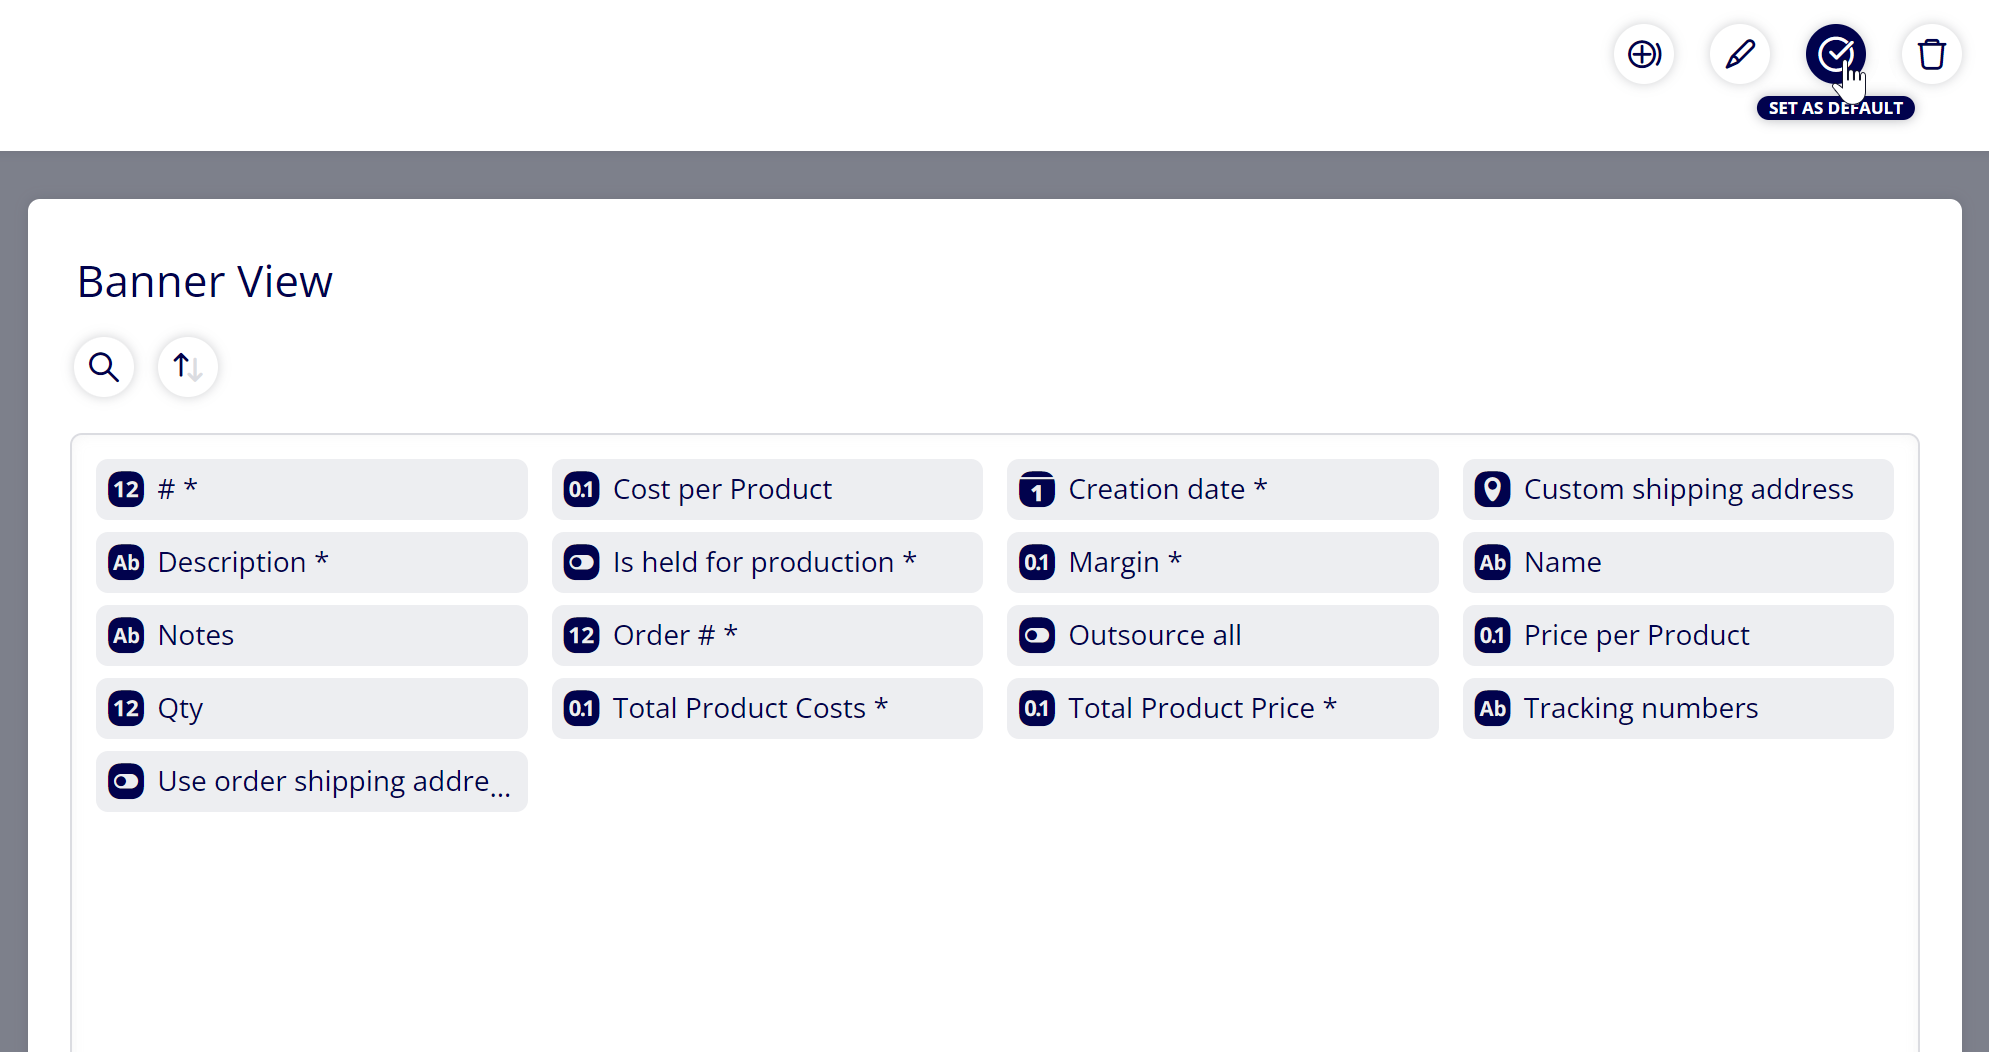
- (6) If you want this to be the default View assigned to Products, click on the "Set as Default" button when the View is selected
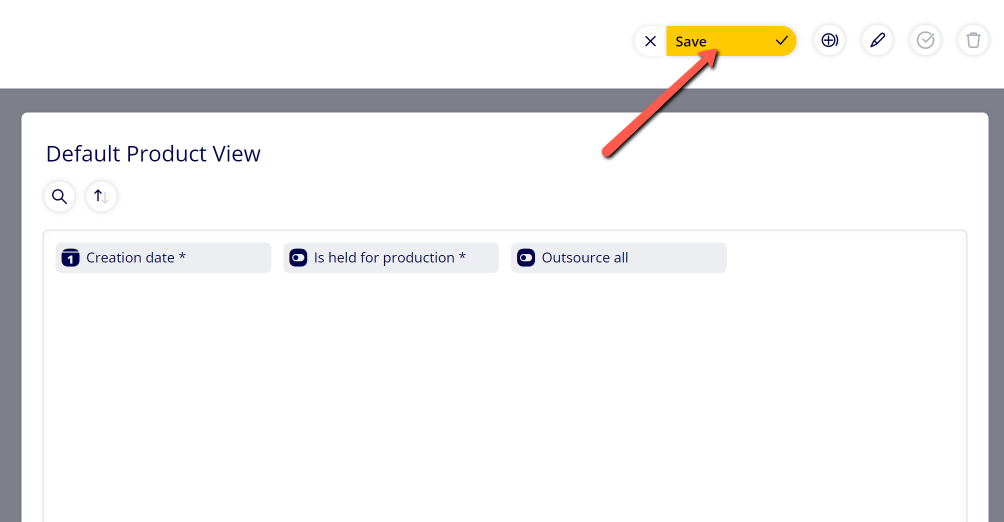
- (7) Click "Save"
- (8) Assign the View to your Products
(1) Navigate to Configuration > View Editor > Product views
(2) Click "+ Add"

(3) Enter the Name of the new View
(4) Drag fields from the top group of fields to the bottom section
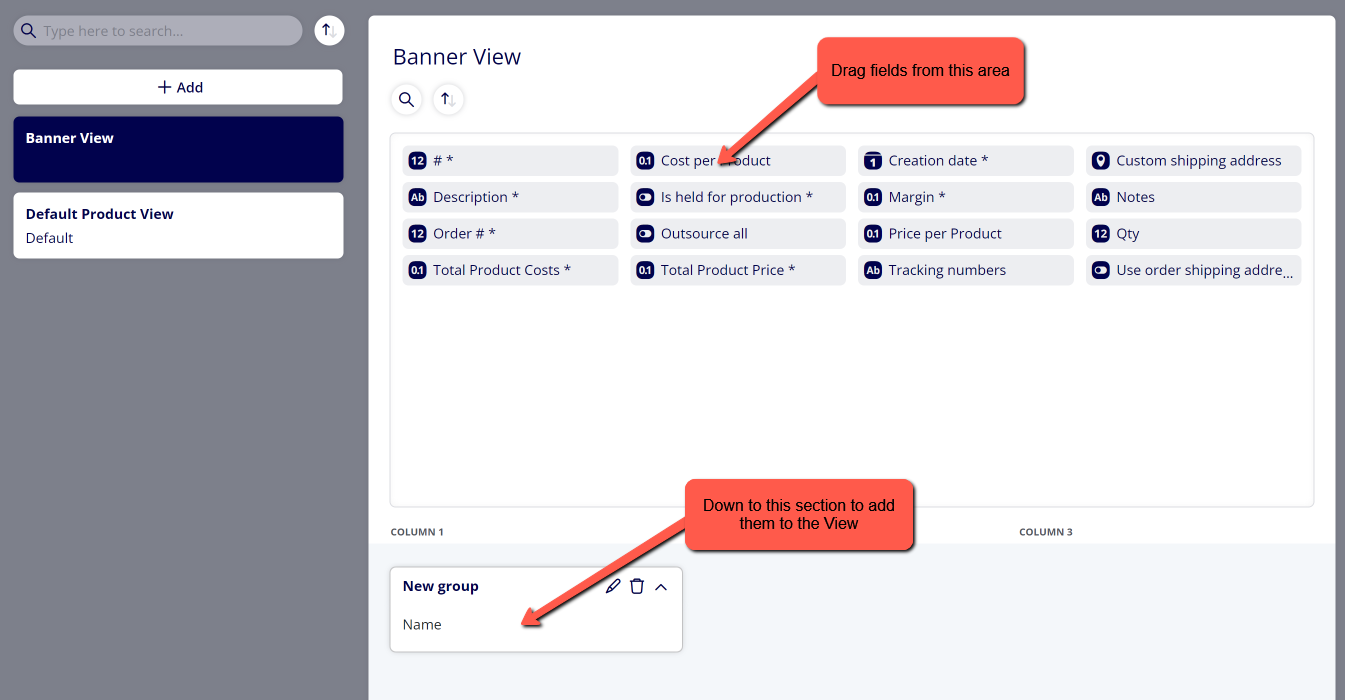
-To find a specific field you are looking for, click on the search icon above the top section and search for the field you are looking for.
-The top section contains all available fields for Products. The bottom section is meant to contain all of the fields you want to display for Products assigned to this View.
(5) Categorize the fields you have added to the bottom section into groups and assign each group a name
-When you add fields to the bottom section, they will be put into groups. You can control which fields are in which group and also change the name of the group.
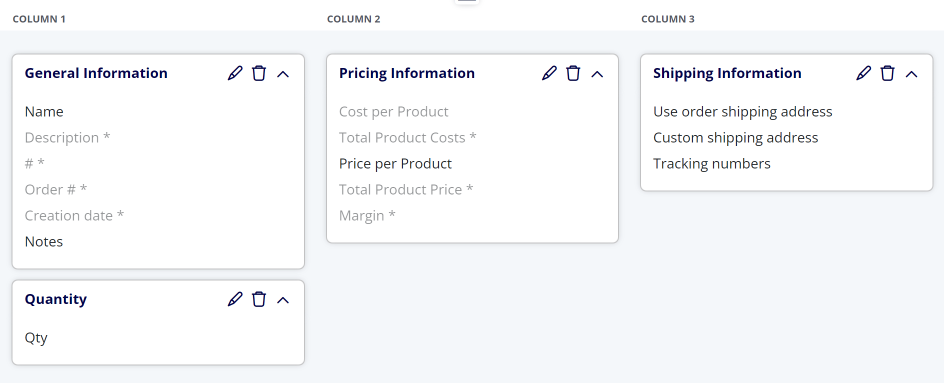
-If you would like to, you can delete the group name, making it appear blank.
(6) If you want this to be the default View assigned to Products, click on the "Set as Default" button when the View is selected
(7) Click "Save"
(8) Assign the View to your Products
Attachments:
 image-2023-3-28_12-58-5.png (image/png)
 image-2023-3-28_12-57-18.png (image/png)
 image-2023-3-28_12-55-16.png (image/png)
 image-2023-3-28_12-53-39.png (image/png)
 image-2023-3-28_12-51-9.png (image/png)
 image-2023-3-28_12-50-3.png (image/png)
 image-2023-3-22_10-57-59.png (image/png)
 image-2022-11-29_14-48-3.png (image/png)
 image-2022-11-29_14-48-3-1.png (image/png)
 image-2022-11-29_14-48-3-2.png (image/png)
 image-2022-11-29_14-48-3-3.png (image/png)
 image-2022-11-29_14-48-3-4.png (image/png)
 image-2022-11-29_14-48-3-5.png (image/png)
 image-2022-11-29_14-50-3.png (image/png)
 image-2022-11-29_14-51-12.png (image/png)
 image-2022-11-29_14-51-30.png (image/png)
 image-2022-11-29_14-51-52.png (image/png)
 image-2022-11-29_14-52-45.png (image/png)
 image-2022-11-29_15-1-12.png (image/png)
 image-2022-11-29_15-1-39.png (image/png)
 image-2022-11-29_15-6-36.png (image/png)
 image-2022-11-30_7-56-32.png (image/png)
 image-2022-11-30_7-57-8.png (image/png)
 image-2023-1-24_14-50-7.png (image/png)
 image-2023-3-7_10-54-1.png (image/png)
 image-2023-3-7_10-54-27.png (image/png)
 image-2023-3-7_10-55-36.png (image/png)
 image-2023-3-7_12-56-40.png (image/png)
 image-2023-3-28_12-3-6.png (image/png)
 image-2023-3-28_12-12-58.png (image/png)
 image-2023-3-28_12-16-24.png (image/png)
 image-2023-3-28_12-18-6.png (image/png)