How to Create a Print Job

Create Print Jobs within ONYX Align that can be added to Products. Print Jobs are the jobs within your shop that involve printing on a substrate. Print Jobs can have Substrates, Printers, Modifiers, Labors and more tied to them.
Table of Contents
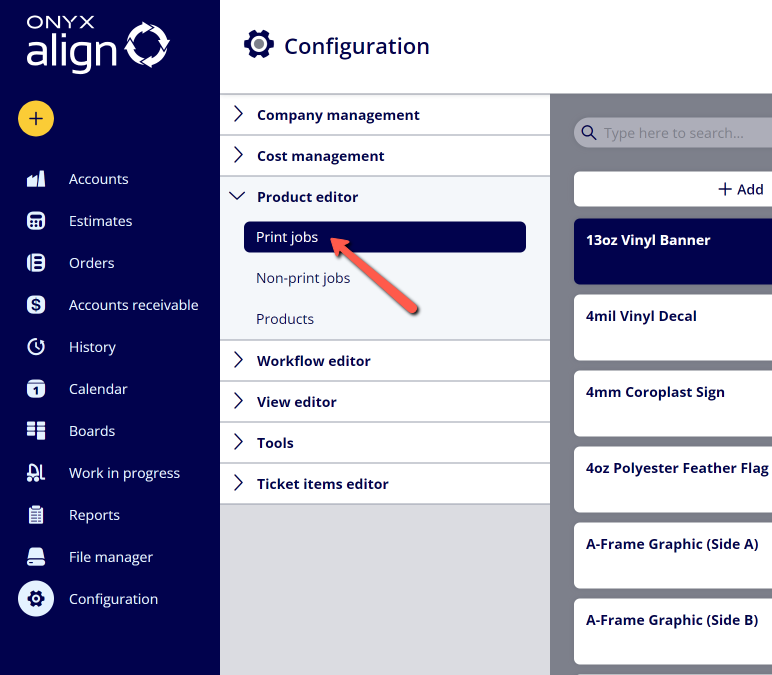
(1) Navigate to Configuration > Product Editor > Print Jobs
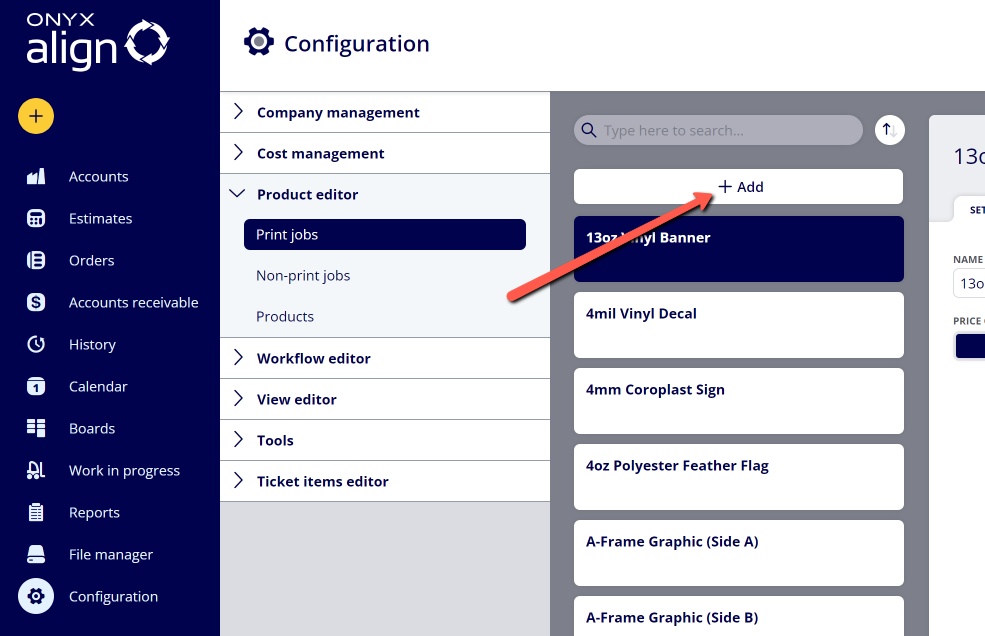
(2) Click "+ Add"
(3) Enter the Print Job Name and select the Template Type
-There are two different Template Types to choose from:
-(Most Common) Default: Select this template if you need to create a standard Print Job
-Batched job: Select this template if you need to create a Print Job that has multiple Job Parts
-This would be used if you are creating a Print Job for a vehicle wrap, multi-panel display, etc.
(4) Configure general Print Job Settings
(4.1) Click on the "Settings" tab
(4.2) Edit the Name of the Print Job
(4.3) Select the Price Calculation Mode for the Print Job
-There are three different Price Calculation Modes to choose from:
-Cost+: Automatically generate the price for the Print Job based off of the calculated costs and the Target Margin provided.
-Fixed Price: Use a fixed price for the Print Job, regardless of what the estimated job costs are.
-Price per SQFT: Use a price per SQFT for the Print Job. You are able to set multiple price breakpoints based on square footage used.
(5) Assign Views to the Print Job
(5.1) Click on the "Assign Views" tab
(5.2) Select the Assigned View for the Operator, Manager, and Sales Role Groups
-Whichever View you select will have a preview of that View displayed in the Window.
-If you need to create a new View, see How to Create Print Job Views.
-To control which Users belong to which Role Groups, see How to Assign Users to Role Groups.
(5.3) Select the Assigned View for the Production Ticket, Estimate and Invoice
-Whichever View you select will have a preview of that View displayed in the Window
-If you need to create a new View, see How to Create a Document View for Print Jobs and How to Create a Production Ticket View for Print Jobs.
(6) Configure Custom Item Settings
(6.1) Click on the "Custom Item Settings" tab
(6.2) Select the Item you would like to edit
(6.3) Make the necessary edits
-The global default settings for all Print Job Items are controlled within Configuration > Ticket Items Editor > Print Job Items.
-When you make edits to Print Job Items within Custom Item Settings for a specific Print Job, those edits will only be applied to that specific Print Job and will override the global Print Job Item settings within the Ticket Items Editor.
-Example: If set the Default Value to "60" within Ticket Items Editor > Print Job Items > Target Margin, then all Print Jobs created within the system will have a default Target Margin of 60% when they are added to an Order. However, if you go into a created Print Job and change the Default Value to "80" within Custom Item Settings > Target Margin, then that specific Print Job will have a default Target Margin of 80% when it is added to an Order.
(6.4) Save your changes
(7) Configure Print Settings
(7.1) Click on the "Print Settings" tab
(7.2) Select the Default Substrate for the Print Job
-You can control which Substrates are allowed to be selected for the Print Job in the Allowed Substrates section within the tab
-If you need to create a new Substrate, see How to Create a Substrate
(7.3) Select the Default Printer for the Print Job
-You can control which Printers are allowed to be selected for the Print Job in the Allowed Printers section within the tab
-Note that the only Printers able to be selected are ones that are compatible with the Allowed Substrates
-If you need to add a new Printer, see How to Create a Printer
(7.4) Select the Default Color Profile, Default Print Mode, and Default Quickset
(7.5) Save your changes
Attachments:
 image-2023-3-13_14-32-7.png (image/png)
 image-2023-3-13_14-31-36.png (image/png)
 image-2022-11-29_14-48-3.png (image/png)
 image-2022-11-29_14-48-3-1.png (image/png)
 image-2022-11-29_14-48-3-2.png (image/png)
 image-2022-11-29_14-48-3-3.png (image/png)
 image-2022-11-29_14-48-3-4.png (image/png)
 image-2022-11-29_14-48-3-5.png (image/png)
 image-2022-11-29_14-50-3.png (image/png)
 image-2022-11-29_14-51-12.png (image/png)
 image-2022-11-29_14-51-30.png (image/png)
 image-2022-11-29_14-51-52.png (image/png)
 image-2022-11-29_14-52-45.png (image/png)
 image-2022-11-29_15-1-12.png (image/png)
 image-2022-11-29_15-1-39.png (image/png)
 image-2022-11-29_15-6-36.png (image/png)
 image-2022-11-30_7-56-32.png (image/png)
 image-2022-11-30_7-57-8.png (image/png)
 image-2023-1-24_14-50-7.png (image/png)
 image-2023-3-7_10-54-1.png (image/png)
 image-2023-3-7_10-54-27.png (image/png)
 image-2023-3-7_10-55-36.png (image/png)
 image-2023-3-7_12-56-40.png (image/png)
 image-2023-3-13_13-54-2.png (image/png)
 image-2023-3-13_13-55-6.png (image/png)