How to Connect an ONYX Align Account to a QuickBooks Online Account
Connecting an ONYX Align account to a QuickBooks Online account is the first step in establishing a live synchronization of data between ONYX Align and QuickBooks Online.
Table of Contents
- (1) Navigate to Configuration > Tools > External connections
- (2) Select “QuickBooks Online”
- (3) Switch the “Environment” toggle to Production
- (3) Select the “Link QuickBooks Online account” link
- (4) Log into the QuickBooks Online account you wish to connect to
- (5) Select the Company
- (6) Select “Next”
- (7) Review the information and select “Connect”
- (7) Review and confirm the information for the connected QuickBooks Online account
- (8) Proceed with selecting sync priorities and performing a manual synchronization of data
(1) Navigate to Configuration > Tools > External connections
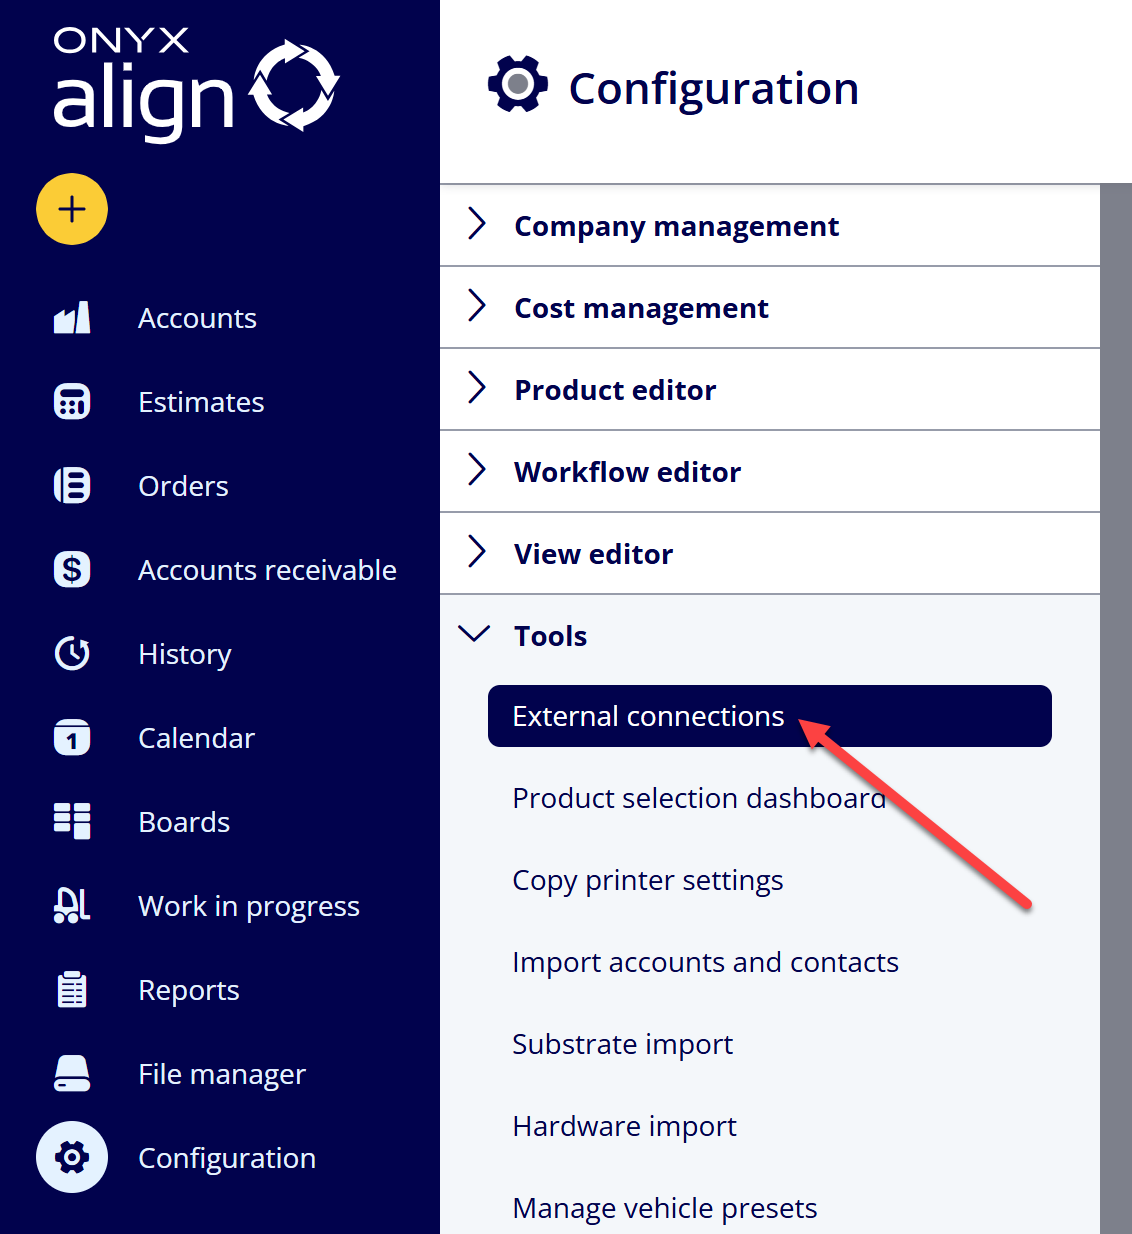
(2) Select “QuickBooks Online”
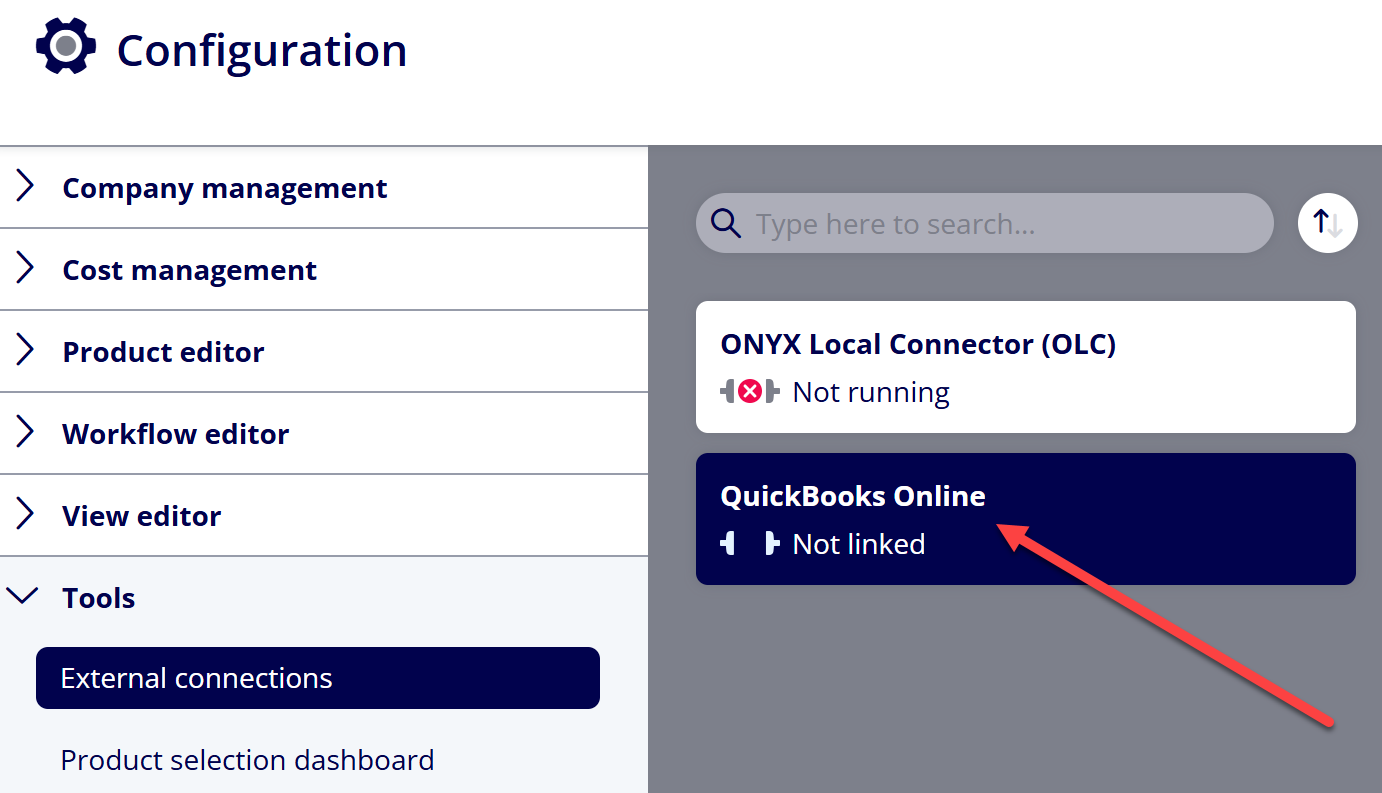
Note: If this section does not appear for you, please contact us at support@onyxgfx.com.
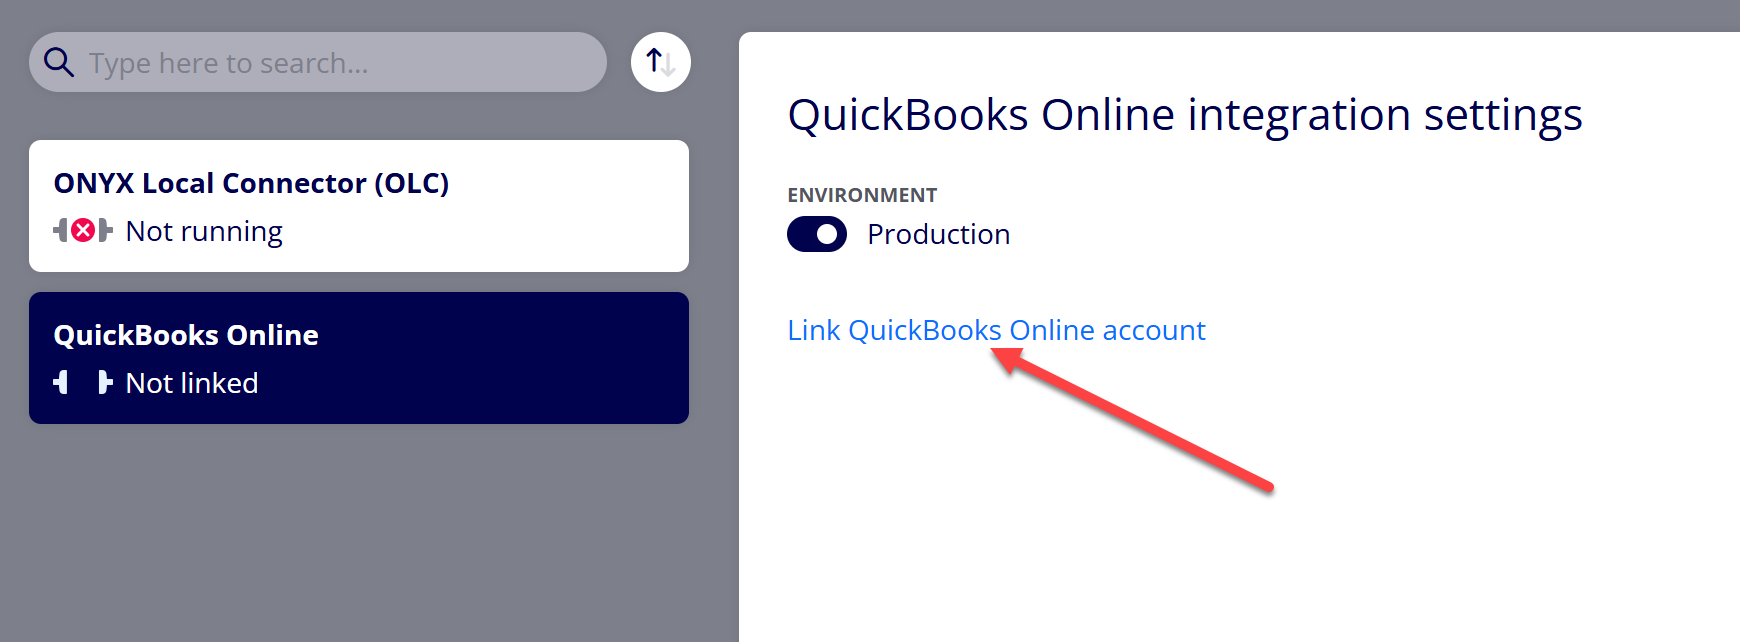
(3) Switch the “Environment” toggle to Production
This toggle determines whether you are connecting to an active QuickBooks Online account (Production) or a sandbox/test account (Sandbox).
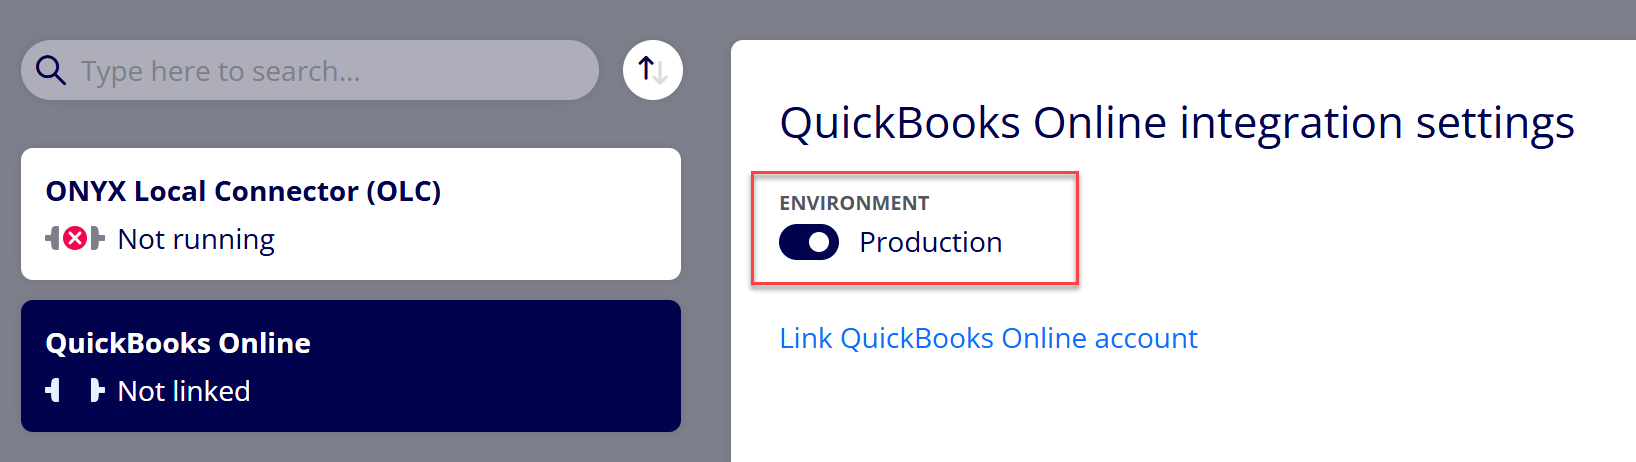
(3) Select the “Link QuickBooks Online account” link
Selecting this link will open up the page to establish the connection within a separate internet browser tab.
(4) Log into the QuickBooks Online account you wish to connect to
You can skip this step if you are already logged into your QuickBooks Online account.
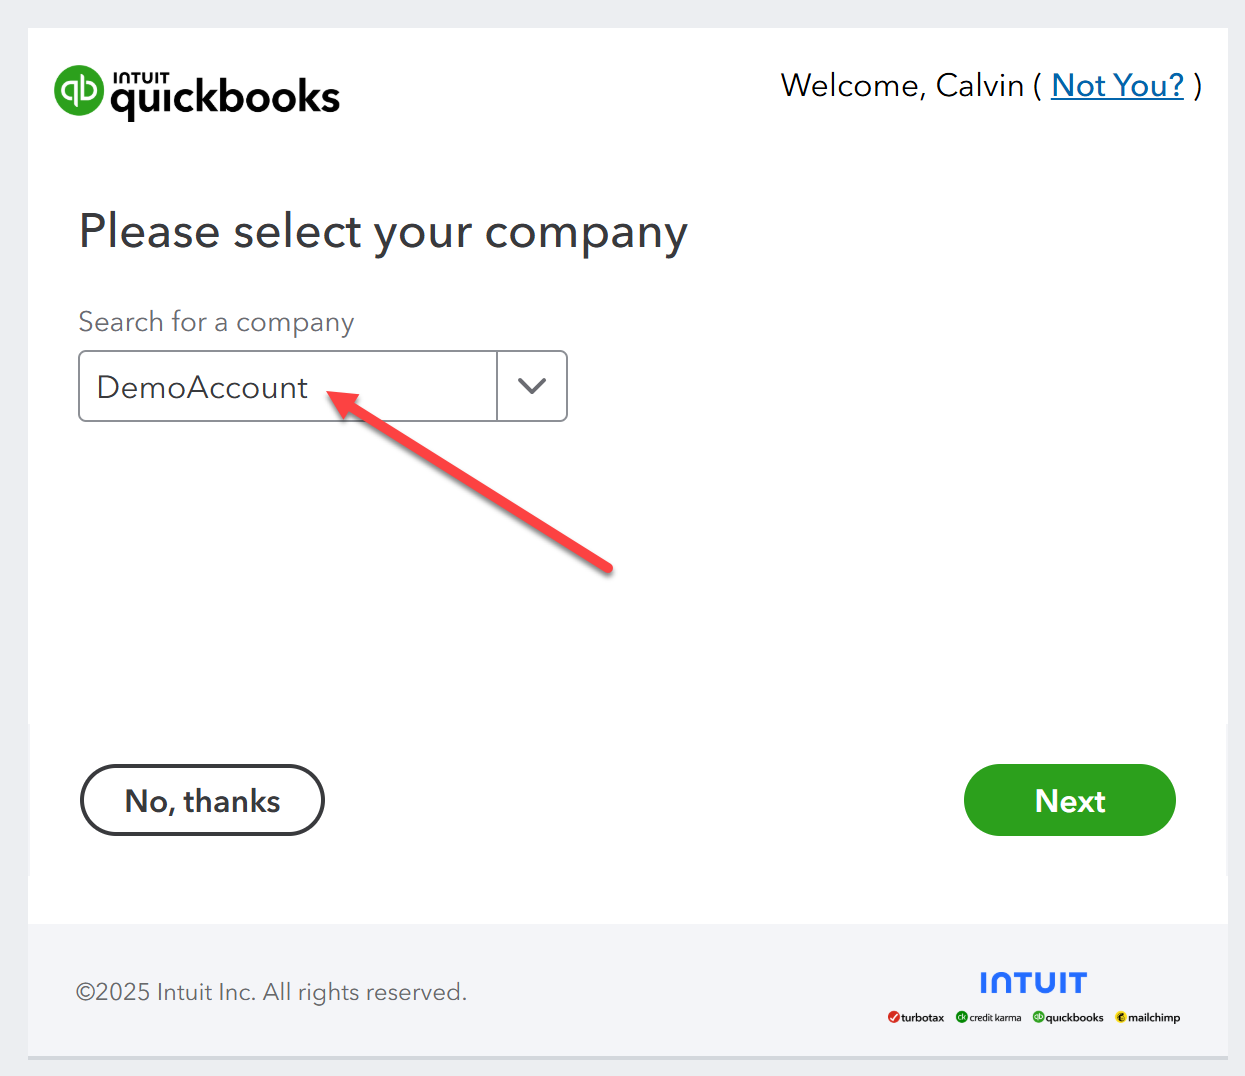
(5) Select the Company
This step may not be presented if you do not have multiple Companies in QuickBooks Online to choose from.
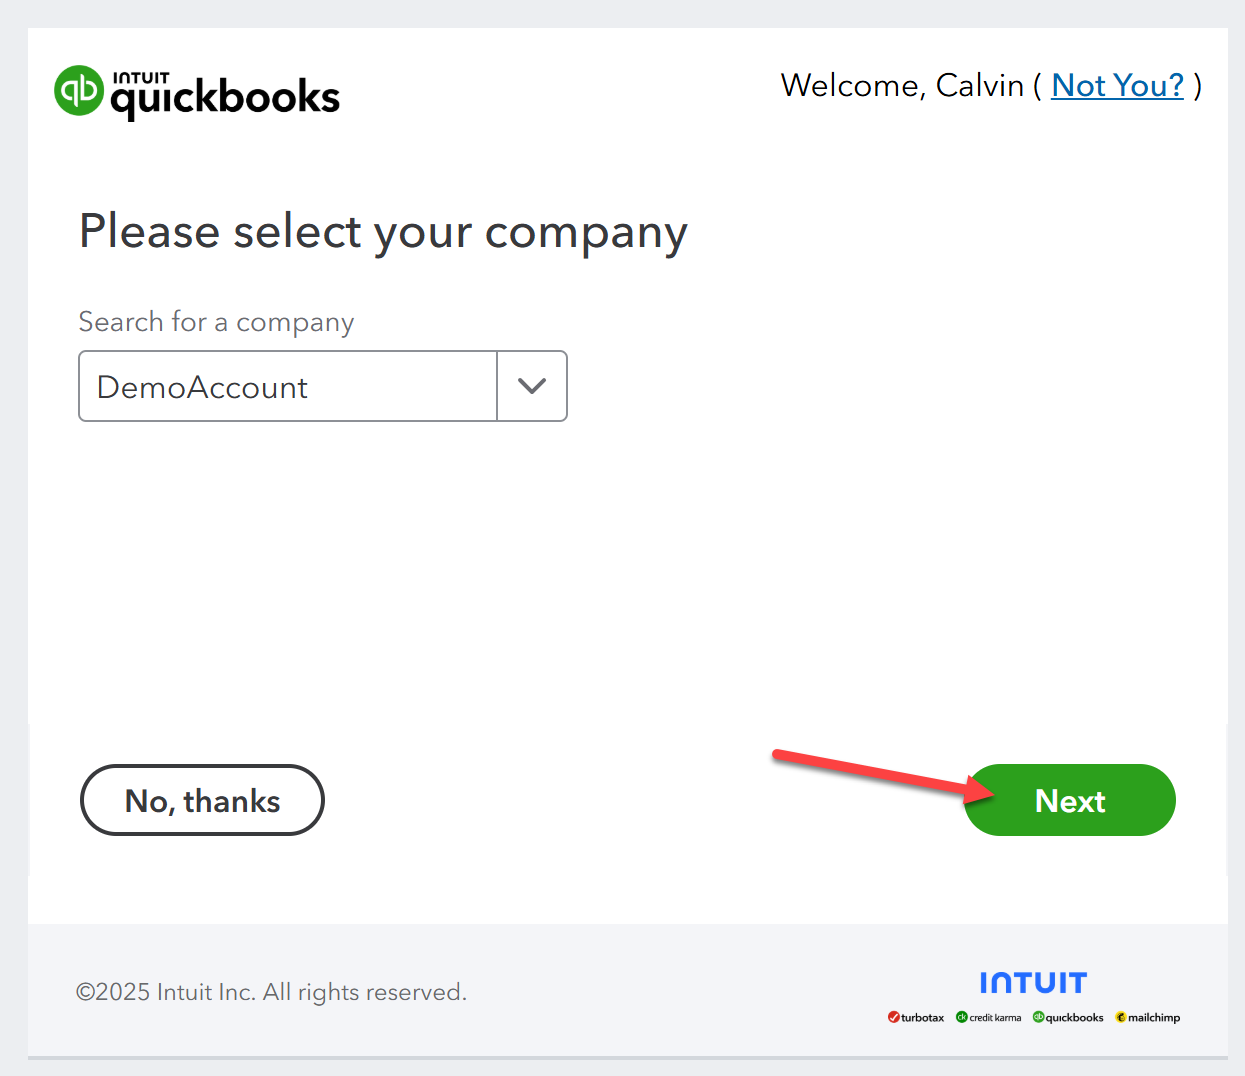
(6) Select “Next”
(7) Review the information and select “Connect”
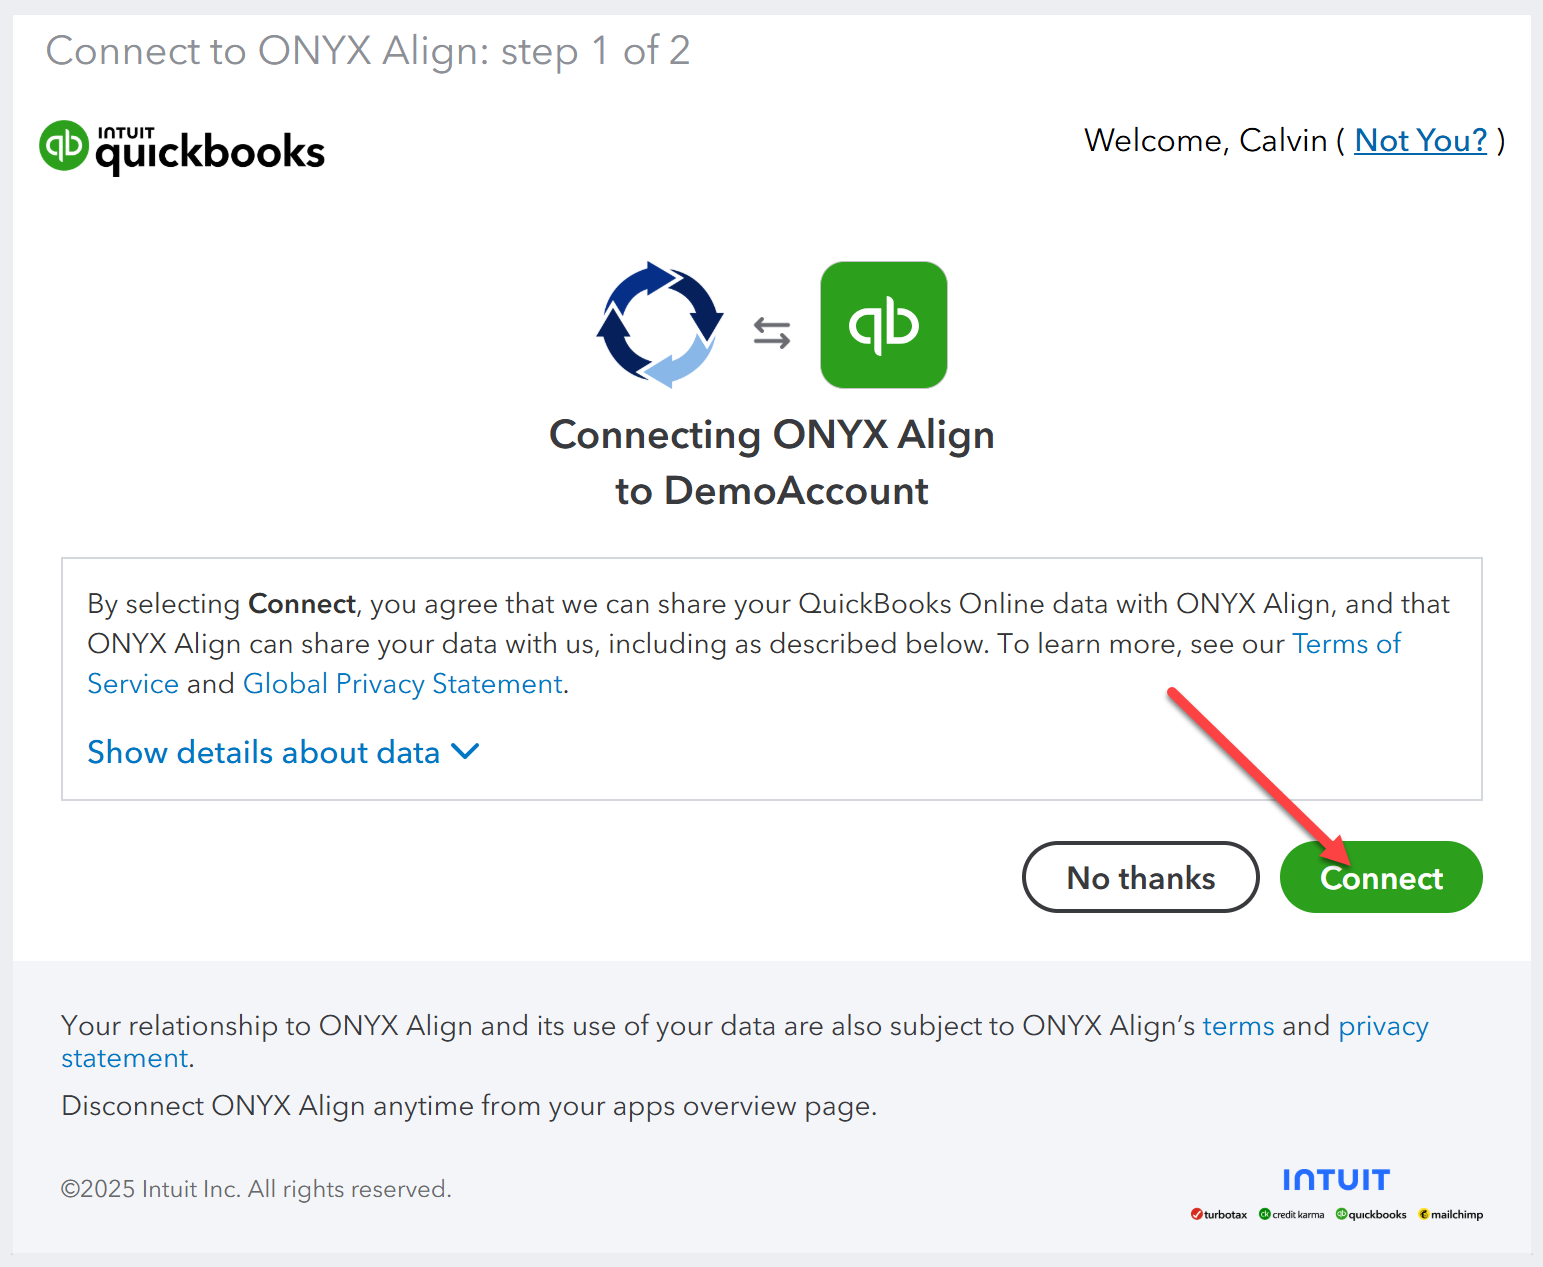
If the connection is successful, the internet browser tab will close and you will be taken back to the tab with ONYX Align displayed.
(7) Review and confirm the information for the connected QuickBooks Online account
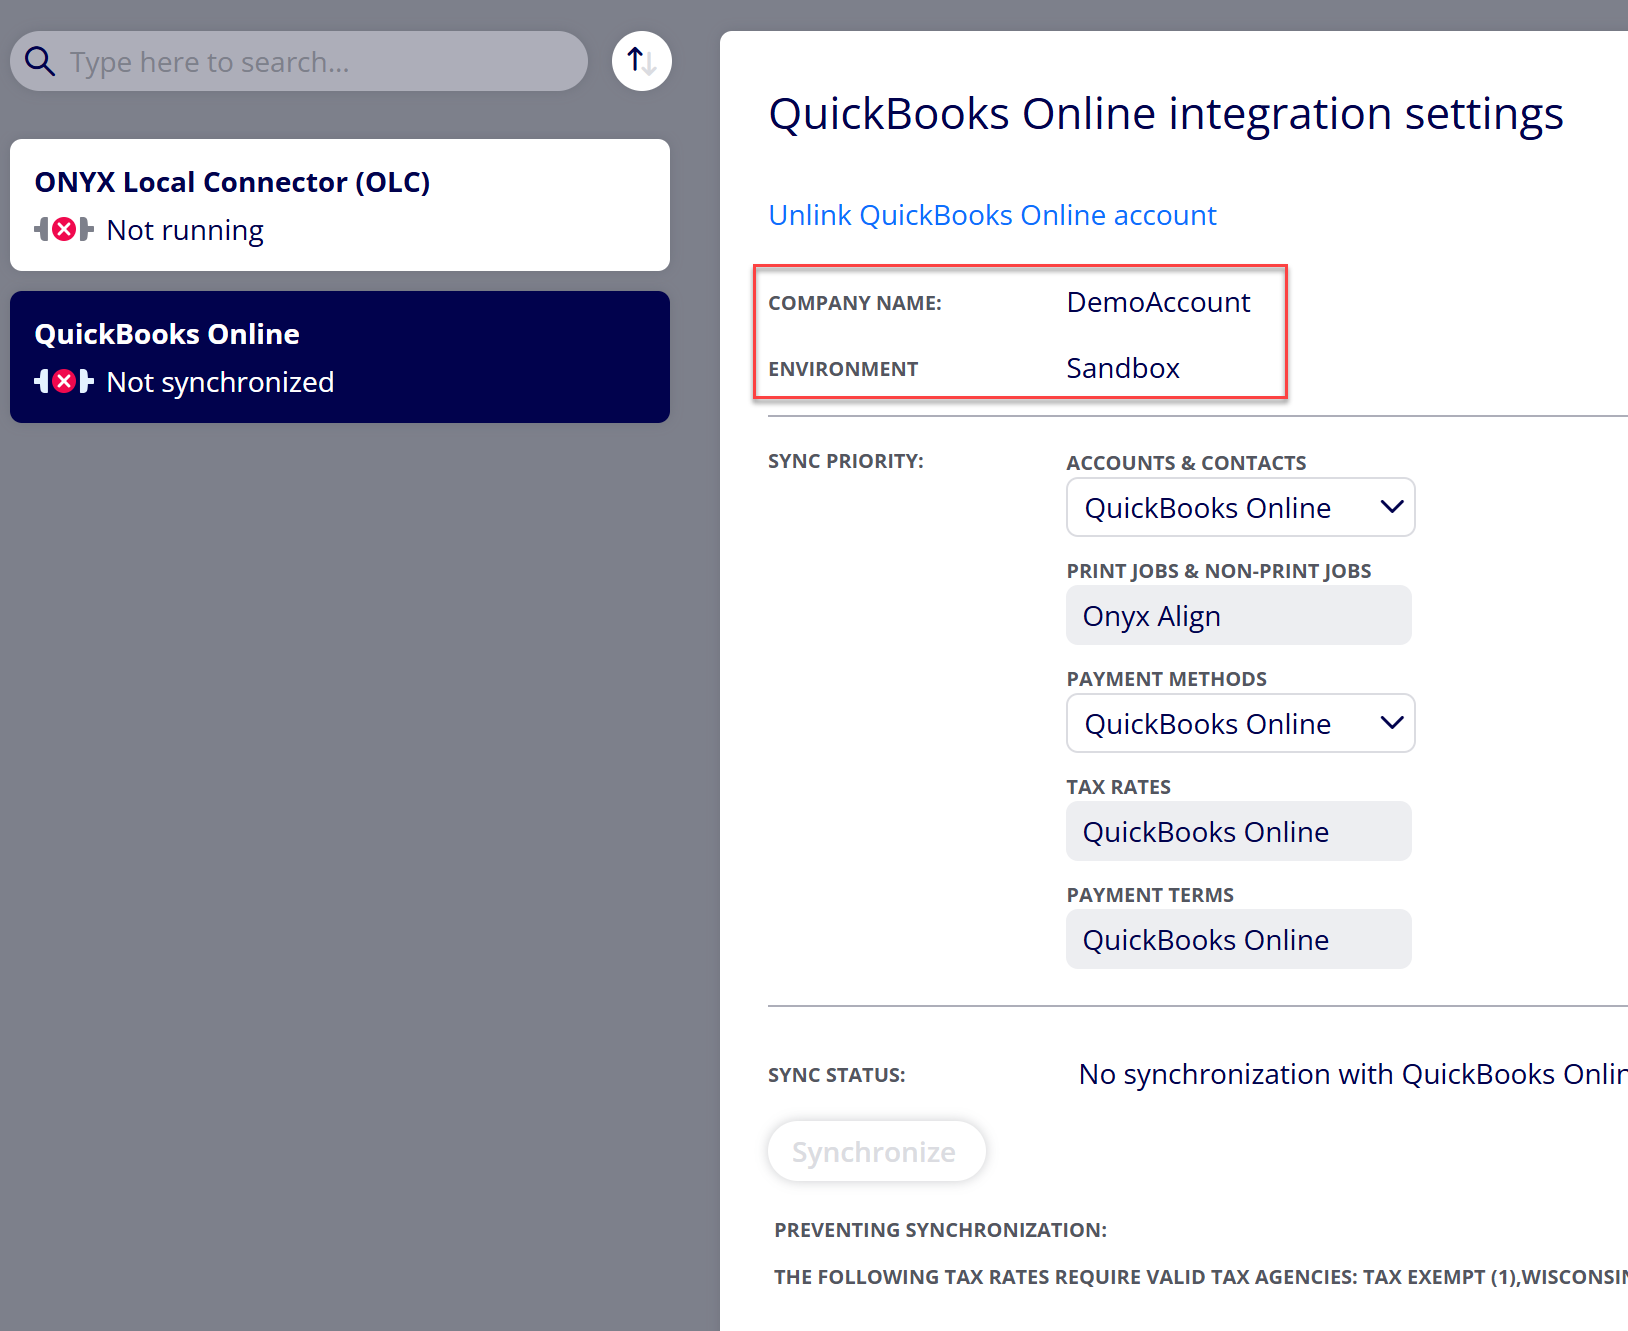
(8) Proceed with selecting sync priorities and performing a manual synchronization of data
-
To learn how to establish sync priorities, see How to Establish Sync Priority Preferences Between ONYX Align and QuickBooks Online.
-
To learn how to perform a manual synchronization, see How to Perform a Manual Synchronization Between ONYX Align and QuickBooks Online.
Attachments:
 image-20250120-212148.png (image/png)
 image-20250120-211934.png (image/png)
 image-20250120-211844.png (image/png)
 image-20250120-211815.png (image/png)
 image-20250120-211521.png (image/png)
 image-20250120-211342.png (image/png)
 image-20250120-211129.png (image/png)
 image-20250120-210911.png (image/png)
 2019 ONYX align PANTONE.png (image/png)
 image-20240117-210948.png (image/png)
 image-20240627-183829.png (image/png)
 image-20240627-183857.png (image/png)
 image-20240627-183926.png (image/png)
 image-20240627-183948.png (image/png)
 image-20240627-184013.png (image/png)
 image-20241031-143935.png (image/png)