How to Issue an Invoice via Print/Download or Email

You are able to issue Invoices through ONYX Align via email, download or print. Issuing invoices allows you to establish/confirm the Invoice Date and Invoice Due Date.
Table of Contents
- (1) Navigate to Orders or Accounts Receivable
- (2) Select the Order you wish to issue the Invoice for
- (3) Select the "Issue Invoice" button
- (4) Verify the Invoice Date and Invoice Due Date
- (5) Issue the Invoice generating an email or downloading/printing the document
- (6) Once the Invoice is issued, note the Invoice Date and Invoice Expiration date within Order Details
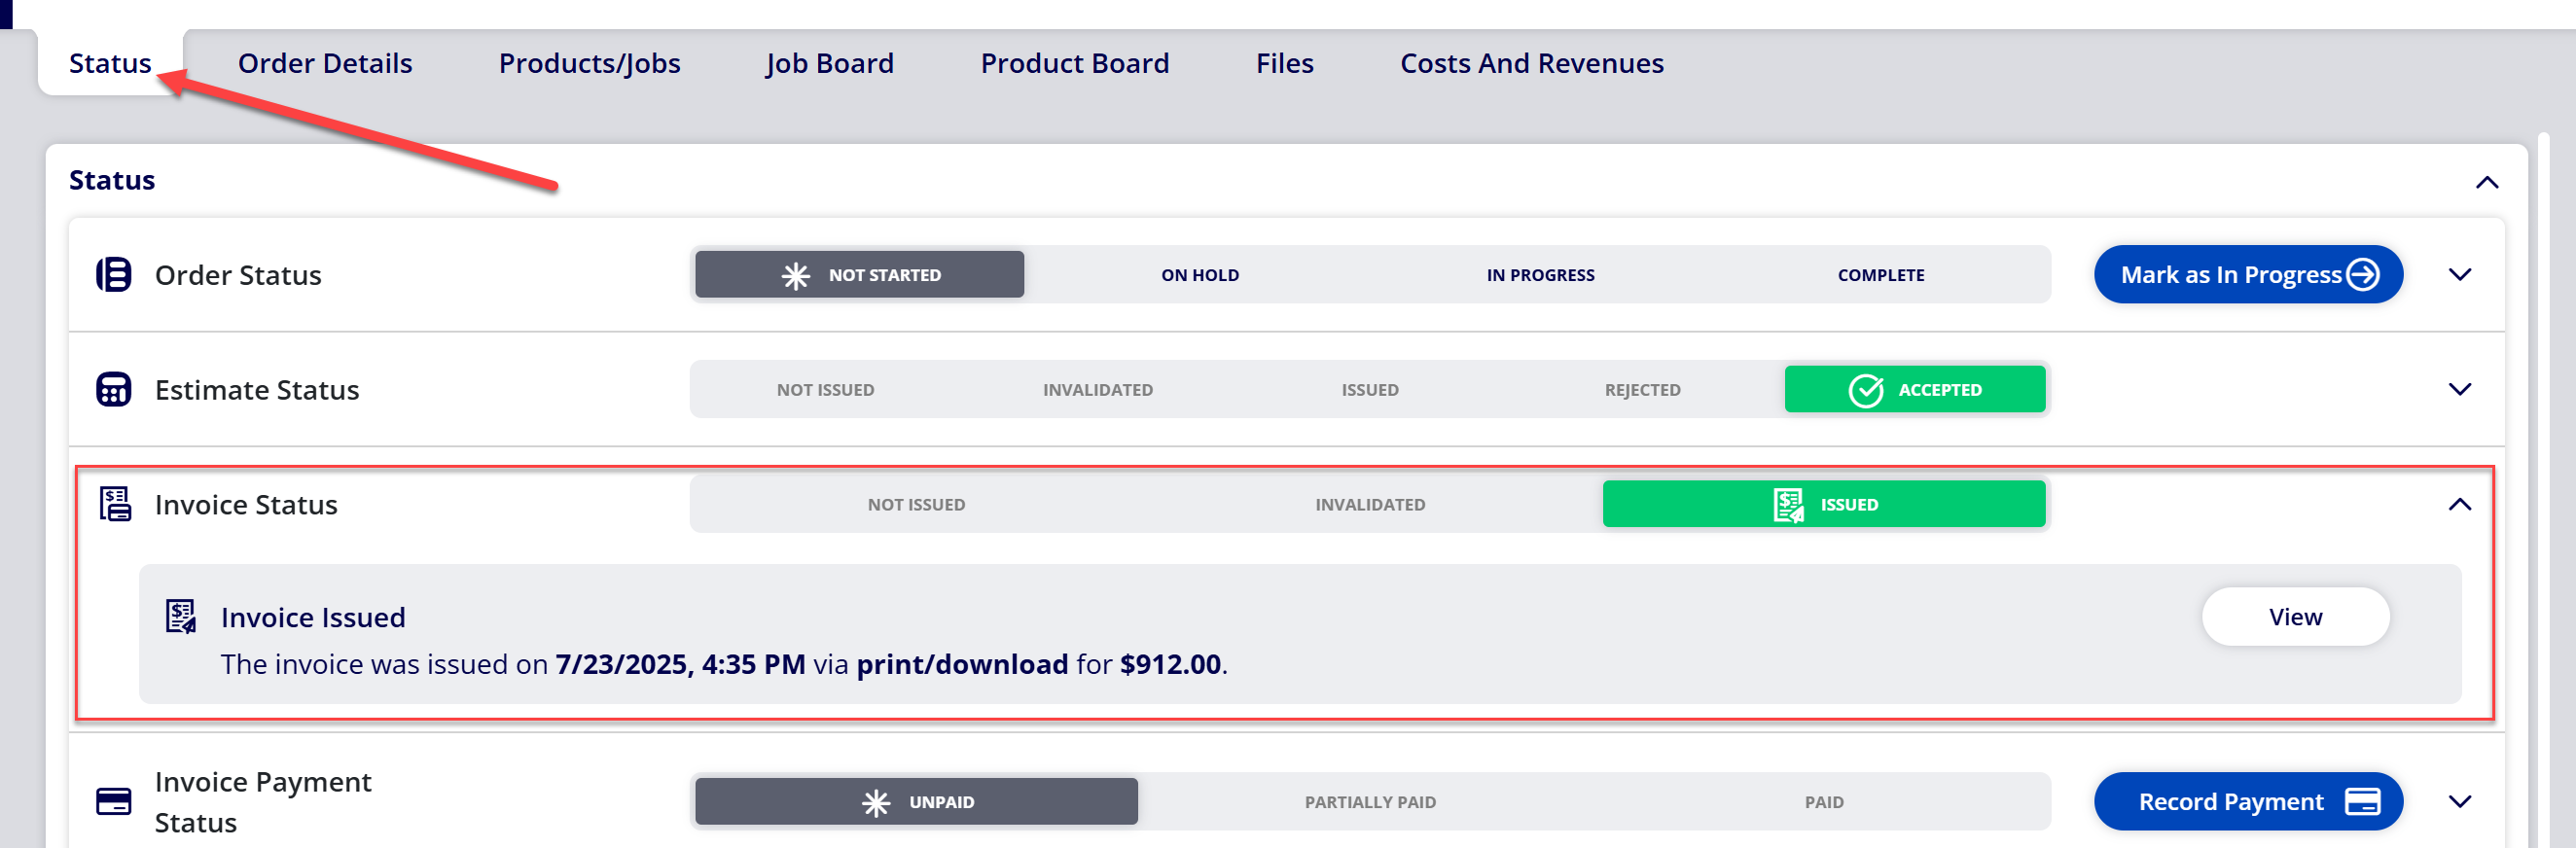
- (7) Navigate to the Status tab to view details about the issued Invoice and to view a copy of the Invoice that was issued
(1) Navigate to Orders or Accounts Receivable

(2) Select the Order you wish to issue the Invoice for
Note
Only Orders that currently have the Invoice Status of Not Issued or Invalidated can be issued. If the Invoice Status is Issued, than the Invoice can only be reissued.
(3) Select the "Issue Invoice" button
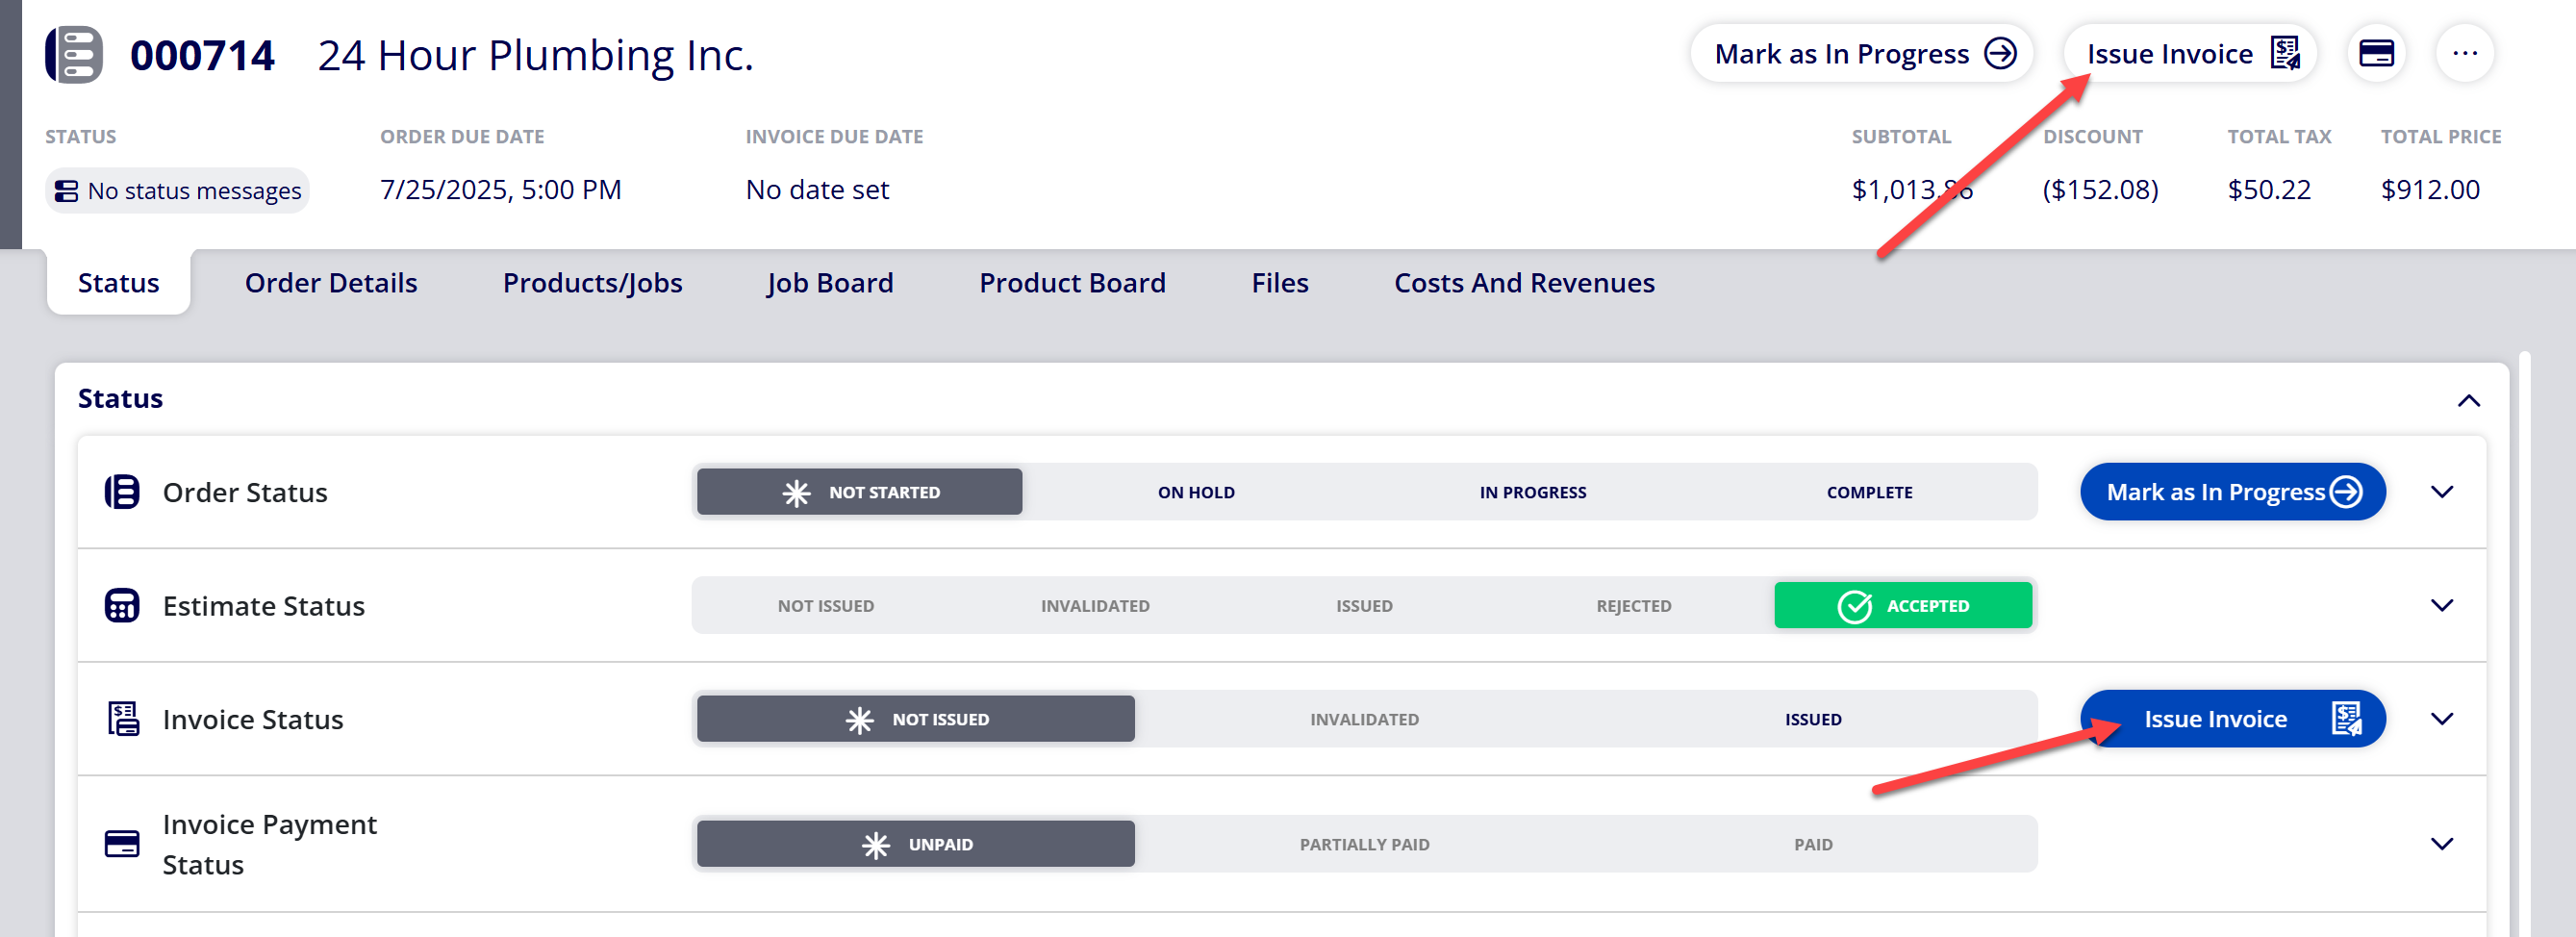
Note
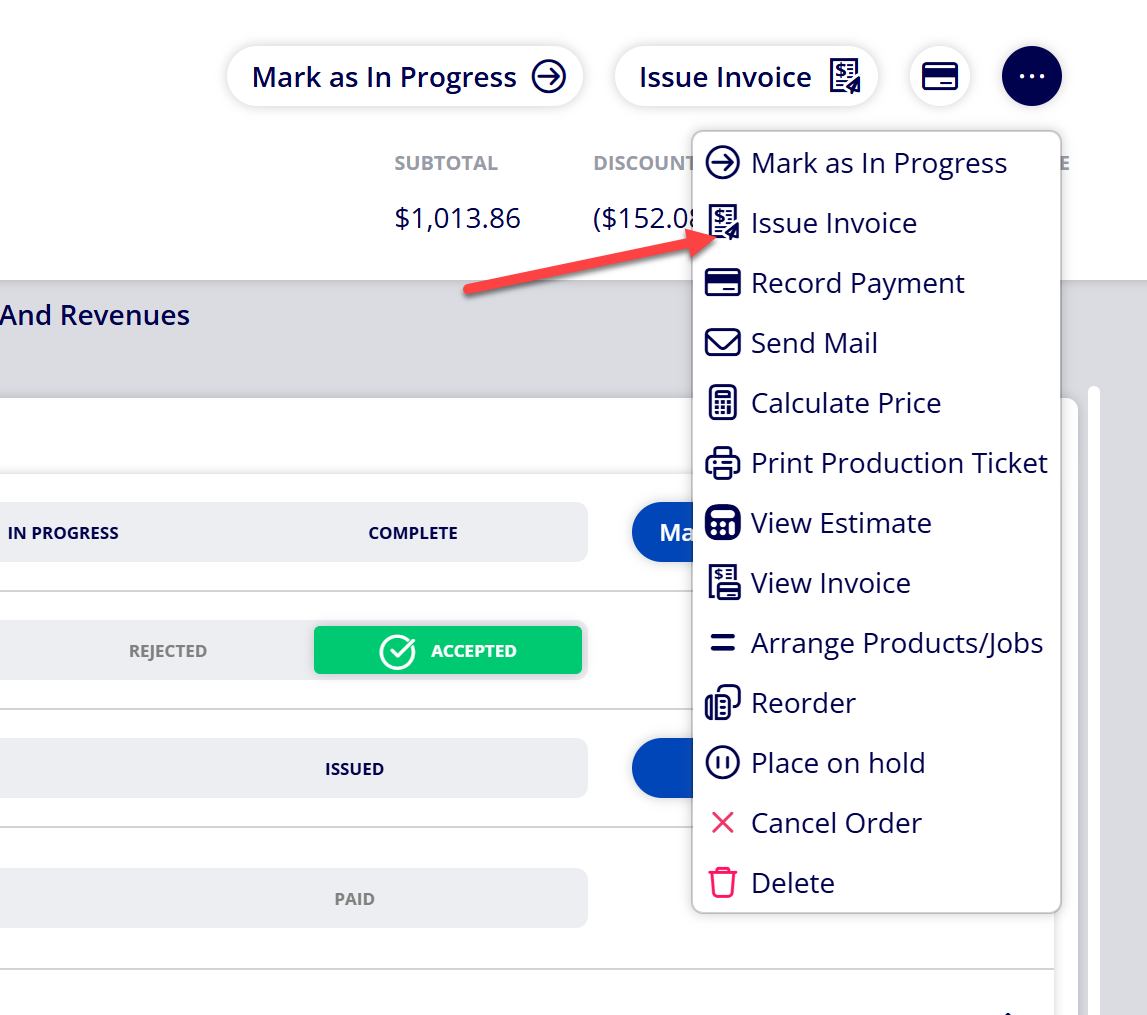
The “Issue Invoice” button is visible in the header of the Order and the Invoice Status section based on the current Invoice Status. If the “Issue Invoice” button is not located in the header or Invoice Status section, then issuing the Invoice is either not available or the action can be completed by selecting the “More..” button and selecting “Issue Invoice”
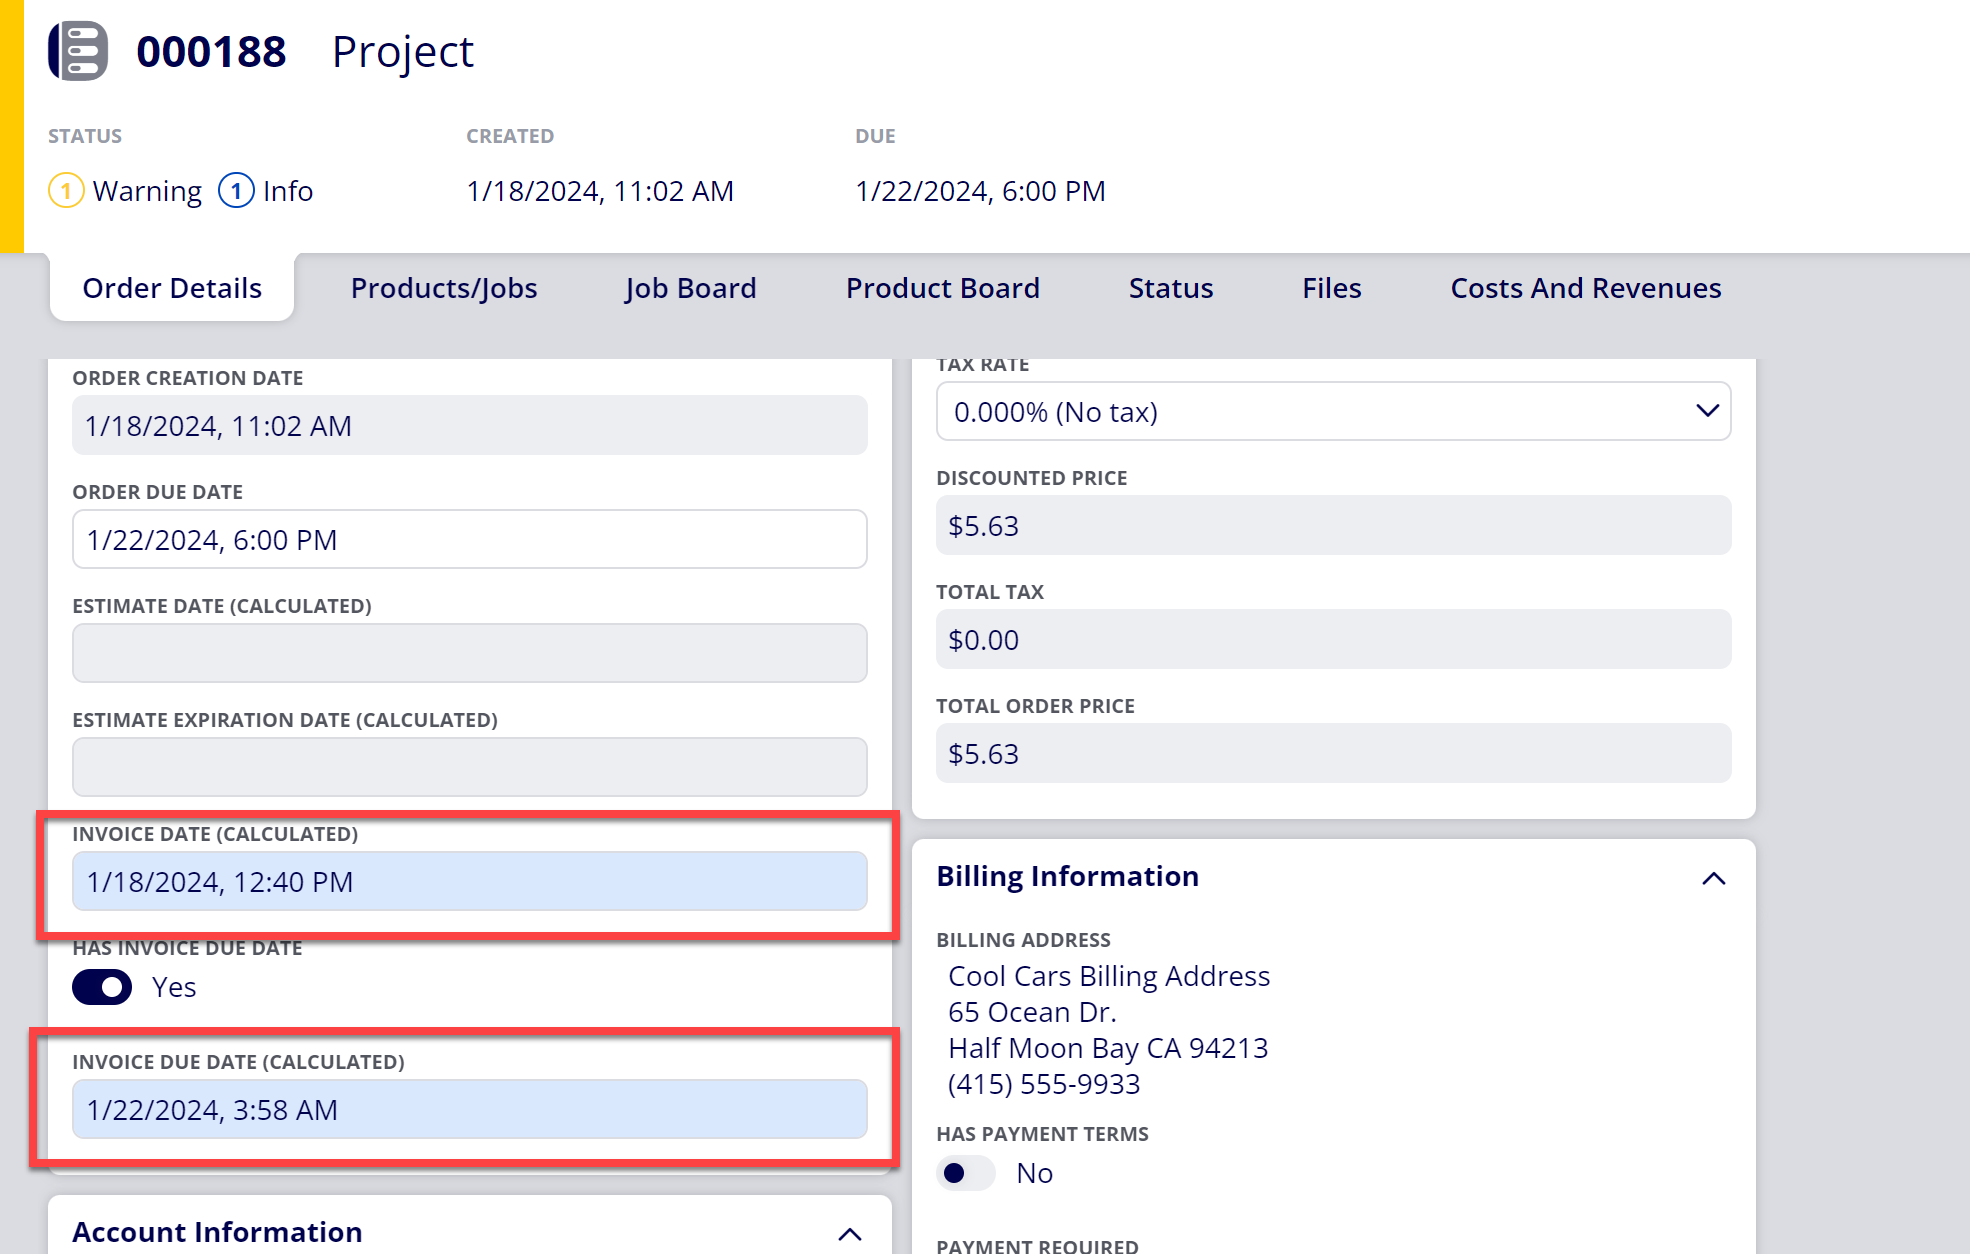
(4) Verify the Invoice Date and Invoice Due Date
-
The "Has Invoice Due Date" field will determine whether or not there is a due date associated with the Invoice
-
When toggled on, an Invoice Due Date will be applied to the Invoice
-
Note: If you are connected to a QuickBooks Online account, this setting is required to be toggled on
-
-
When toggled off, an Invoice Due Date will not be applied to the Invoice
-
-
If an Invoice Date is not assigned prior to selecting the "Issue Invoice" button, the date/time which the button was selected will be populated for the Invoice Date.
-
You can override the assigned value by selecting the Invoice Date field and selecting a new date/time.
-
-
The Invoice Due Date is automatically set based off either:
-
1) Settings established for the Invoice Due Date Order Item in Configuration > Ticket items editor > Order items > Invoice Due Date.
-
2) Settings established within the selected Payment Term.
-
You can override the assigned value by selecting the Invoice Due Date field and selecting a new date/time.
-
(5) Issue the Invoice generating an email or downloading/printing the document

Note
Once an Invoice is successfully issued, the Invoice Status will automatically update to Issued.
(6) Once the Invoice is issued, note the Invoice Date and Invoice Expiration date within Order Details
Note
If you do not see the Invoice Date or Invoice Due Date fields within Order Details, then you will need to update your Order Views to include the Invoice Date and Invoice Due Date ticket items. Refer to How to Create an Order View for assistance with this if needed.
(7) Navigate to the Status tab to view details about the issued Invoice and to view a copy of the Invoice that was issued
Attachments:
 image-20240118-184217.png (image/png)
 image-20240118-184048.png (image/png)
 image-2023-9-11_11-0-0.png (image/png)
 image-2023-9-11_10-37-27.png (image/png)
 image-2023-9-11_10-57-11.png (image/png)
 image-2023-9-11_10-56-27.png (image/png)
 image-2023-9-11_10-31-25.png (image/png)
 image-2023-9-11_10-32-53.png (image/png)
 image-2023-9-11_10-30-2.png (image/png)
 image-2023-9-11_10-25-37.png (image/png)
 image-2023-9-11_10-28-42.png (image/png)
 image-2023-9-11_10-25-6.png (image/png)
 image-2022-11-29_14-48-3-1.png (image/png)
 image-2022-11-29_14-48-3.png (image/png)
 image-2022-11-29_14-48-3-2.png (image/png)
 image-2022-11-29_14-48-3-3.png (image/png)
 image-2022-11-29_14-48-3-4.png (image/png)
 image-2022-11-29_14-48-3-5.png (image/png)
 image-2022-11-29_14-50-3.png (image/png)
 image-2022-11-29_14-51-12.png (image/png)
 image-2022-11-29_14-51-30.png (image/png)
 image-2022-11-29_14-51-52.png (image/png)
 image-2022-11-29_14-52-45.png (image/png)
 image-2022-11-29_15-1-12.png (image/png)
 image-2022-11-29_15-1-39.png (image/png)
 image-2022-11-29_15-6-36.png (image/png)
 image-2022-11-30_7-56-32.png (image/png)
 image-2022-11-30_7-57-8.png (image/png)
 image-2023-1-24_14-50-7.png (image/png)
 image-2023-3-7_10-54-1.png (image/png)
 image-2023-3-7_10-54-27.png (image/png)
 image-2023-3-7_10-55-36.png (image/png)
 image-2023-3-7_12-56-40.png (image/png)
 image-2023-3-13_13-54-2.png (image/png)
 image-2023-3-13_13-55-6.png (image/png)
 image-2023-3-13_15-0-30.png (image/png)
 image-2023-9-11_10-44-17.png (image/png)
 image-2023-9-11_10-45-24.png (image/png)
 image-2023-9-11_10-52-24.png (image/png)
 image-20250723-213054.png (image/png)
 image-20250723-213242.png (image/png)
 image-20250723-213417.png (image/png)
 image-20250723-213534.png (image/png)
 image-20250723-213920.png (image/png)