How to Install the ONYX Local Connector (OLC)

Installing the ONYX Local Connector (OLC) allows you to successfully establish a direct connection between ONYX Align and ONYX Thrive. This connection allows data to be sent back and forth between the two applications, such as job submissions and printer information.
Table of Contents
- (1) Log in to your ONYX Align account
- (2) Navigate to Configuration > Tools > External connections
- (3) Select the ONYX Local Connector (OLC) settings
- (4) Click "Download Onyx Local Connector"
- (5) Extract the files from the downloaded OLC.zip file
- (6) Open the extracted OLC folder
- (7) Right click on the OLC.exe file and click "Run as administrator"
- (9) Click "Next" within the welcome window of the setup wizard
- (10) Click "Next" on the remaining windows, making any necessary adjustments
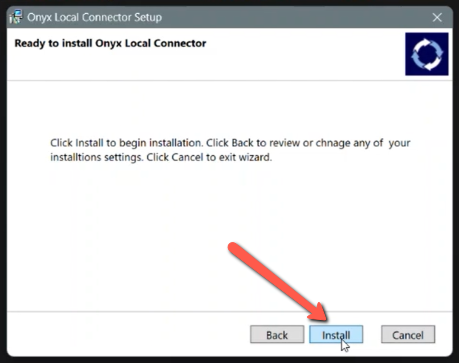
- (11) Click "Install" on the final window of the setup wizard
(1) Log in to your ONYX Align account
-If you need assistance with logging in to your account, see How to Log into Your ONYX Align Account.
(2) Navigate to Configuration > Tools > External connections
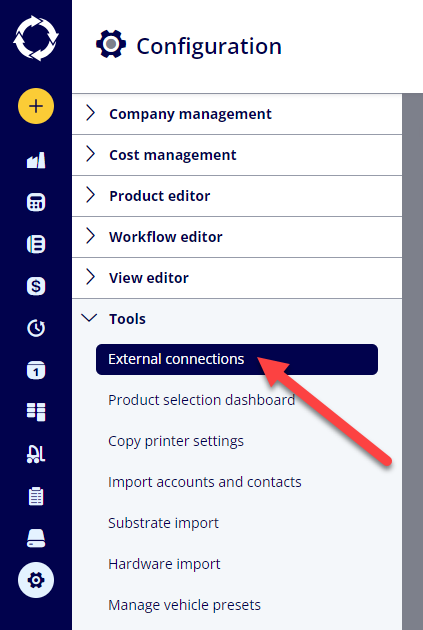
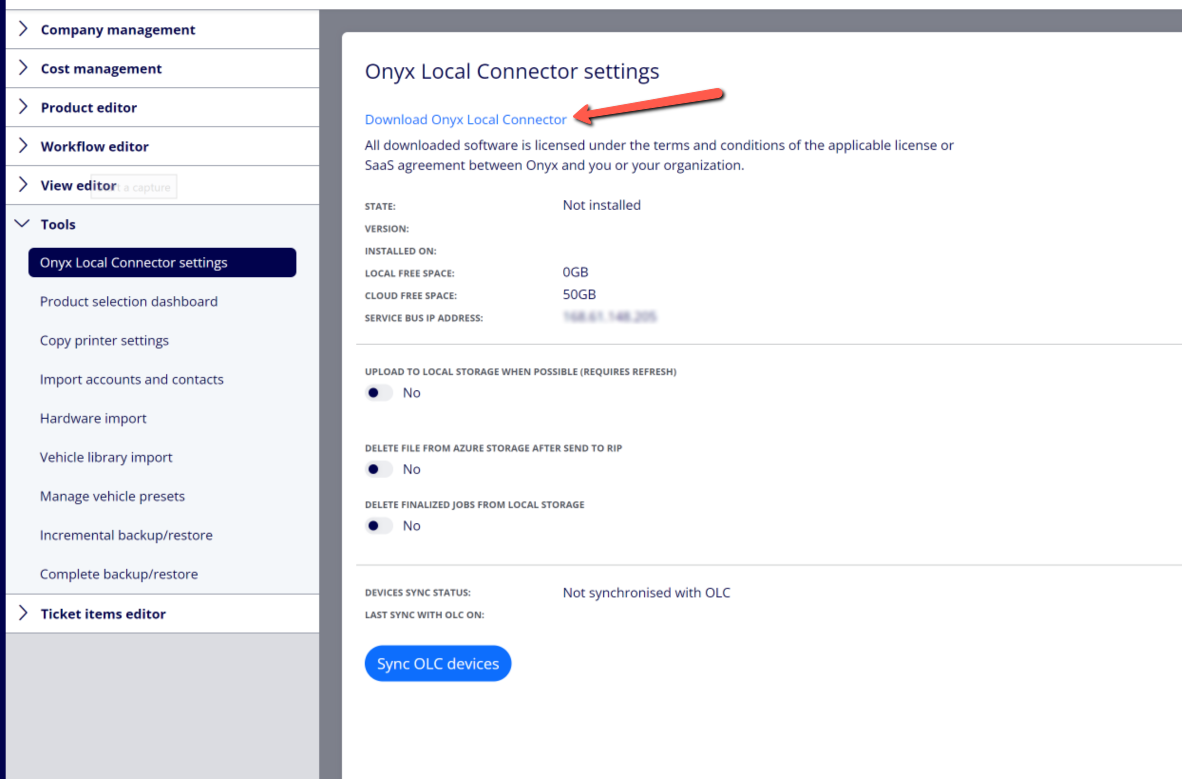
(3) Select the ONYX Local Connector (OLC) settings
(4) Click "Download Onyx Local Connector"
(5) Extract the files from the downloaded OLC.zip file
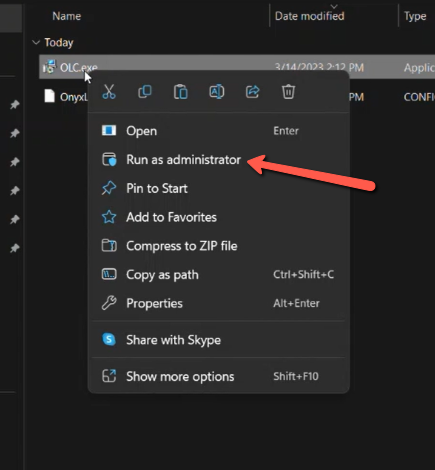
(6) Open the extracted OLC folder
(7) Right click on the OLC.exe file and click "Run as administrator"
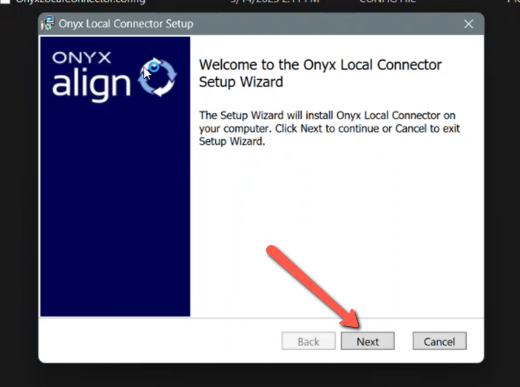
(9) Click "Next" within the welcome window of the setup wizard
(10) Click "Next" on the remaining windows, making any necessary adjustments
-Unless you are going through an advanced setup, we recommend sticking with the defaults provided within each window.
(11) Click "Install" on the final window of the setup wizard
Attachments:
 image-20240801-141424.png (image/png)
 image-20240801-141127.png (image/png)
 image-2022-11-29_14-48-3.png (image/png)
 image-2022-11-29_14-48-3-1.png (image/png)
 image-2022-11-29_14-48-3-2.png (image/png)
 image-2022-11-29_14-48-3-3.png (image/png)
 image-2022-11-29_14-48-3-4.png (image/png)
 image-2022-11-29_14-48-3-5.png (image/png)
 image-2022-11-29_14-50-3.png (image/png)
 image-2022-11-29_14-51-12.png (image/png)
 image-2022-11-29_14-51-30.png (image/png)
 image-2022-11-29_14-51-52.png (image/png)
 image-2022-11-29_14-52-45.png (image/png)
 image-2022-11-29_15-1-12.png (image/png)
 image-2022-11-29_15-1-39.png (image/png)
 image-2022-11-29_15-6-36.png (image/png)
 image-2022-11-30_7-56-32.png (image/png)
 image-2022-11-30_7-57-8.png (image/png)
 image-2023-1-24_14-50-7.png (image/png)
 image-2023-3-7_10-54-1.png (image/png)
 image-2023-3-7_10-54-27.png (image/png)
 image-2023-3-7_10-55-36.png (image/png)
 image-2023-3-7_12-56-40.png (image/png)
 image-2023-3-22_10-16-53.png (image/png)
 image-2023-3-22_10-20-56.png (image/png)
 image-2023-3-22_10-23-48.png (image/png)
 image-2023-3-22_10-27-47.png (image/png)
 image-2023-3-22_10-29-40.png (image/png)
 image-2023-3-22_10-32-32.png (image/png)
 image-2023-3-22_10-39-13.png (image/png)
 image-2023-3-22_10-44-8.png (image/png)