How to Edit the Name of Default Product Parts (Print Jobs and Non-Print Jobs) Assigned to Products

Edit the Name of default Product Parts (Print Jobs and Non-Print Jobs) assigned to Products in order to assign a custom default Job Name for jobs assigned to specific Products.
Table of Contents
- (1) Navigate to Configuration > Product Editor > Products
- (2) Select the Product you wish to edit
- (3) Select the Assign Jobs tab within the Product settings
- (4) Select the more options icon for the Product Part you wish to edit
- (5) Select “Edit”
- (6) Enter the Name for the Product Part
- (7) Select the confirm button
- (8) Select “Save”
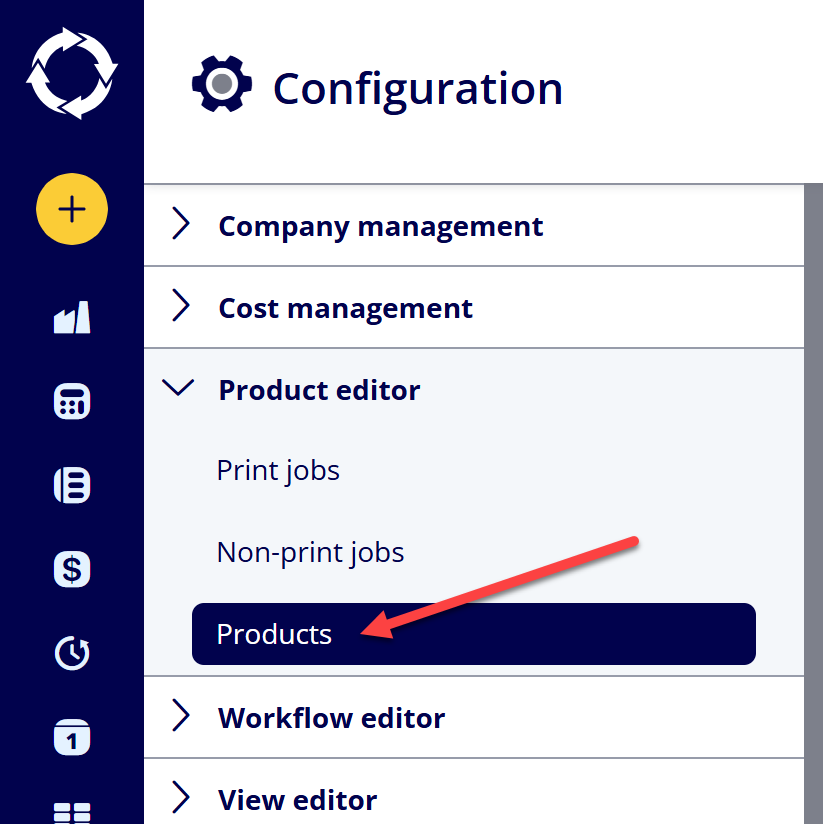
(1) Navigate to Configuration > Product Editor > Products
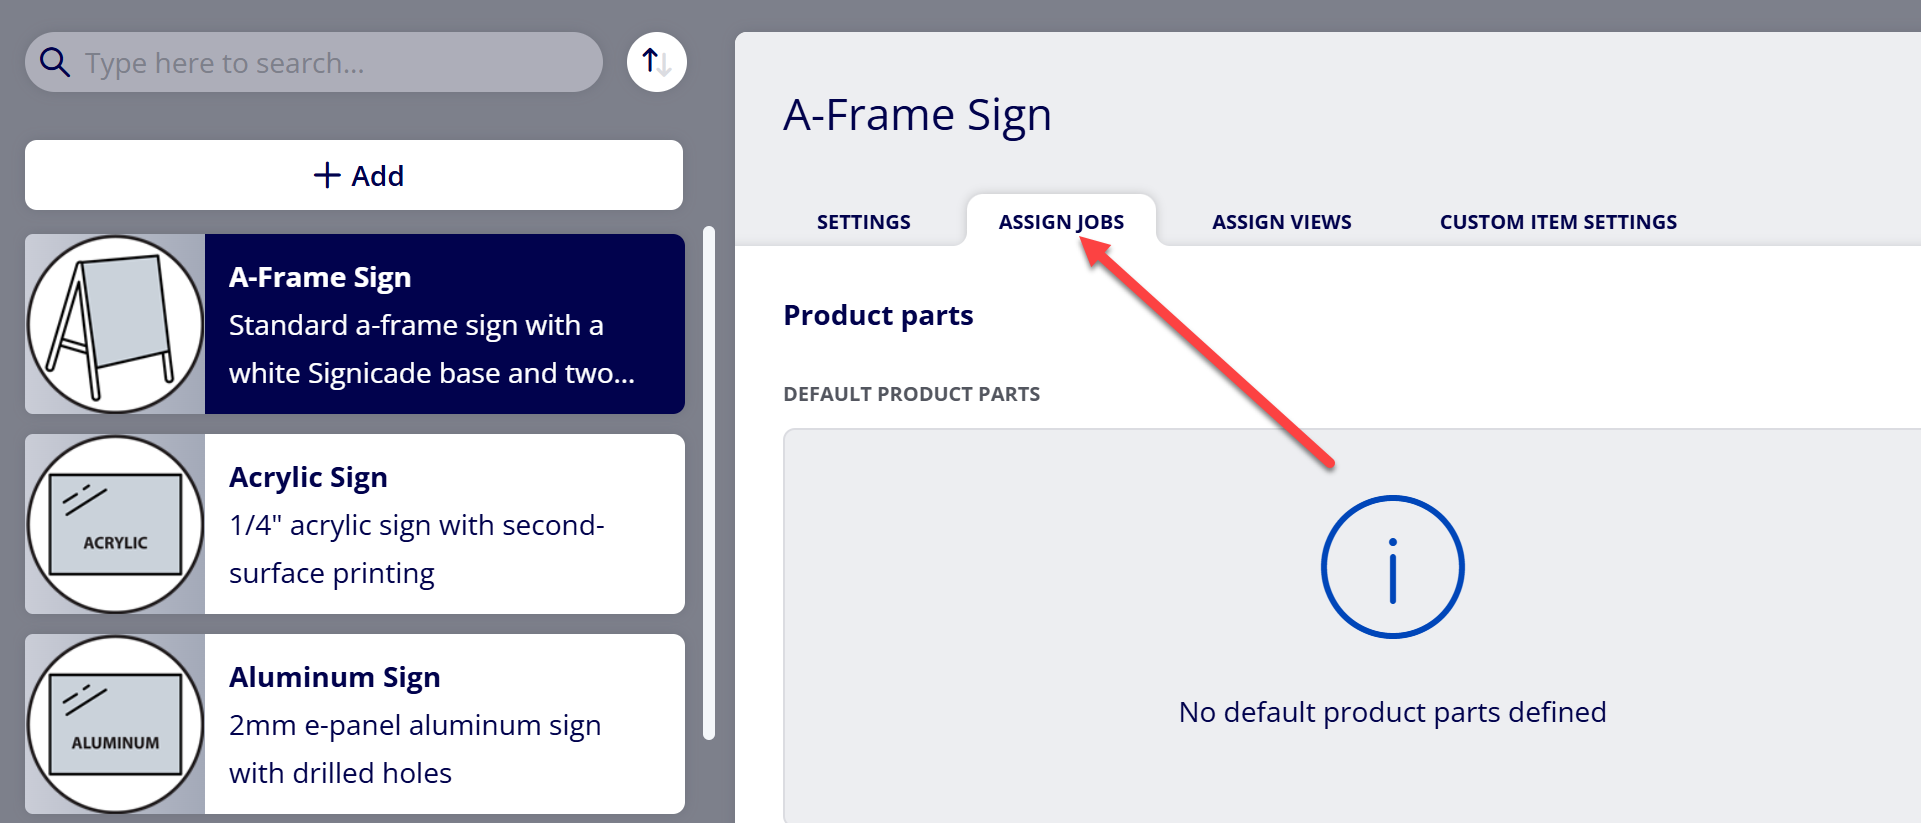
(2) Select the Product you wish to edit
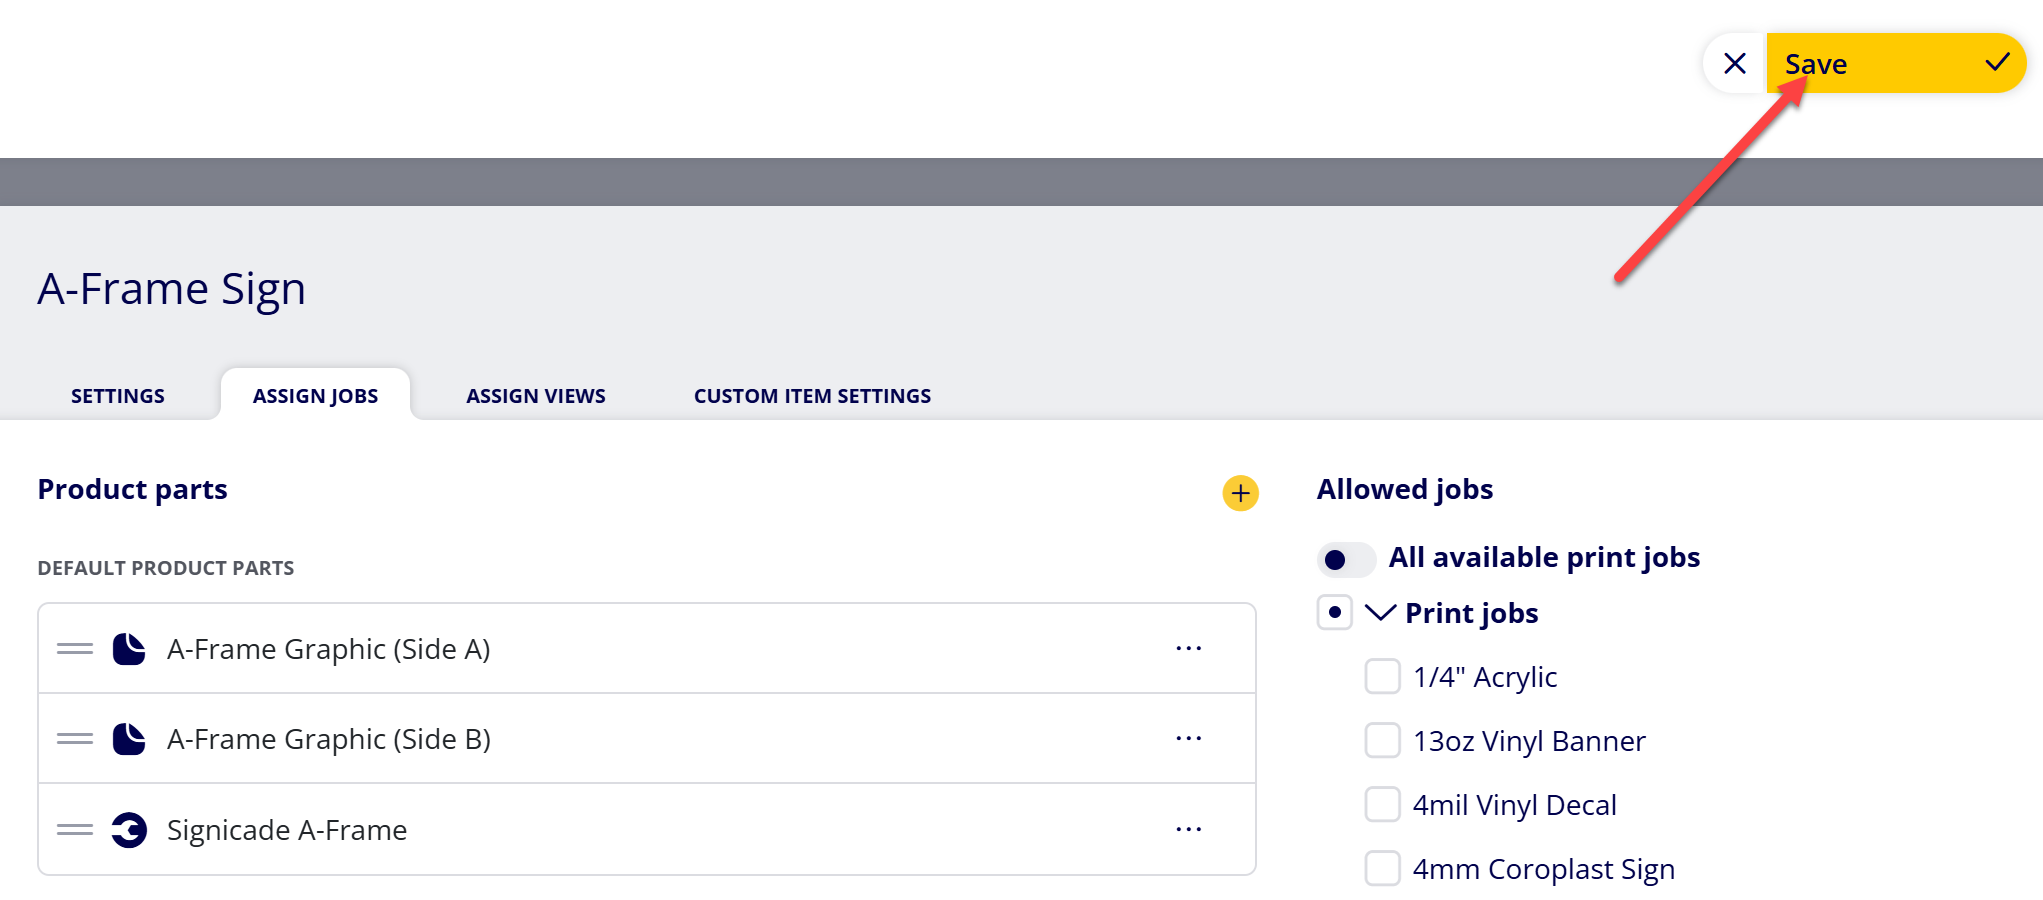
(3) Select the Assign Jobs tab within the Product settings
(4) Select the more options icon for the Product Part you wish to edit
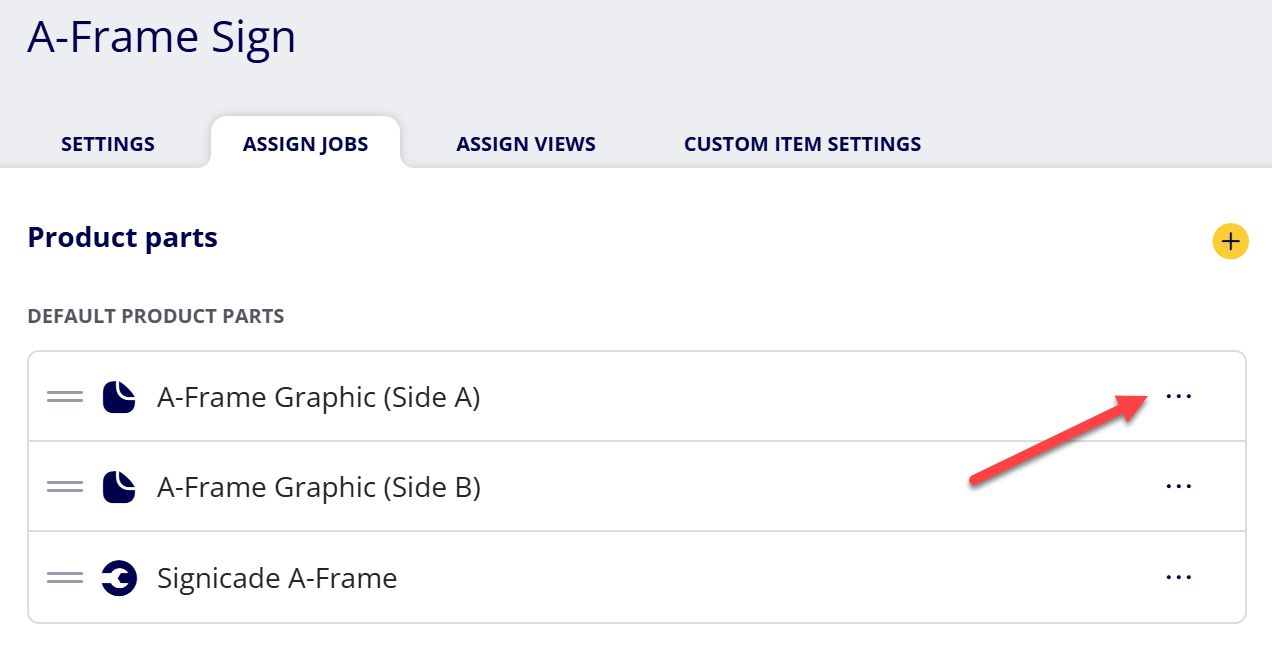
(5) Select “Edit”
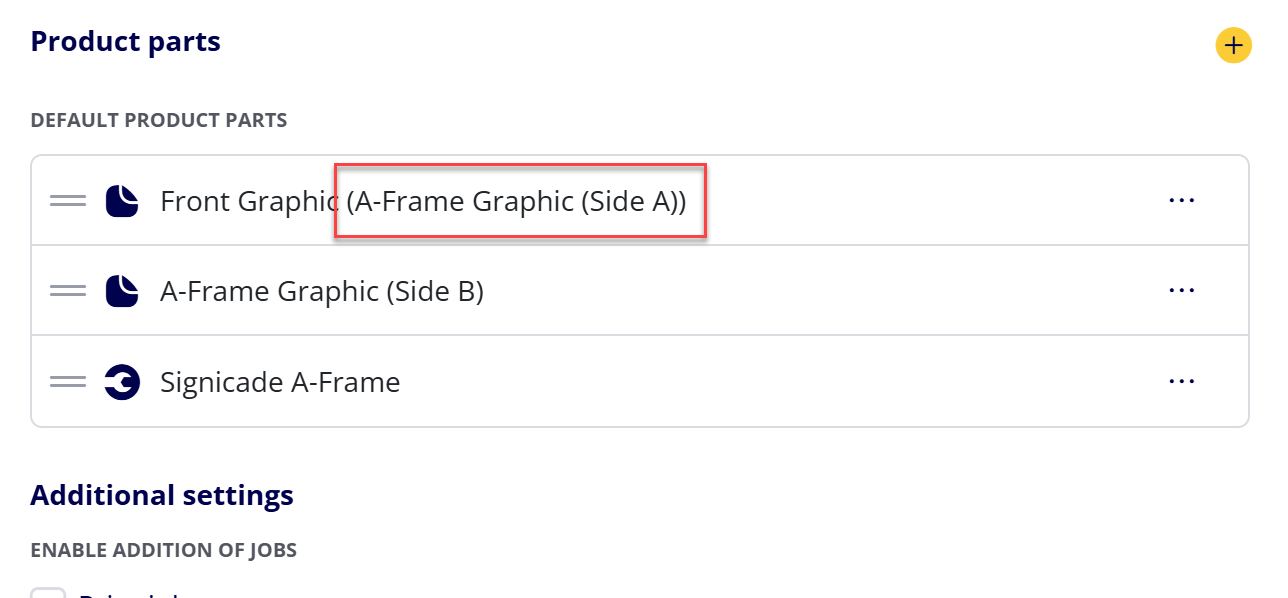
(6) Enter the Name for the Product Part
Note: This will not change the official Job Name for the Print Job/Non-Print Job. It only controls the default Job Name of the Print Job/Non-Print Job when the parent Product is added to an Estimate/Order.
(7) Select the confirm button
Note: The original Print Job/Non-Print Job name will be displayed in parentheses following the new custom name. This is only displayed in the Product settings, not when the actual Product is added to an Estimate/Order.
(8) Select “Save”
Attachments:
 image-20250113-154120.png (image/png)
 image-20250113-153545.png (image/png)
 image-20241031-143935.png (image/png)
 image-20240627-184013.png (image/png)
 image-20240627-183948.png (image/png)
 image-20240627-183926.png (image/png)
 image-20240627-183857.png (image/png)
 image-20240627-183829.png (image/png)
 image-20240117-210948.png (image/png)
 2019 ONYX align PANTONE.png (image/png)
 image-20250113-150523.png (image/png)
 image-20250113-150630.png (image/png)
 image-20250113-150827.png (image/png)
 image-20250113-151544.png (image/png)
 image-20250113-151651.png (image/png)
 image-20250113-151754.png (image/png)
 image-20250113-152242.png (image/png)
 image-20250113-152859.png (image/png)
 image-20250113-153039.png (image/png)