Getting Started with Layout
The Layout Tool in ONYX software provides an intuitive, visual interface designed specifically for large format print workflows. It allows users to organize, position, and prepare multiple images for output on wide media such as roll-fed or flatbed substrates.
User Interface Essentials
Main Menu Overview
The Main Menu at the top of the Layout Tool provides quick access to essential functions for managing your print layout. These tools streamline your workflow and help you efficiently prepare and organize images for output.
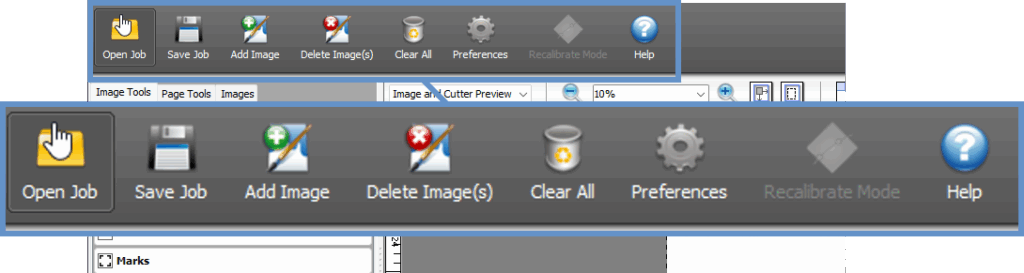
Here’s a breakdown of each menu option:
•Open Job
Use this option to open previously saved layouts. This is helpful for resuming work on in-progress jobs or reusing common layout templates.
•Save Job
Saves the current image layout.
Use this feature often to preserve your work and avoid losing any adjustments you’ve made.
•Add Image
Allows you to import and place new images into the layout workspace.
You can add multiple images to the same job for printing or cutting.
•Delete Image
Removes the selected image from the layout.
This does not delete the image file from your computer — only from the current layout session.
•Clear All
Clears all images from the layout in a single step.
Useful when you want to start fresh or reset the layout without closing the job.
•Preferences
Opens the Layout Tool Settings, where you can customize how the tool behaves.
Options may include units of measurement, interface behavior, and default layout properties.
•Recalibrate Mode
Initiates a media recalibration process to update or refine media profiles.
This ensures accurate alignment and print quality based on your current media conditions.
•Help
Opens the Thrive Help Center, giving you access to tutorials, troubleshooting guides, and documentation.
Left-Side Panel Overview
On the left side of the Layout Tool, you’ll find three primary tabs that help you manage and customize different aspects of your layout. These tabs are designed to give you quick access to the most commonly used controls while working with your image and print job.
Image Tools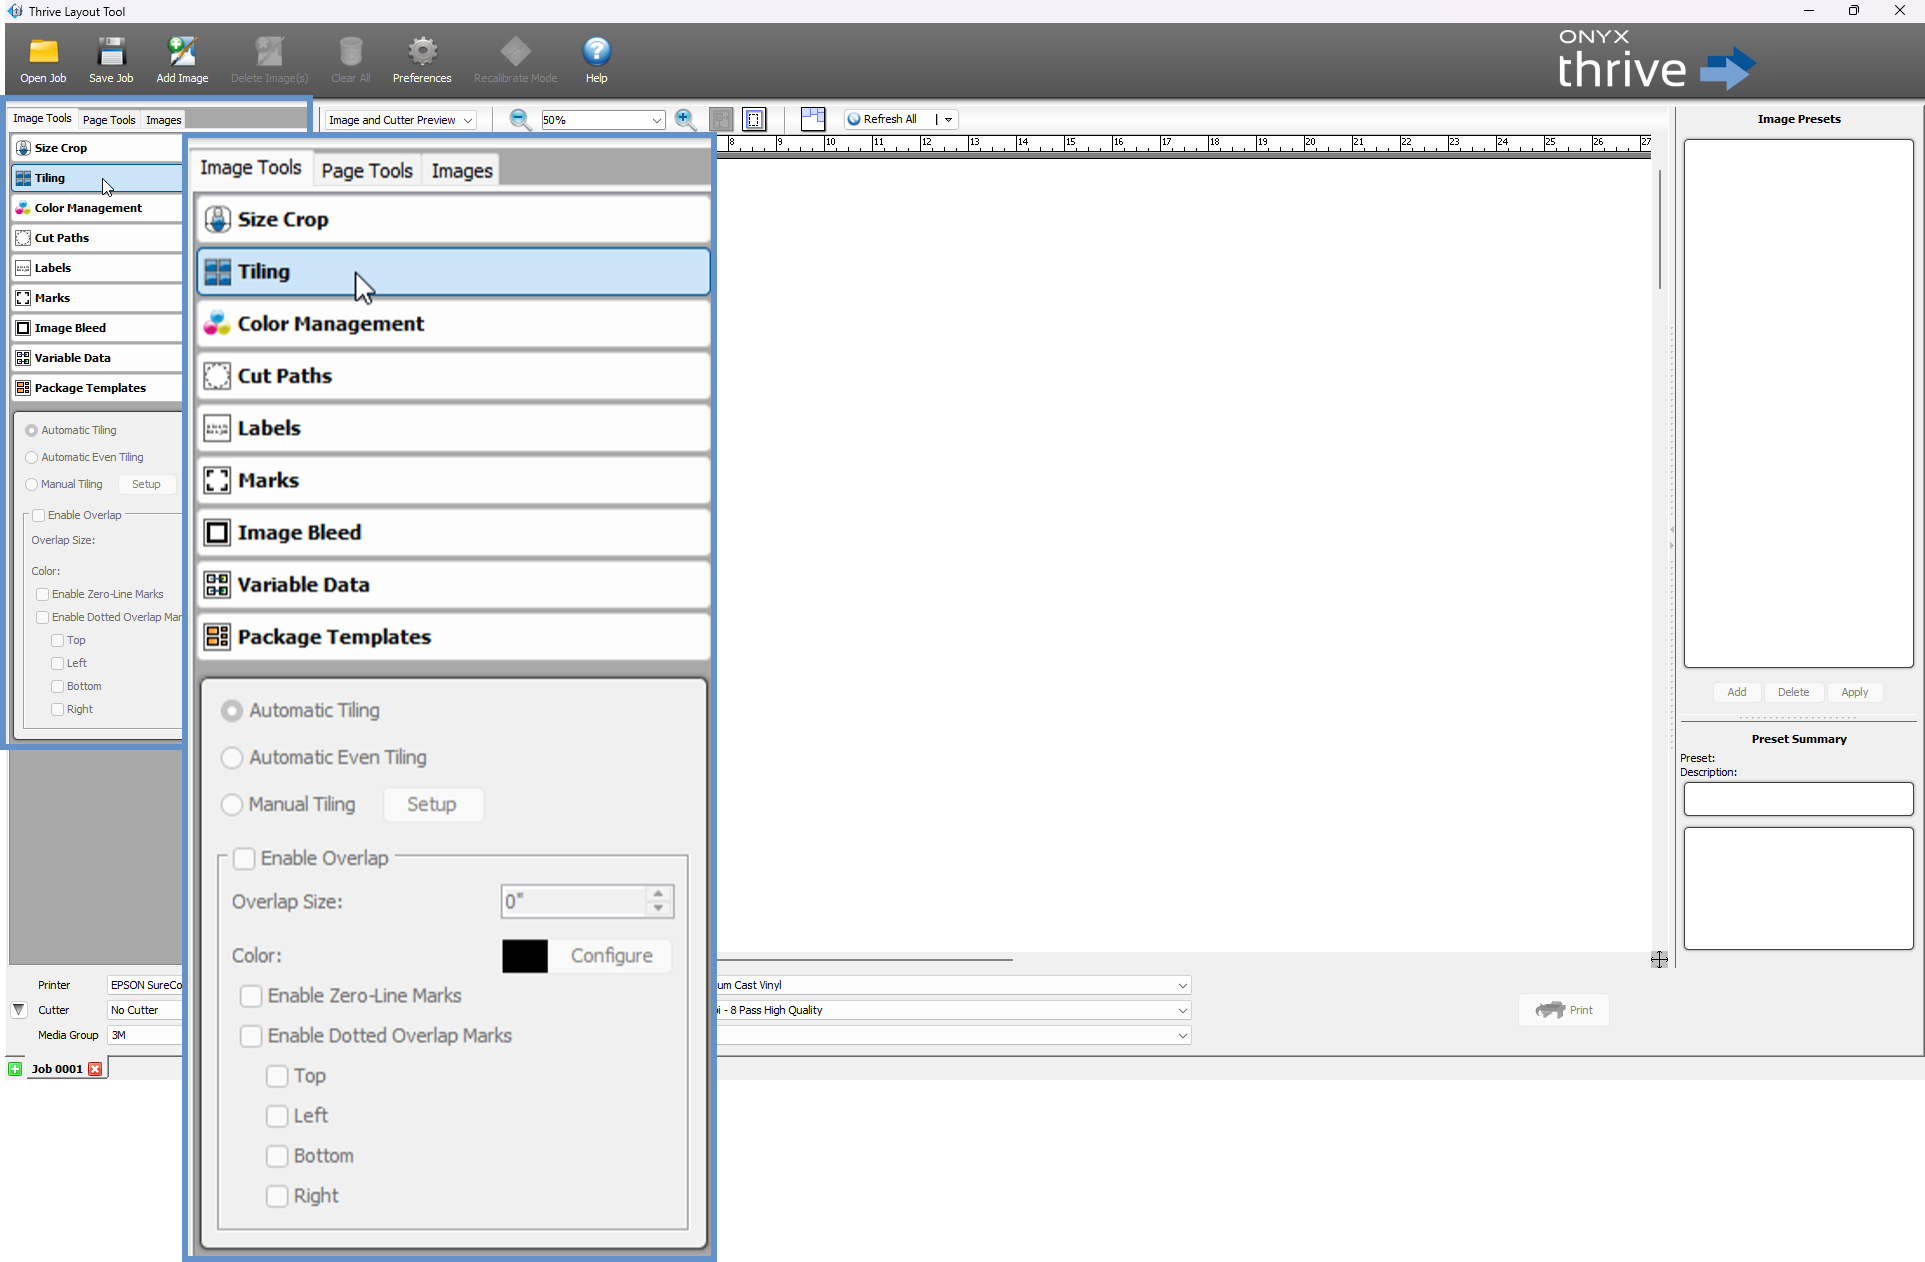
This tab provides access to all settings related to individual images in your layout.
Here, you can:
-
Crop, resize, or tile images
-
Adjust color settings and apply ICC profiles
-
Add cut paths, marks, bleeds, and labels
-
Enable variable data for dynamic image generation
These tools give you full control over how each image is prepared for output.
Page Tools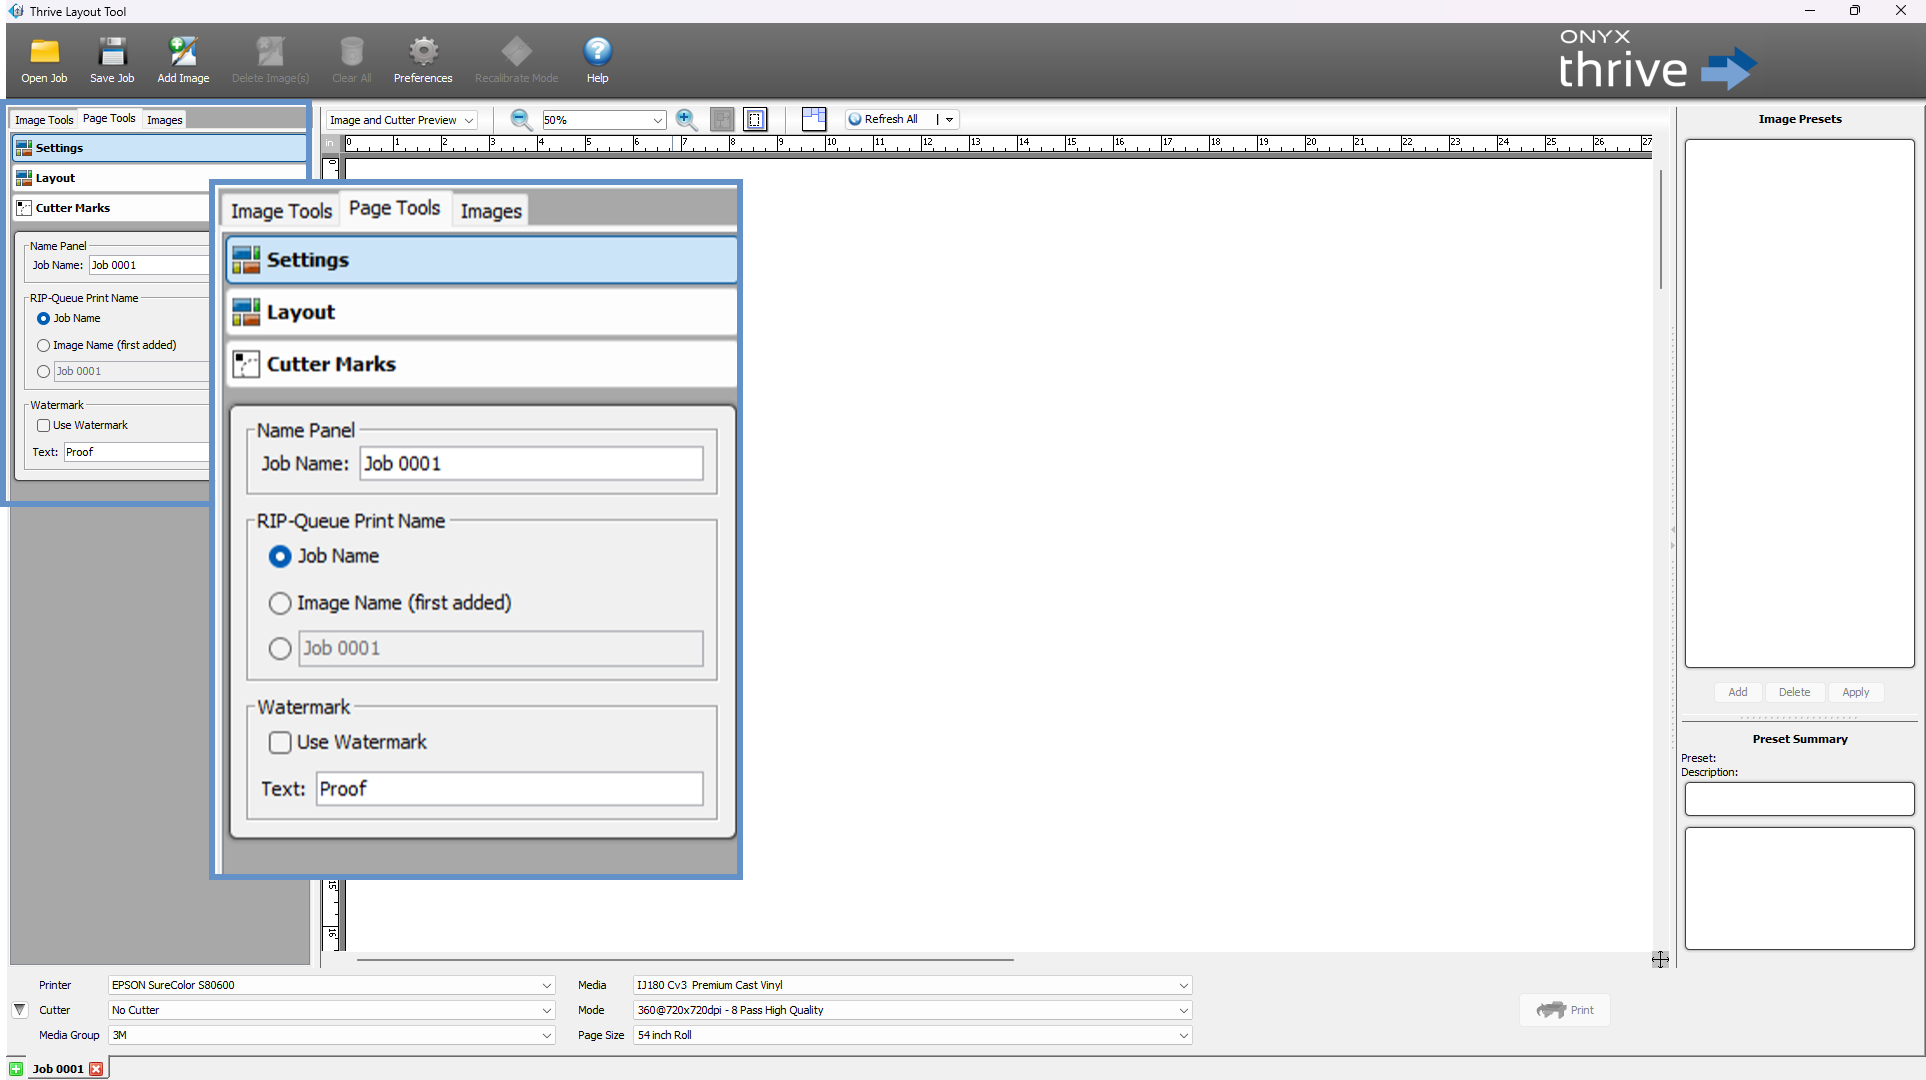
The Page Tools tab allows you to define overall job-level settings.
In this section, you can:
-
Name your job for easier tracking and retrieval
-
Add a watermark to your output for branding, proofing, or copyright purposes
Page Tools focus on the layout as a whole, rather than on individual image elements.
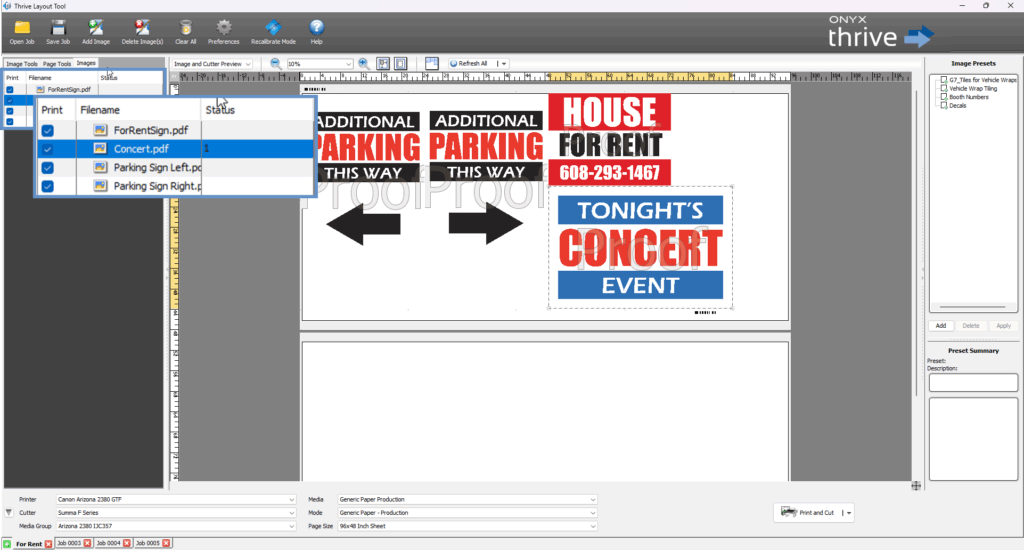
Images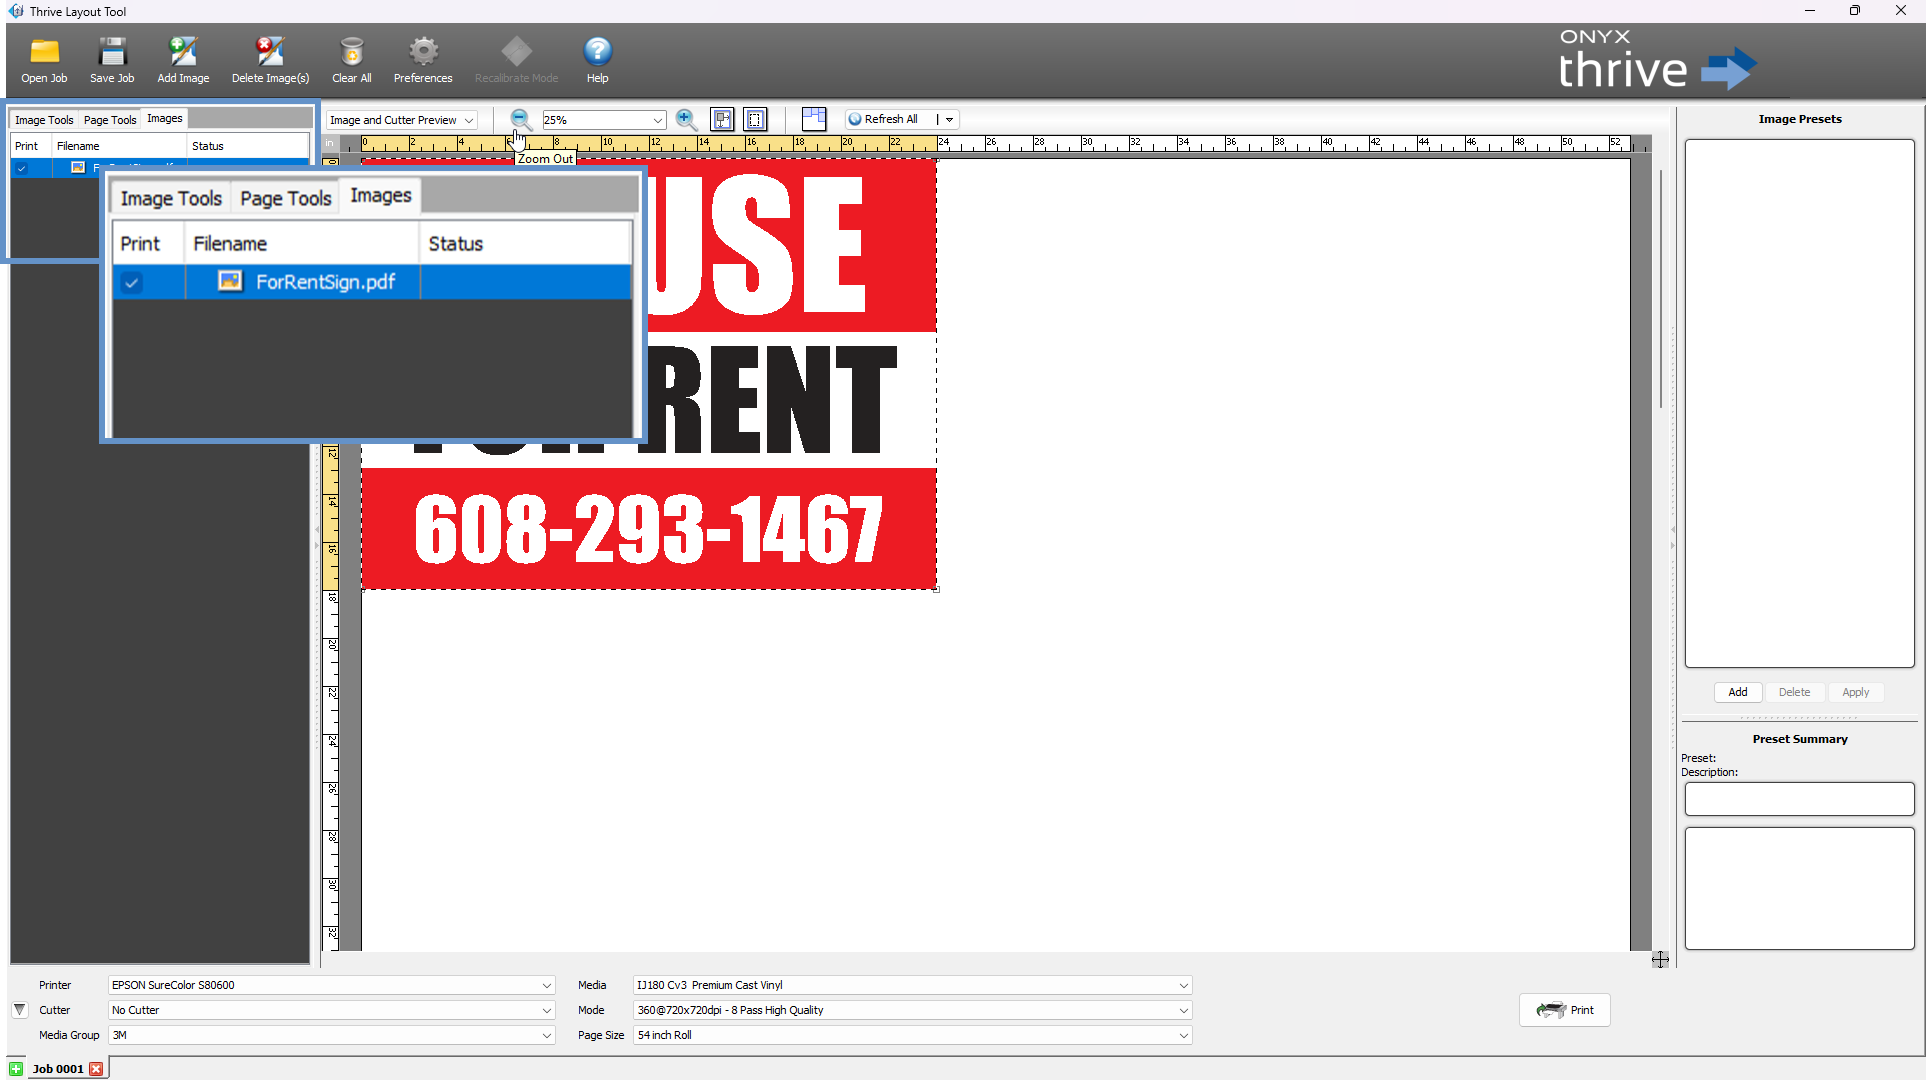
The Images tab displays a list of all images currently loaded into your layout session.
From here, you can:
-
Select images to edit or reposition
-
Confirm which images are active in the layout
Right-Side Panel Overview
Image Presets for Consistent Output
On the right side of the Layout Tool, you’ll find the Image Presets panel — a powerful feature that allows you to save and apply predefined image settings for consistent, repeatable results across multiple jobs.
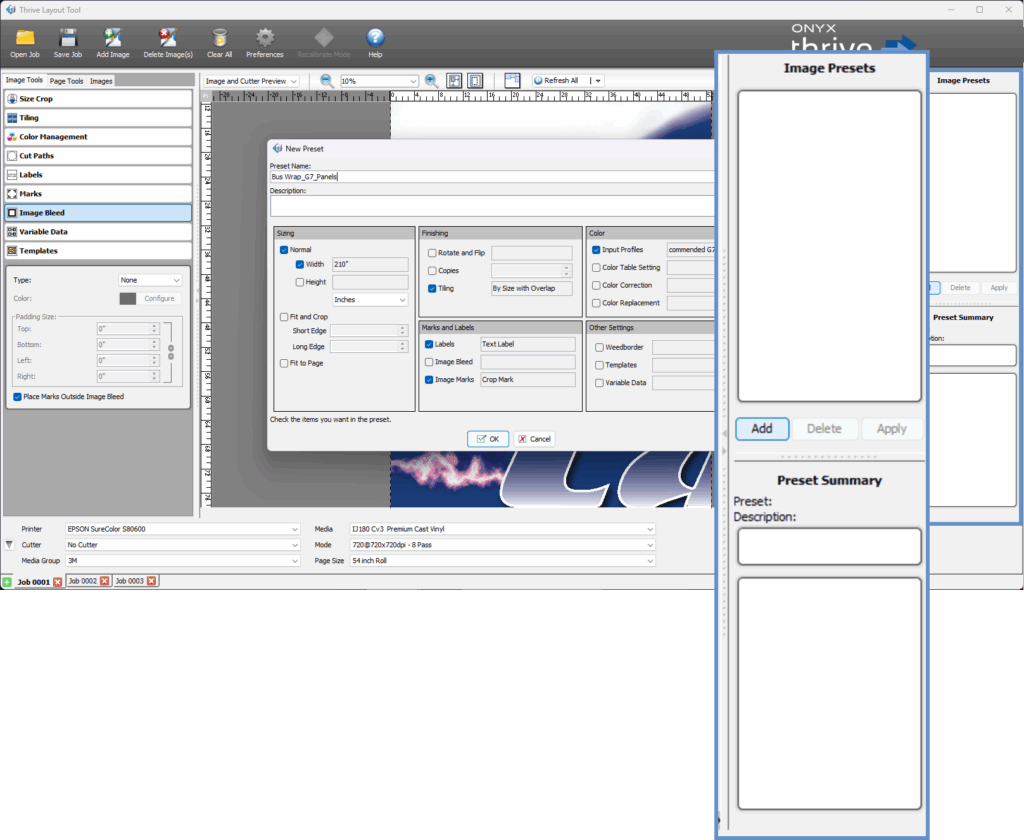
What Are Image Presets?
Image presets are collections of saved settings that control how an image is processed and printed. These can include parameters such as:
-
Size and crop settings
-
Cut paths and bleed options
-
Color management profiles
-
Labels, marks, and more
Once created, presets allow you to apply the same configuration to new images without needing to manually repeat every adjustment.
How to Create an Image Preset:
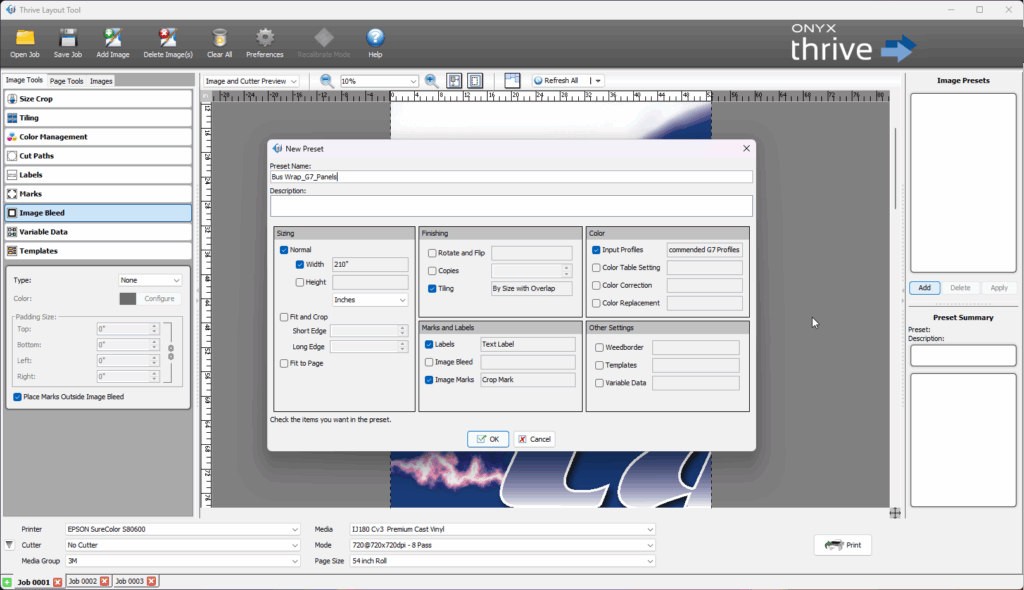
-
Add an image to your layout.
-
Use the Image Tools on the left panel to configure all desired parameters (e.g., tiling, color correction, marks).
-
Once the image is set up as needed, save these settings as a preset.
-
The preset will then appear in the Image Presets panel on the right for future use.
Why Use Image Presets?
-
Ensure consistency across multiple jobs and operators
-
Save time by avoiding repetitive setup steps
-
Reduce errors by standardizing image handling
Printer, Cutter, and Media Settings
The Printer, Cutter, and Media Settings section—found at the bottom of the Layout Tool’s main window—is where you select key output configurations before printing or cutting your job. This section helps ensure your settings align with your production environment.
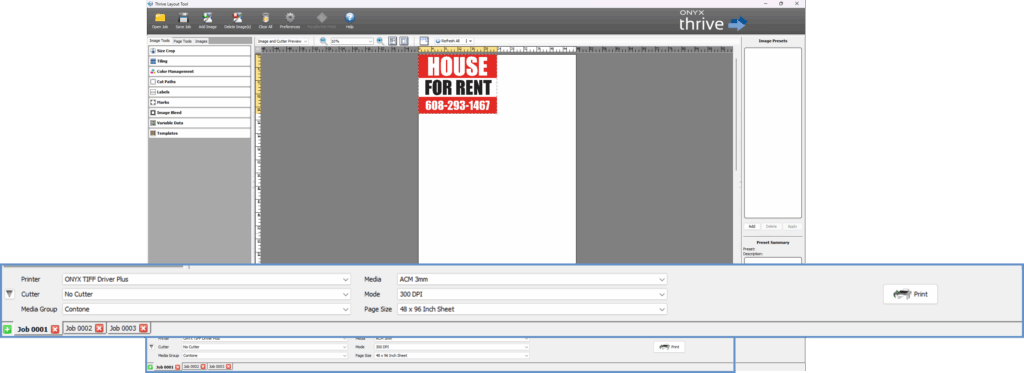
Printer
Select the printer you’d like to use from the list of installed devices. Click the drop-down arrow to choose. This selection determines what media groups and profiles will be available.
Cutter
Choose the cutter associated with your workflow. Note: You must first add your cutter in Preferences > Cutters before it will appear in this list.
Media Group
The Media Group is tied to your selected printer. Choose the appropriate group from the drop-down menu based on your workflow or media type.
Media
Select the specific media loaded on your printer. Media availability depends on your selected printer and media group.
Mode
Mode controls your resolution and color management settings. Choose the mode that best suits your output quality needs.
Page Size
Choose the page size that matches the physical media currently loaded in your printer. Incorrect page size selections may cause layout or output errors.
Print Button
Use the Print button to start output. Click the arrow on the button to choose between:
-
Print
-
Cut
-
Print and Cut
Once your job is ready, click [Print] to send it to production.
Jobs
Jobs are independent layouts which can be named, saved, and reopened for repeatability. Each job will have its own settings and file handling.