Automate Layouts with Predefined Image Arrangements
The Templates feature in the Image Tools panel allows you to automatically arrange and multiply images based on predefined layout templates. This is ideal for large-format printing environments where repeated image patterns, efficient material usage, and consistency are crucial — such as for posters, signage, decals, or product labels.
How to Use Templates

To begin:
-
Select an image in your layout.
-
Choose a template from the Package Template drop-down menu.
-
A live preview of the selected layout will appear.
-
To create, modify, or manage templates, click the Template Manager.
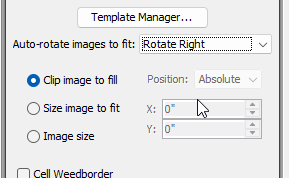
Image Fitting Options
When placing images into template cells, you can choose from the following behaviors:
-
Auto-Rotate Images to Fit
Automatically rotates images to best fit within the cell, improving layout efficiency and conserving media. -
Clip Image to Fit
Maintains the image at the exact cell dimensions, cropping where necessary. This option closely follows the template layout but may trim image content. -
Size Image to Fit
Scales the image proportionally to fit inside the cell without cropping. May result in some white space around the image if aspect ratios differ.
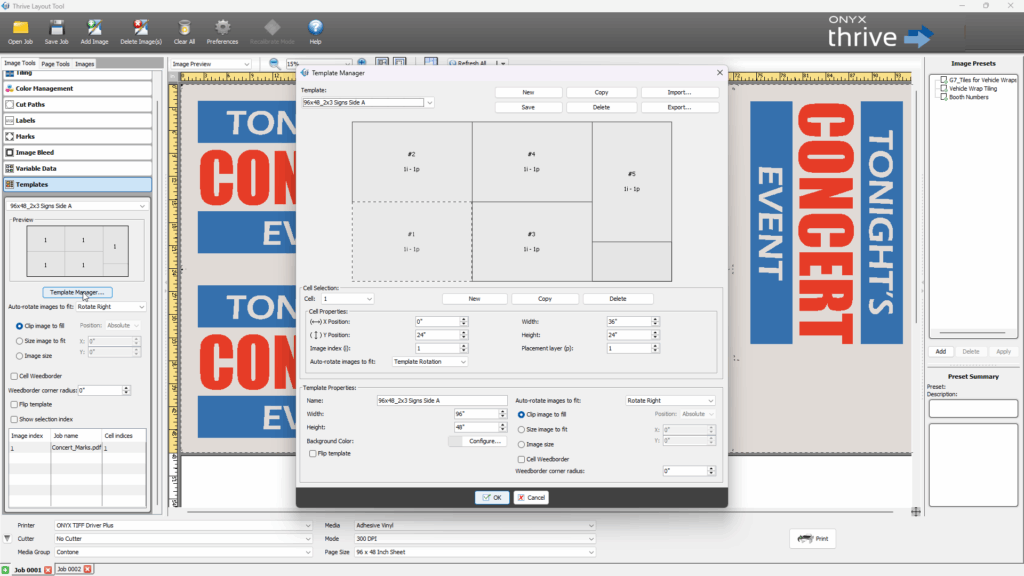
Template Manager Overview
The Template Manager lets you create, edit, import, and export templates. Templates define the layout structure (number, size, and position of cells) used to arrange images.
Template Creation and Saving

-
New – Create a new blank template (default name: “Default”).
-
Save – Save edits to the currently selected template.
-
Copy – Duplicate an existing template.
-
Delete – Remove the selected template.
-
Import / Export – Use .xml files to load or share templates.
Template Properties
-
Template Properties – Set the template dimensions, name, background color, and default image fitting behavior.
-
Template Width and Height are related to the dimensions of the media you have selected
-
Flip Template makes double sided printing easy by flipping the cell positions.
-
Template defaults can set rotation for the cells including left, right and do not allow rotation
-
Default sizing parameters are clip, scale to fit, or a specific image size.
-
Cells can have a weedboarder for cutting and can include a corner radius.
-
Cell Selection
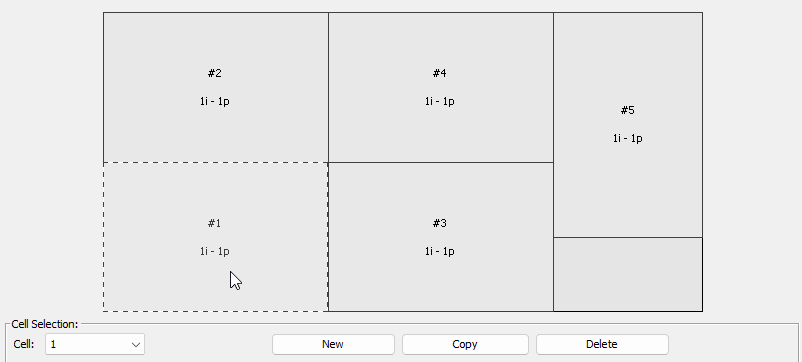
-
Cell Selection – Select, add, copy, or delete individual cells.
-
Select a cell by selecting the desired cell from the drop down
-
Cell Properties

-
Cell Properties
-
Set the width, height, and X/Y position for each cell.
-
Set the Image Index number to the appropriate image you would like to be placed.
-
Adjust the Placement Layer for overlapping images. (Placing a Logo on top of another Image)
-
Layering Cells with Indexes and Placement Layer

-
Overlay Cells
-
Select the cell using the drop down window
-
Since this cell represents a logo, the image index correlates to the appriate image selected when imported
-
The placement layer ensures the logo prints over the image index with a placement layer of 1
-
Image Indexing in Templates
When using multi-image templates in the Layout Tool, each image is assigned an index number. This index determines which image is placed into which template cell — a key feature for managing multiple images across a complex layout.
Image Index 1 – The First Selected Image
The first image you select from your group of images is automatically assigned Image Index 1. This image will populate the first indexed cell in your selected template.
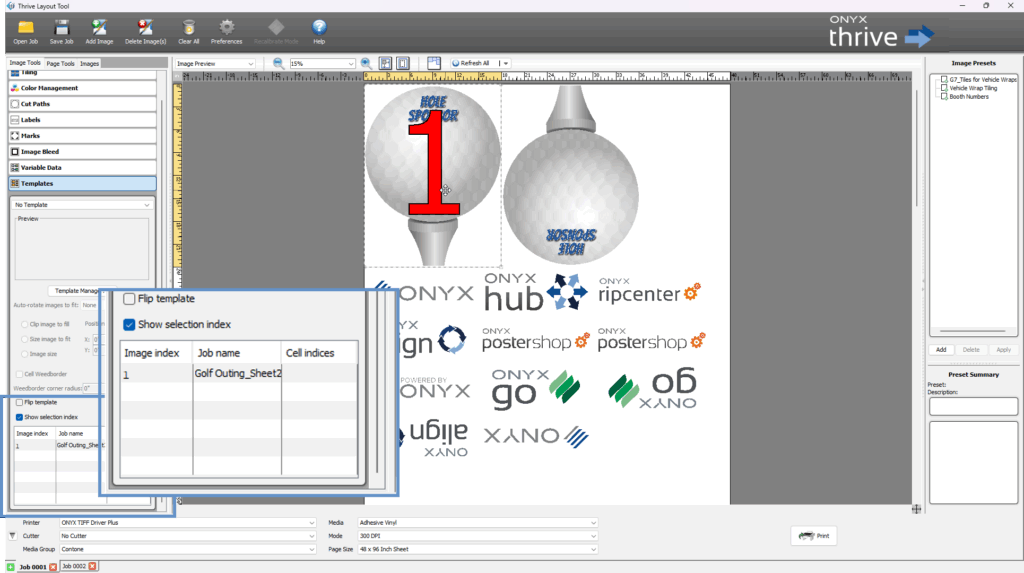
Viewing Image Index Numbers
Hold the Control key and select the images in the order in which you would like them to be indexed
To display the image index assignments:
-
Check the box labeled “Show Selection Index” (located above the image index list).
-
The index numbers will appear over each image, making it easy to confirm which image corresponds to each cell in the template.
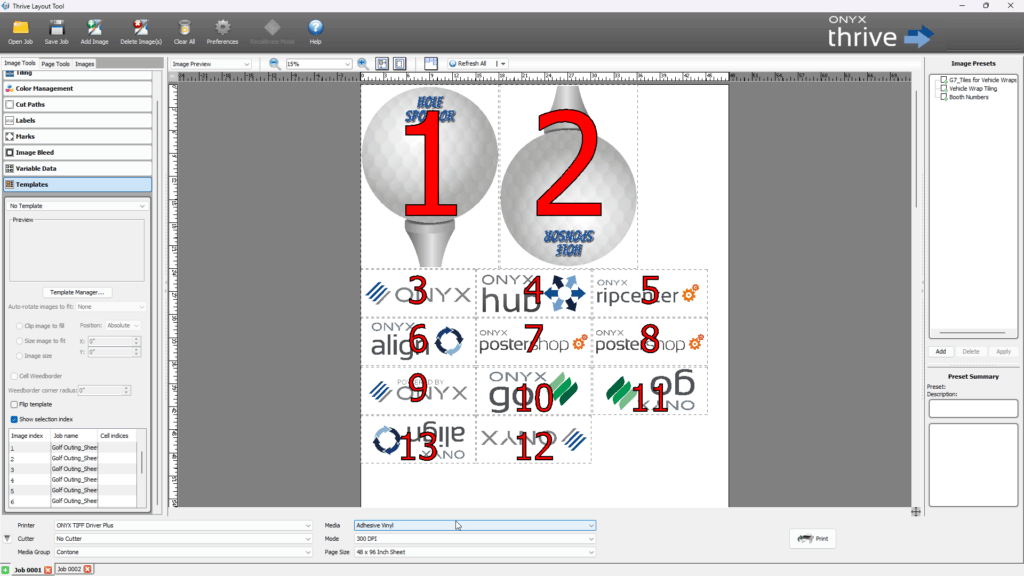
This feature helps ensure that the correct image is mapped to the correct location in your layout — particularly when using templates with variable image content.
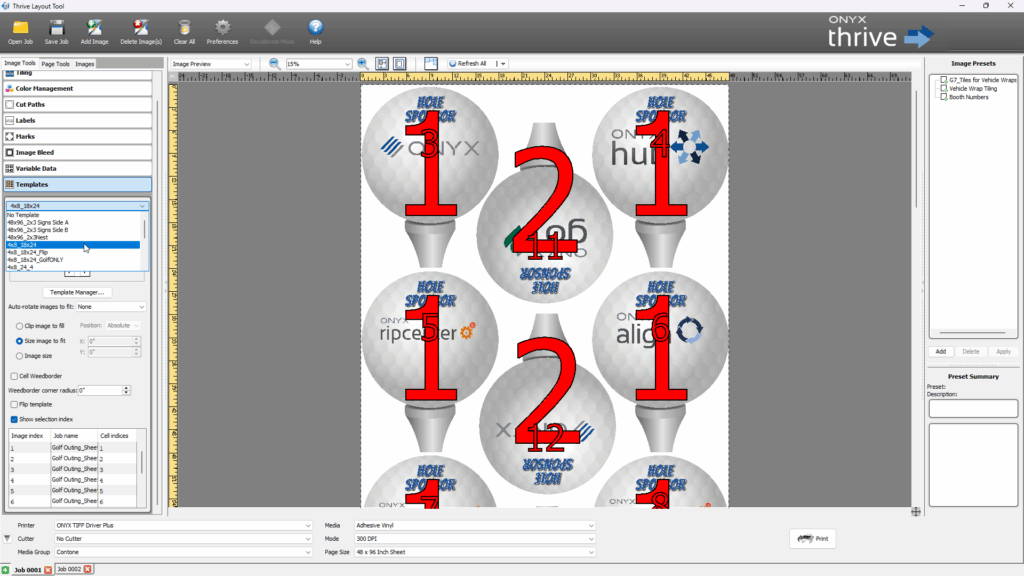
Apply your template by selecting it from the drop down window.
Hotfolders
Hot folders can be used to import images and automatically process based on the Template folder they are put into. This is particularly useful when there are a large number of files that are being imported.
Input folders are located in the ONYX directory under Input>Layout Tool. Many times the ONYX directory is located on the root of C:\.
C:\ONYXThrive{version}25\Input\LayoutTool