| Tiling | |
|---|---|
|
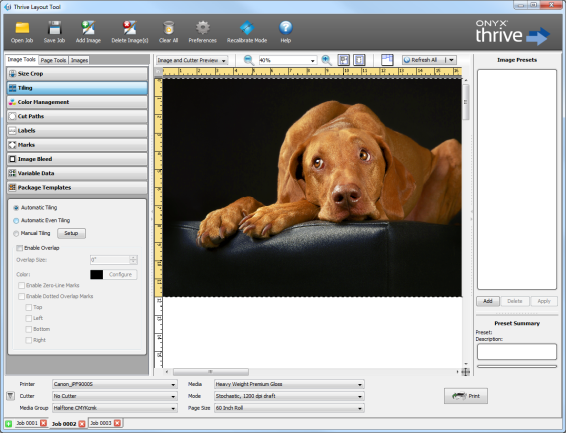
The Tiling option in the Image Tools allows you to break your image into multiple pieces. This lets you increase the size of your image beyond your media size. Each Tile is processed and printed individually. If you need to reprocess and reprint a single tile, you can do so without needing to reprocess and reprint the entire image. To open the [Tiling] options, click Image Tools > Tiling. You can choose from the following options when using [Tiles]:
[Automatic Tiling] will automatically create tiles automatically if your image is larger than your media. [Automatic Tiling] is the default setting for Tiles.
[Automatic Even Tiling] will automatically create tiles that are of equal size if your image is larger than your media.
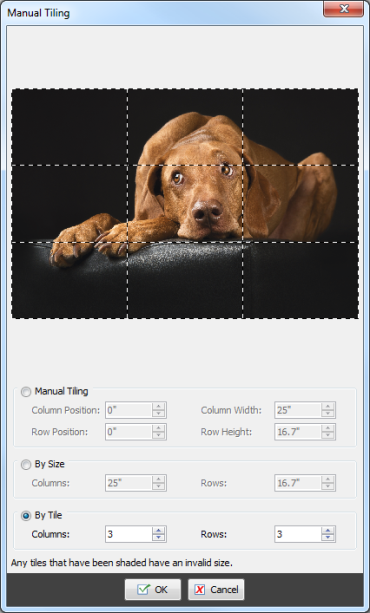
[Manual Tiling] allows you to create your own tiles for an image. To use [Manual Tiling], select Tiling from Image Tools, check [Manual Tiling], and then click [Setup] button. This opens the "Manual Tiling" dialog (Figure 2). [Manual Tiling] allows you to select from the following options:
TIP: You can learn more about the manual tiling tool by watching the Manual Tiling video tutorial
[Overlap] assists you when piecing tiles together by placing marks and other aids on your media. To use Tile Overlap, check the [Enable Overlap] option. [Overlap Size] determines how much of the inside edge of your image will be repeated on sequential tiles. This allows you to join two tiles more precisely by giving you repeated portions of your image to match. [Enable Zero-Line Marks] places cross hairs on your image showing exactly where you need to place each tile to get a perfect match. [Enable Dotted Overlap Marks] show the boundaries of the tiles and help you place each tile. You can determine the sides of your tiles that will get Dotted Overlap Marks by selecting the appropriate option.
|
Figure 1
Figure 2 |