| Print Advanced Grayscale Swatch | |
|---|---|
|
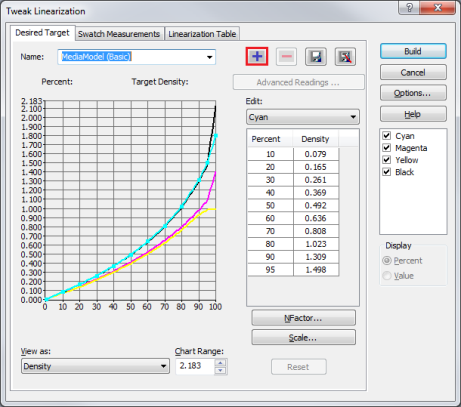
After printing a swatch, click [Advanced…] button. This opens “Tweak Linearization” dialog (Figure 1). In this dialog, click
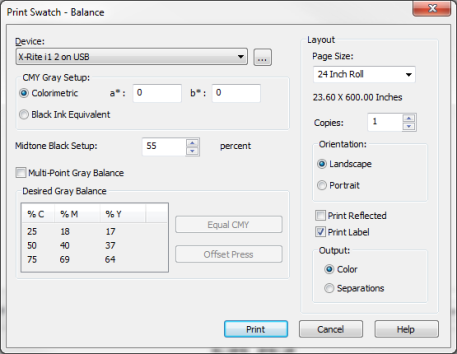
Use the Measurement Device pull-down menu to select, or add the device that you will use to read in the swatch. Click the [...] button to configure the device.
Use this option to set the black ink midpoint. Values range from 1-100%.
Enable [Multi-Point Gray Balance] to set multiple points in your balance. Click on the numbers in the [M] and [Y] columns to edit the values. [C ] is your set primary value and cannot be edited. You can also adjust values in the chart by using the following presets:
Output : Choose the type of output you want printed
Click [Print ] to print the swatch, or [Cancel] to close this dialog without printing.
|
Figure 1
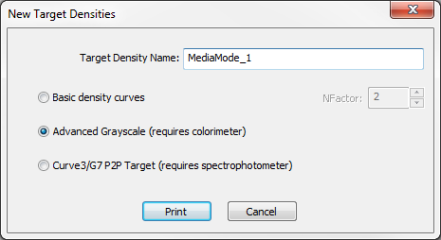
Figure 2
Figure 3
|
 button and check [Advanced Grayscale (requires colorimeter)] when “New Target Densities” dialog opened (Figure 2). Then Click [Print]. This opens “Print Swatch-Balance” dialog (Figure 3).