|
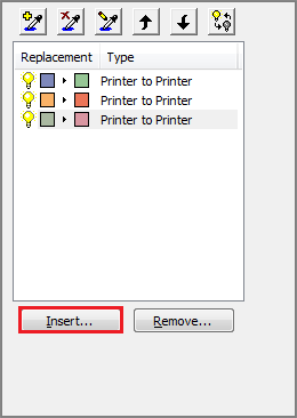
The Color Replacements tool allows you to change the colors in a job by replacing one color for another.
You can access this tool by clicking [Tools] button in the Color Correction Tab and then selecting [Color Replacements] from a drop-down menu.
 Creating a Color Replacement Creating a Color Replacement
To create a color replacement:
- In the Color Replacements tool, click [Insert] button or the Insert icon (first icon).
This opens the "Color Replacements" dialog (Figure 2).
- Click the [Sample] button under [Current Color], and select a color from your image. You can also type in a color value or drag the "o" mark to a specific color from a color bar on the right side.
- Click the [Sample] button under [Desired Color], and select a color from your image. You can also type in a color value or drag the "o" mark to a specific color from a color bar on the right side.
This replaces the Current Color with your Desired Color.
- Close the dialog.
Your color replacement is automatically saved.
- Continue creating Color Replacements as needed.
NOTE: If you cannot find your desired color, you can use Swatch Books.
Color Replacement Modes
Color Replacement Modes
determine how the colors are mapped. You can set your mode by clicking [Insert] button and then modifying the options under [Type].
- Printer to Printer - This color conversion substitutes one specific printer ink color for another specific printer ink color. Ranges are not supported, nor are changes in brightness.
If the Media configuration has a spot value, you can replace a printer ink color with the color in the spot ink channel fountain of your printer by specifying S (or “Spot”) as the replacement color. You can also blend the spot color with other inks to create a different color.
The [Map Saturation] and [Map Brightness] controls are disabled for this type of replacement.
- HSV to HSV
- This color conversion allows you to specify one HSV (Hues, Saturation, Value) color to replace another HSV color. This substitution also allows you to indicate the color range to be modified, and how much blending is to be done in the substitution. This allows you to smooth out the transitions between the neighboring original colors and the new replacement color.
- HSV to Printer
- This color conversion allows you to specify a specific printer ink color to replace a HSV color. This substitution also allows you to indicate the color range to be modified, and whether the saturation and brightness values are to be carried over from the original color. This allows you to keep the intensity values the same between the original colors and the new replacement color.
If the Media configuration has a spot value, you can replace a printer ink color with the color contained in the spot ink fountain of your printer by specifying S (or “Spot”) as the replacement color,. You can also blend the spot color with other inks to create a different color.
- Map Saturation and Map Brightness
- These options are only available when using HSV. If [Map Saturation] is selected, then the saturation values for the two colors will be kept the same. If [Map Brightness] is selected, then the Brightness values for the two colors will be kept the same.
Deleting a Color Replacement
To delete a color replacement, select the "Color Replacement" you want to delete and click [Remove] button or the Delete icon (second button).
Changing the Color Replacement Order
To change the order of a color replacement, select the "[Color Replacement" you want to move and click either the [Up] or [Down] icons (fourth and fifth buttons).
Modifying a Color Replacement
To modify a color replacement:
- Double-click the replacement you want to modify. This opens the Color Replacement dialog (Figure 2).
- Click the [Sample] button under [Current Color], and select a color from your image. You can also type in a color value or drag the "o" mark to a specific color from a color bar on the right side.
- Click the [Sample] button under [Desired Color], and select a color from your image. You can also type in a color value or drag the "o" mark to a specific color from a color bar on the right side.
This replaces the Current Color with your Desired Color.
- Close the dialog.
Your changes are automatically saved.
Selecting a Color Range
To select a color range, you need to be in [HSV to HSV] mode or [HSV to Printer] mode. You can either enter a range value in the dialog, or you can press Shift and click and drag on the [+]. Job Editor will draw a selection box around the area to be shifted. Although it is not shown on the screen, a similar box centers around the "o" mark.
You can modify these boxes by clicking and dragging on the box or by changing the range values in the dialog. You can also do the same change with the brightness column.
|
|
|
Figure 1
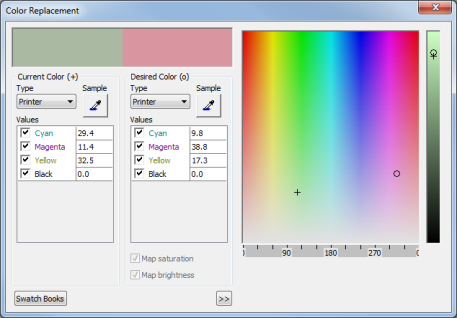
Figure 2
|
|