In Configure ColorCheck dialog, you can set to add, copy, edit, delete, print, export, and import your ColorCheck Swatch using following buttons.
Click this button to create a new ColorCheck swatch (Figure 1). First, enter a unique Swatch Name (Figure 2). Then select a Quick Set to be associated with this Swatch. Only the color management information from the Quick Set will be used when printing the swatch.
Then select one of the ColorCheck environments from the drop-down menu to create a swatch definition
You can copy a selected swatch definition.
- Click [Copy…] button. This opens Copy Swatch Definition dialog (Figure 3).
- You can give the copy a new name if needed, then click [OK].
NOTE: If the original swatch definition is Read-only, the copy will have that restriction removed.
This button is used to view a Read-only ColorCheck swatch or edit a custom ColorCheck swatch (Figure 4). The UI is the same for adding a new ColorCheck swatch for different ColorCheck environments.
This button is used to delete a custom ColorCheck swatch. You cannot delete a read-only ColorCheck swatch.
- Select a swatch that you want to delete.
- Then Click [Delete]. A dialog appears that asks if you want to delete the file (Figure 5). Click [Yes].
This button is used to print a selected ColorCheck swatch.
You must first setup a color device to measure the printed ColorCheck swatch. Click add button ( ) (Figure 6).
NOTE: You need to be careful when setting up color device options, such as measurement conditions. These options affect the measured color values of the ColorCheck patches. You should use the same color device options each time when you print and read a ColorCheck swatch.
In the Print ColorCheck Swatch dialog, you can see information for the ColorCheck swatch to be printed is listed, including the Swatch Name, ColorCheck Environment, Characterization Data Set, and Verification Expiration.
You can set up printer information by selecting [Mode:] and [Quick Set:]. You can also set up the printing layout, such as [Page Size], [Copies], [Orientation], [Label] and Output style (Color, Separations).
After you have made your selections, click the [Print] button at the bottom to send the selected ColorCheck swatch to RIP-Queue
When you go to RIP-Queue, you will find the swatch job is in the queue and its status shows as “Waiting to Print” if the print setup is appropriate. Click the [Print Now] button in RIP-Queue to print the ColorCheck job.
This button is used to export ColorCheck swatches as an OSL (ONYX Swatch Library) file. You can select the ColorCheck swatches you want to save.
- Click the [Export…] button. This opens the Export Swatch Definitions dialog (Figure 7).
- Select the swatches that you want to export.
- Click the […] button to select a location and name for the .osl file.
- Click [Export].
NOTE: You cannot export Read-only or Custom Image swatches.
This button is used to import ColorCheck swatches from an OSL file.
- Click the [Import…] button. This opens a standard Windows file open dialog filtered for .osl files (Figure 8).
- Select the .osl file that you want to import, and click [Open].
NOTE: If a swatch that you want to import has the same name as one already in your “PCT\SwatchDefs” folder, you can either overwrite, automatically adjust the swatch name (by addimg~1, etc), or cancel the import.
SeeColorCheck Help for more information.
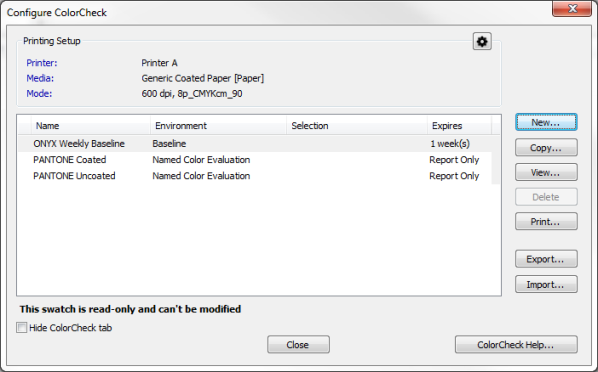 Figure 1
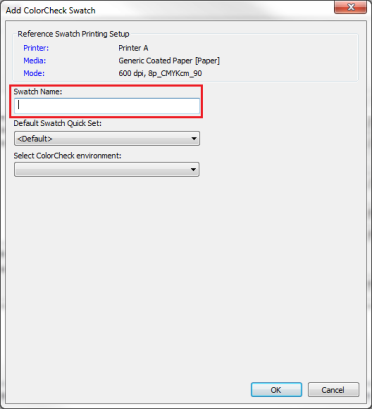
Figure 2
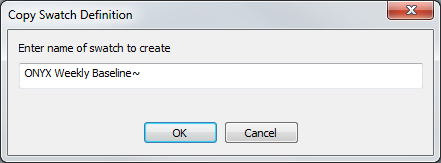
Figure 3
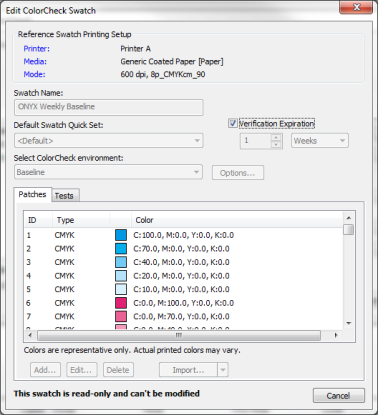
Figure 4
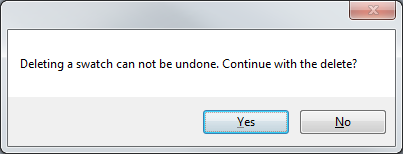
Figure 5
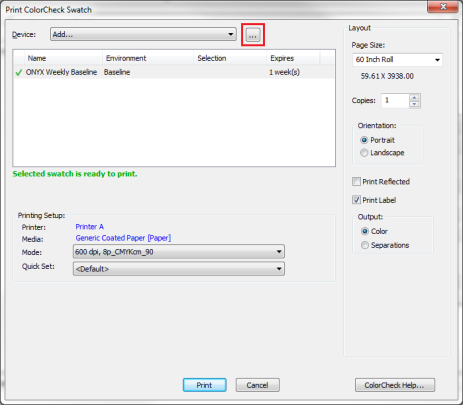
Figure 6
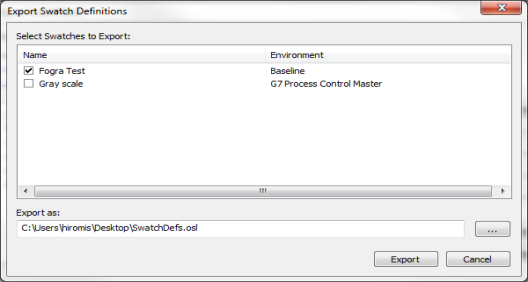
Figure 7
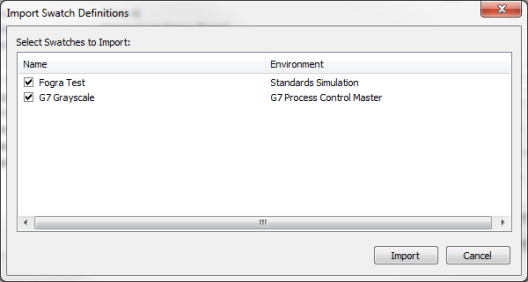
Figure 8